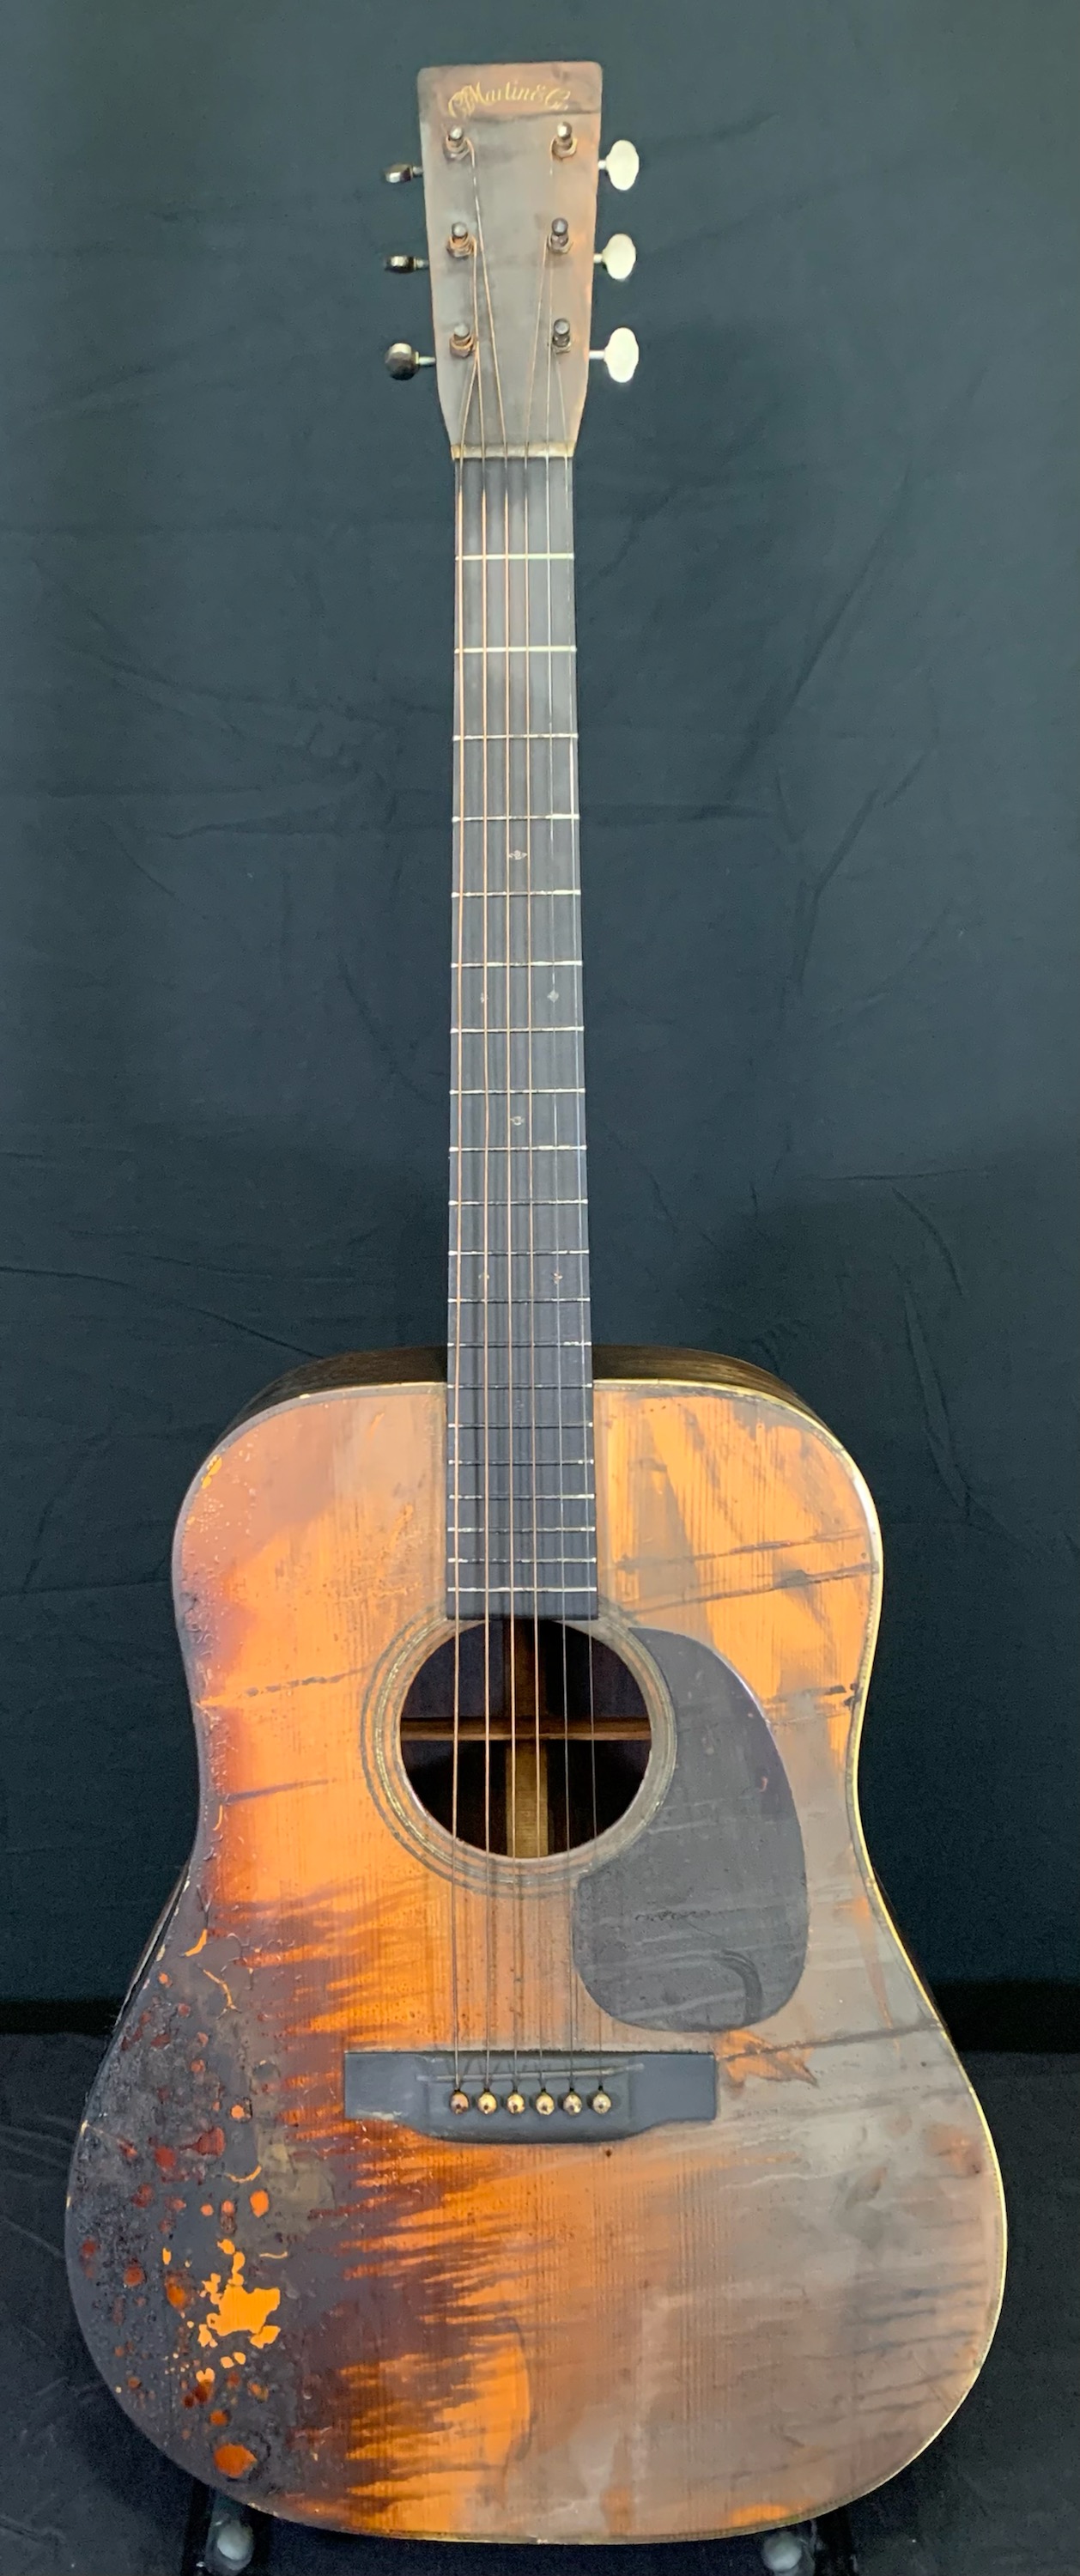
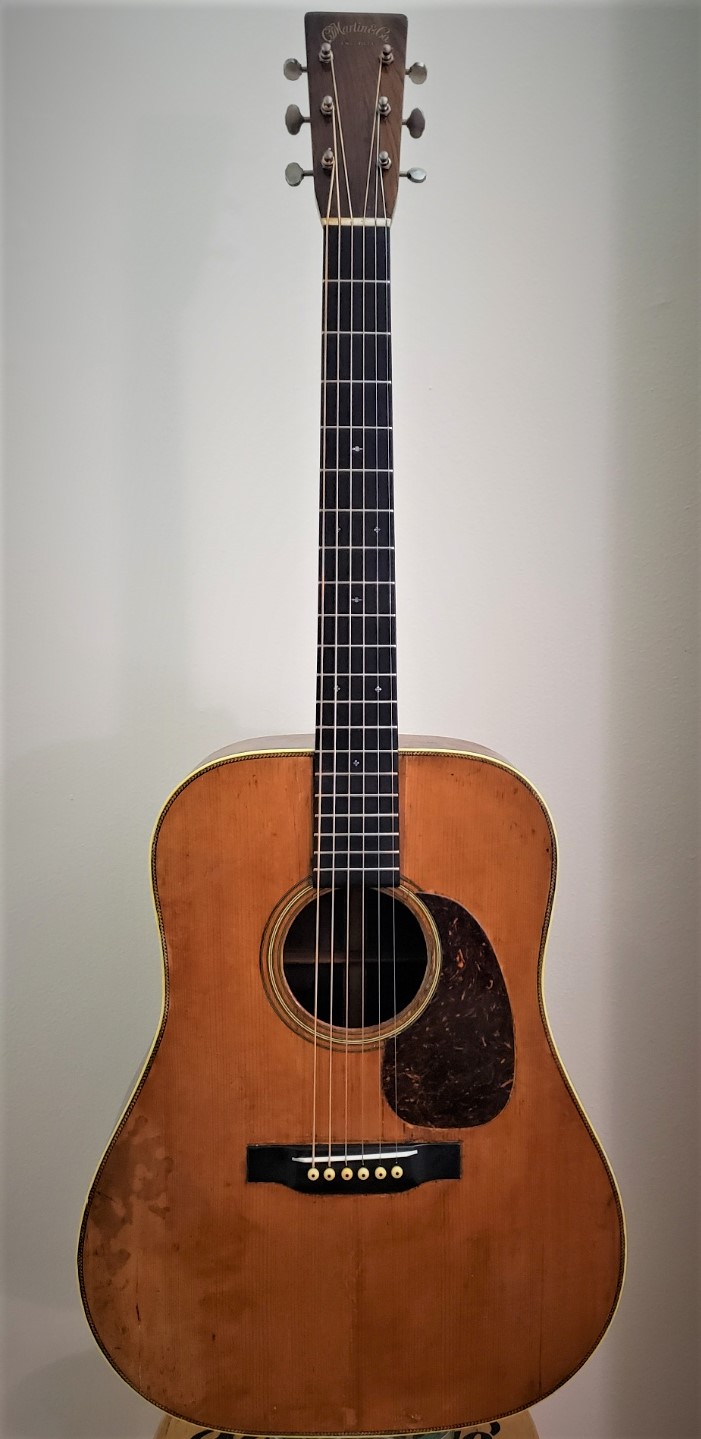
Restoration of a 1938 Martin D-28 Herringbone guitar.
This fine vintage guitar was damaged in a house fire along with one other fine guitar and five banjos. The story has it that the case holding this guitar was badly burned and was a total loss. The guitar suffered significant smoke damage and some discoloration from the fluids that were used to put out the fire.
Fortunately, there was no serious structural damage to the instrument. The lower bass side was charred to some degree, and the interior and exterior of the guitar suffered from smoke discoloration and absorption. The bridge was lifting at a severe angle.
The guitar was purchased from the estate of the prior owner and I was commissioned to restore it.
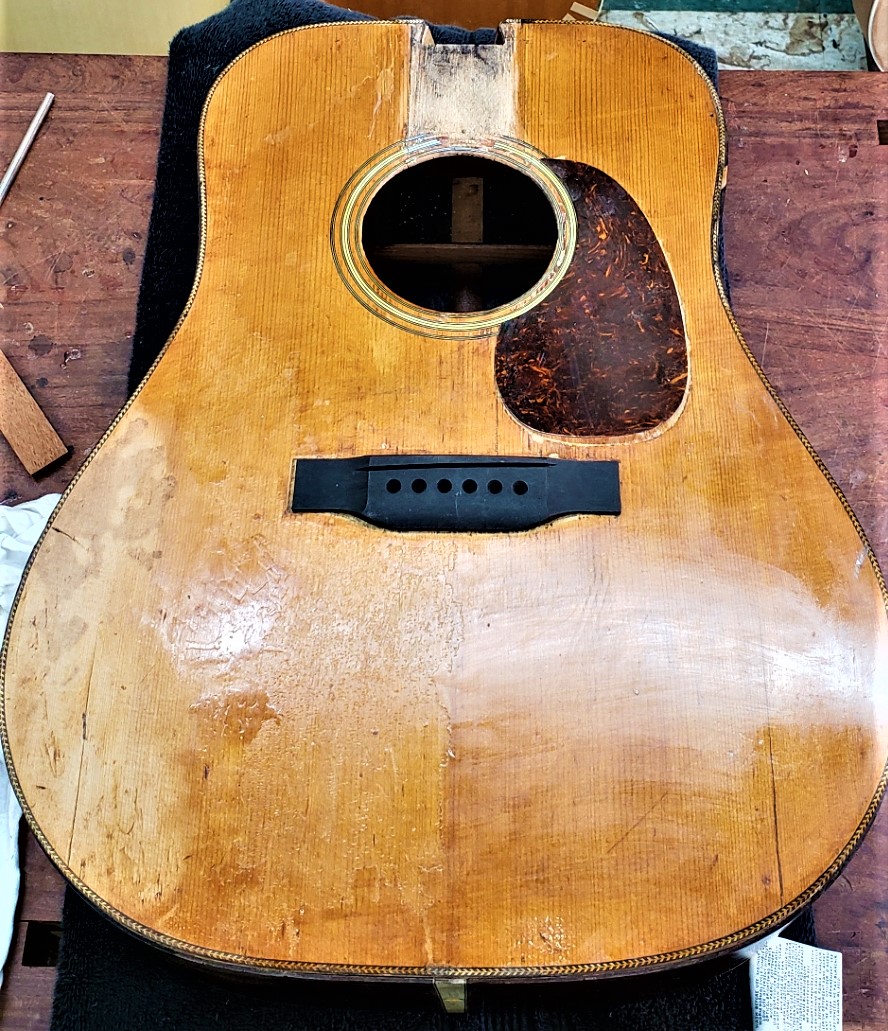
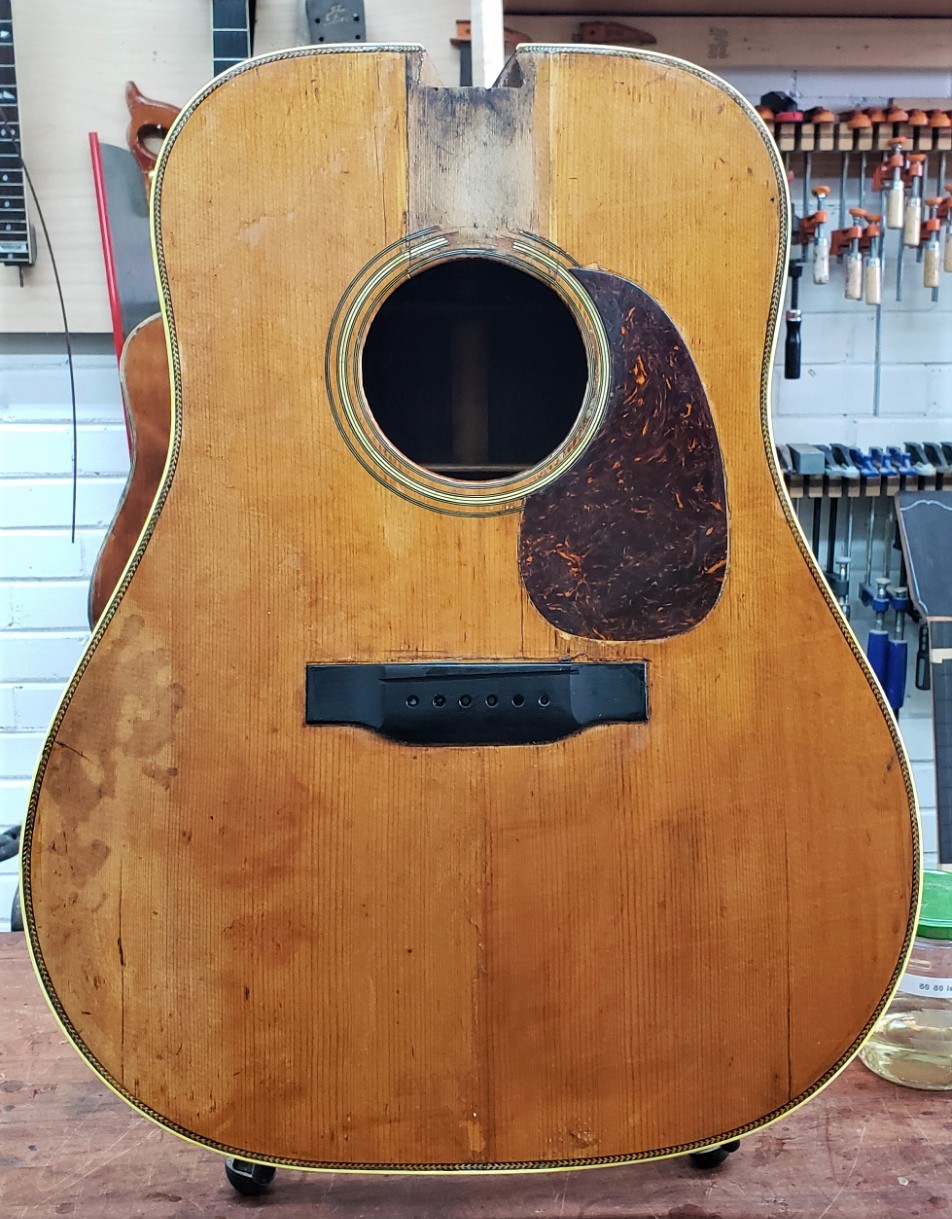
The Guitar as Found:
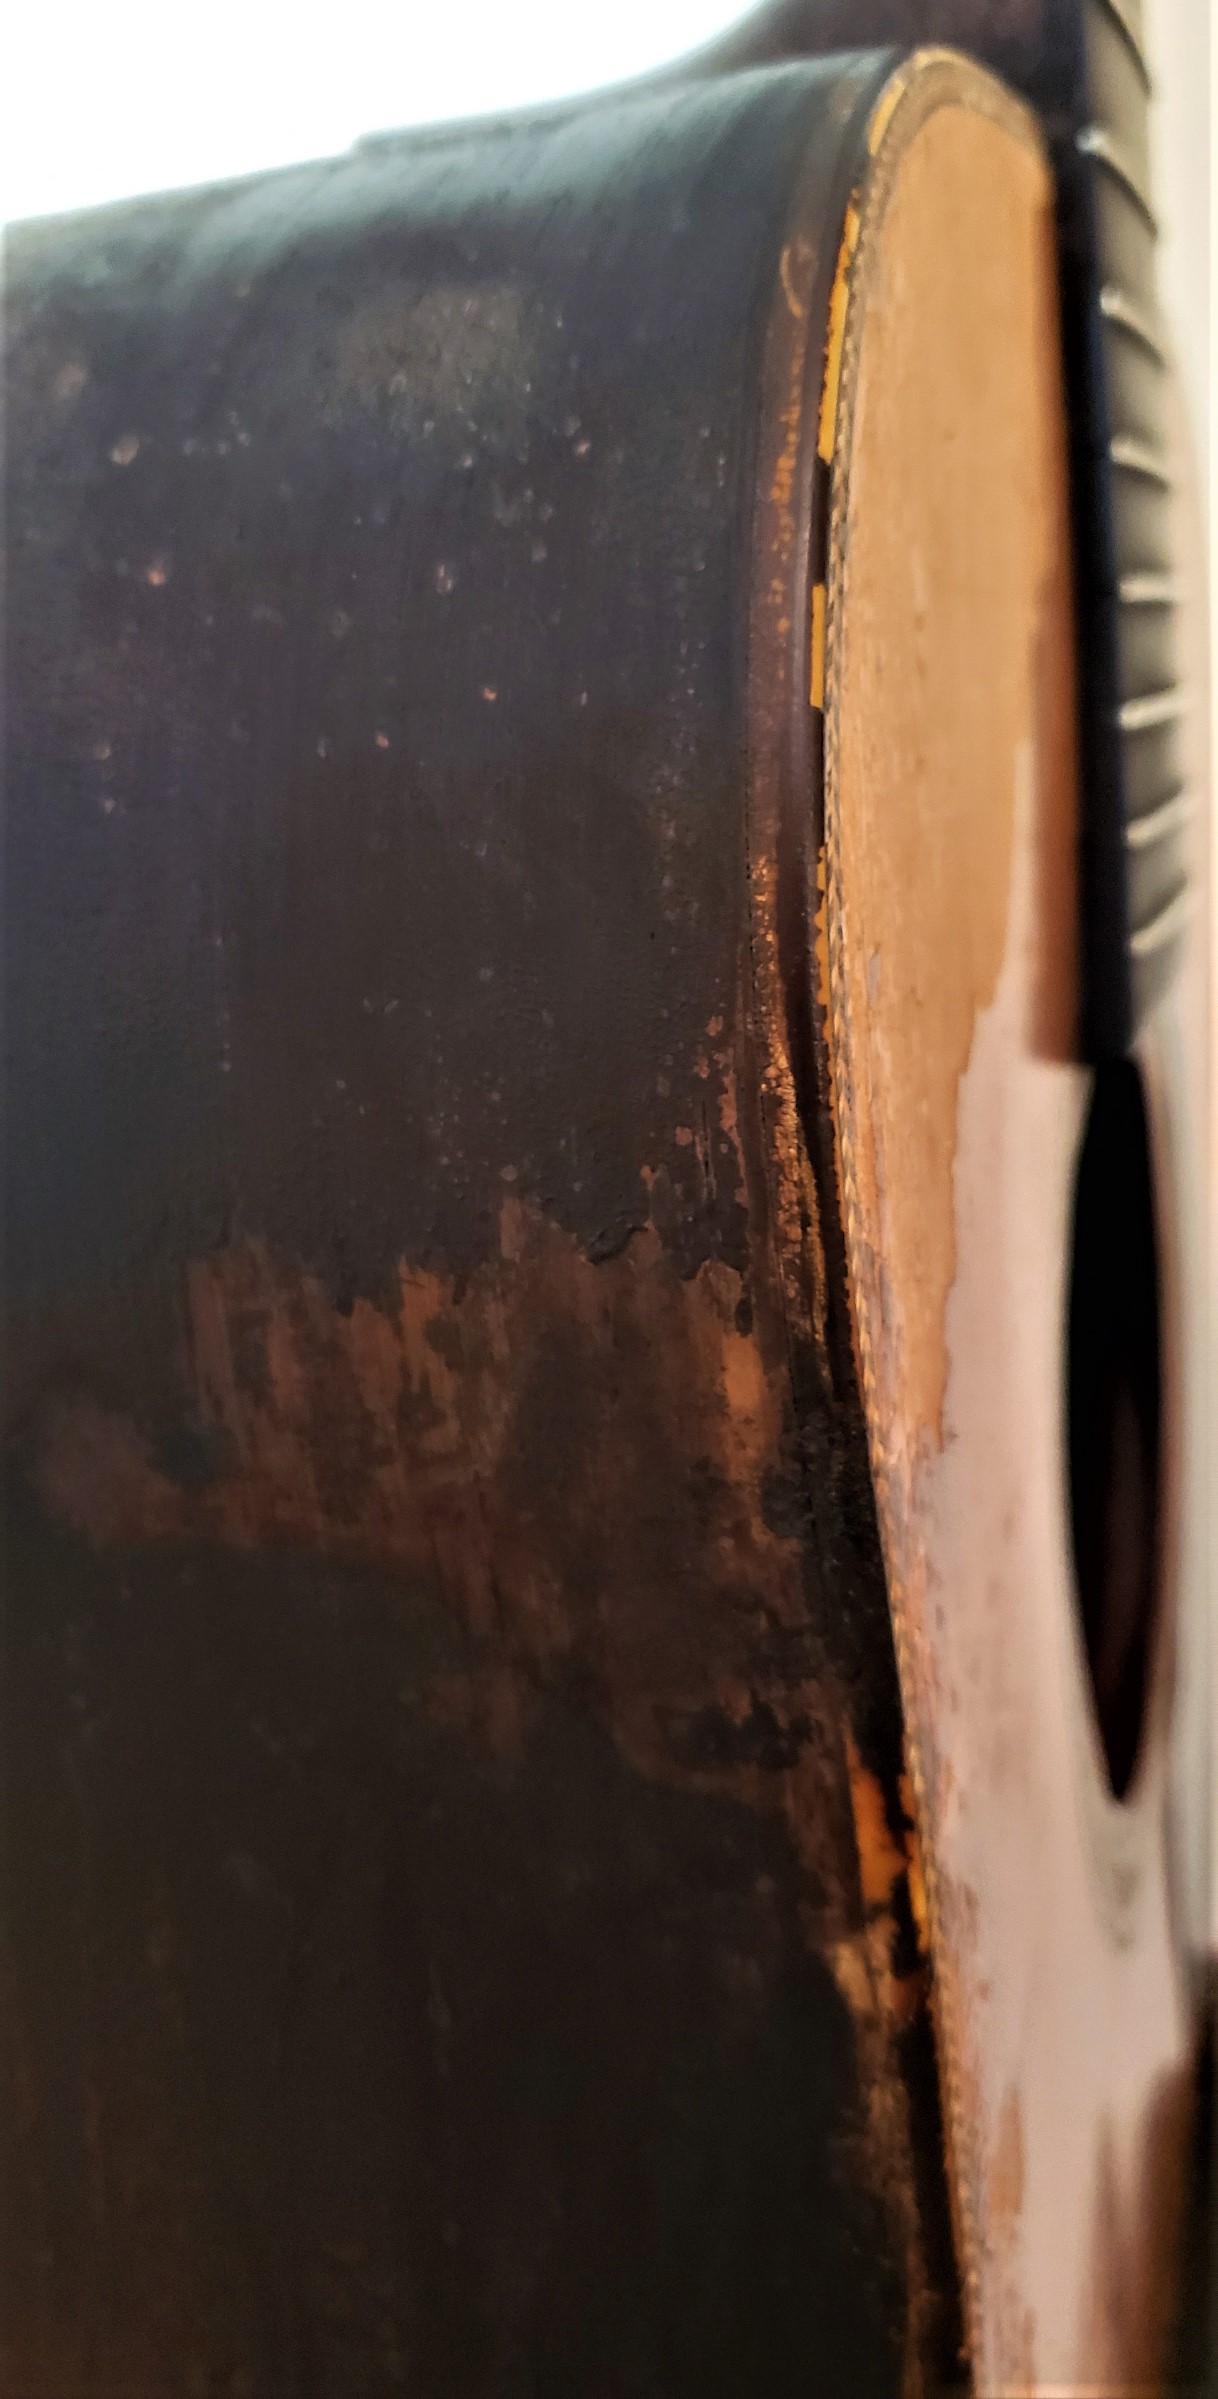
Other photos of the damage:
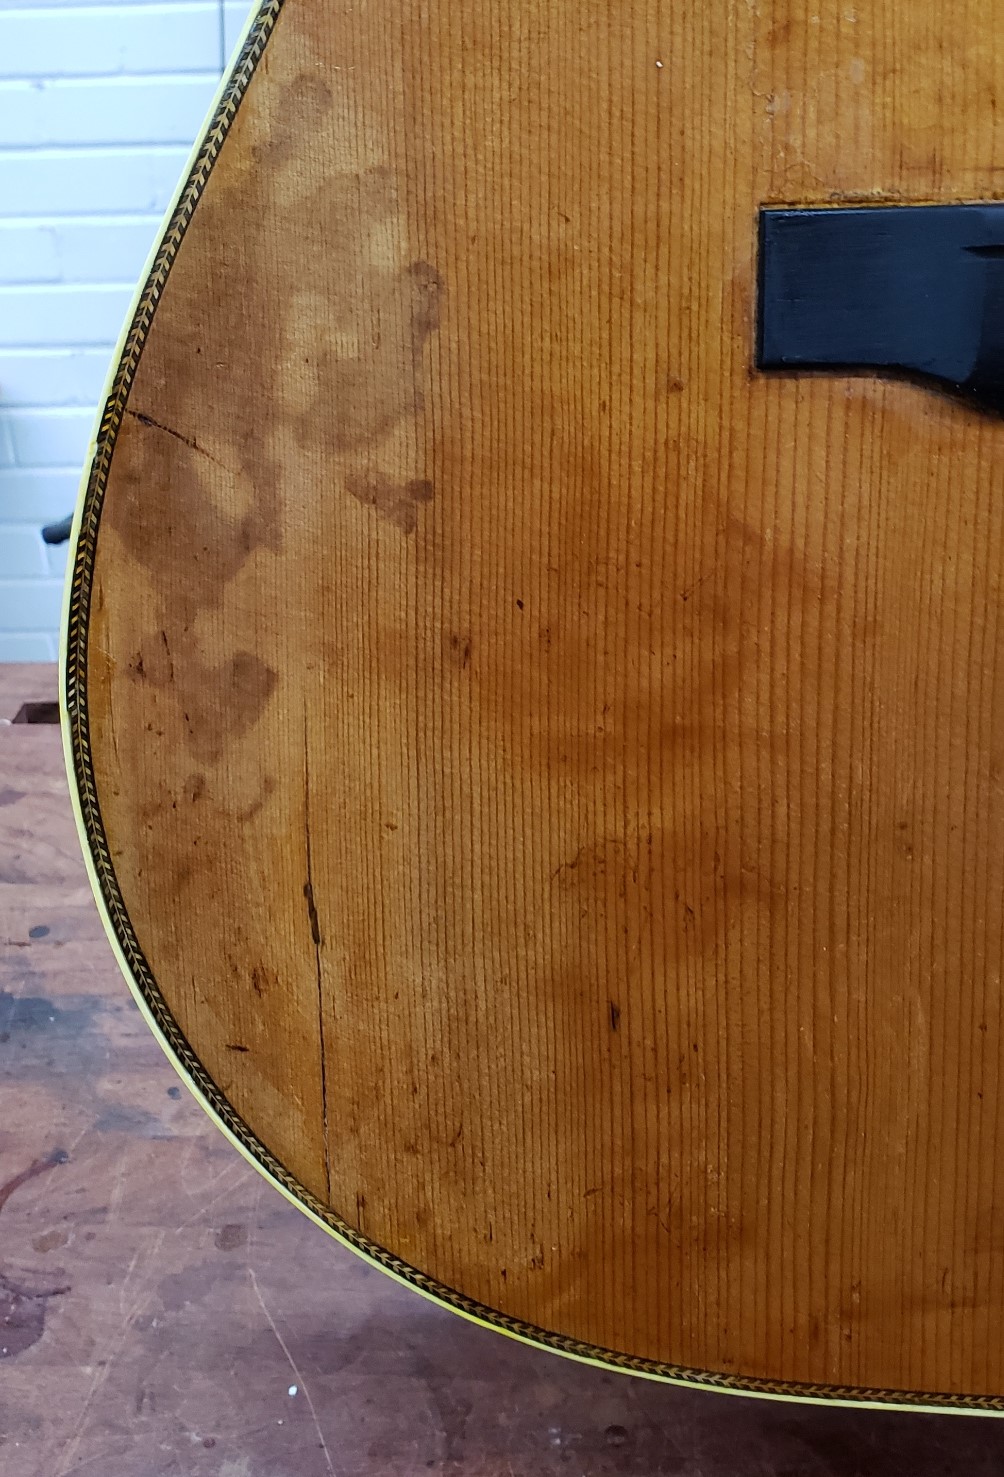
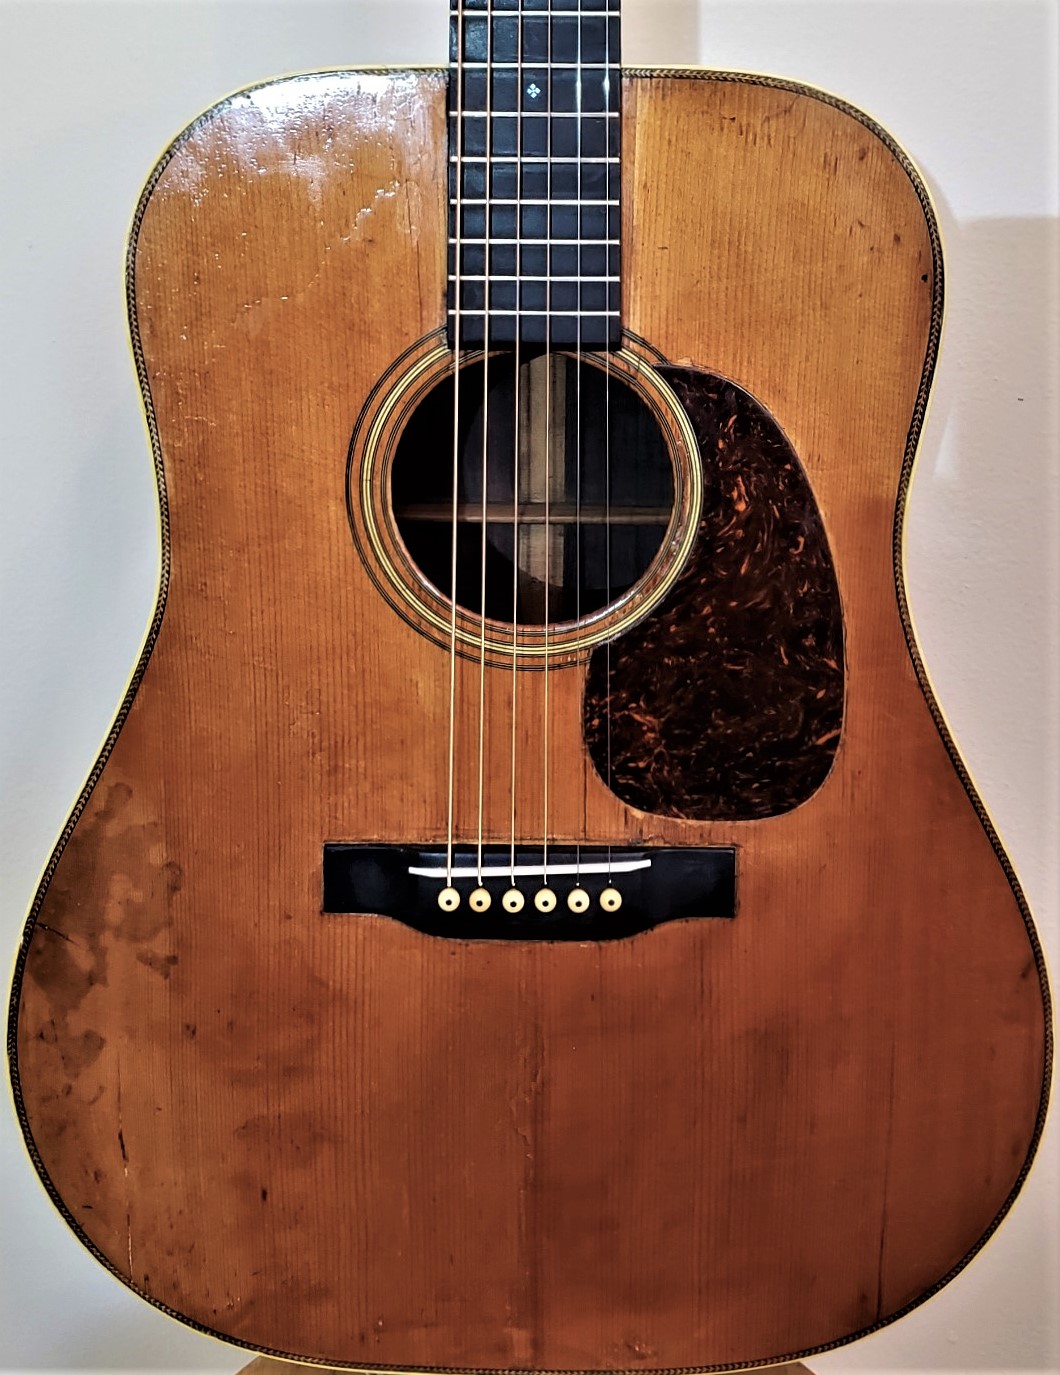
Lower bass side of the top. The finish here was largely gone, deeply blistered and blackened by heat and smoke. The side below this section was charred black and the pitch from the Brazilian Rosewood had liquified and oozed out in a small area inside the guitar.

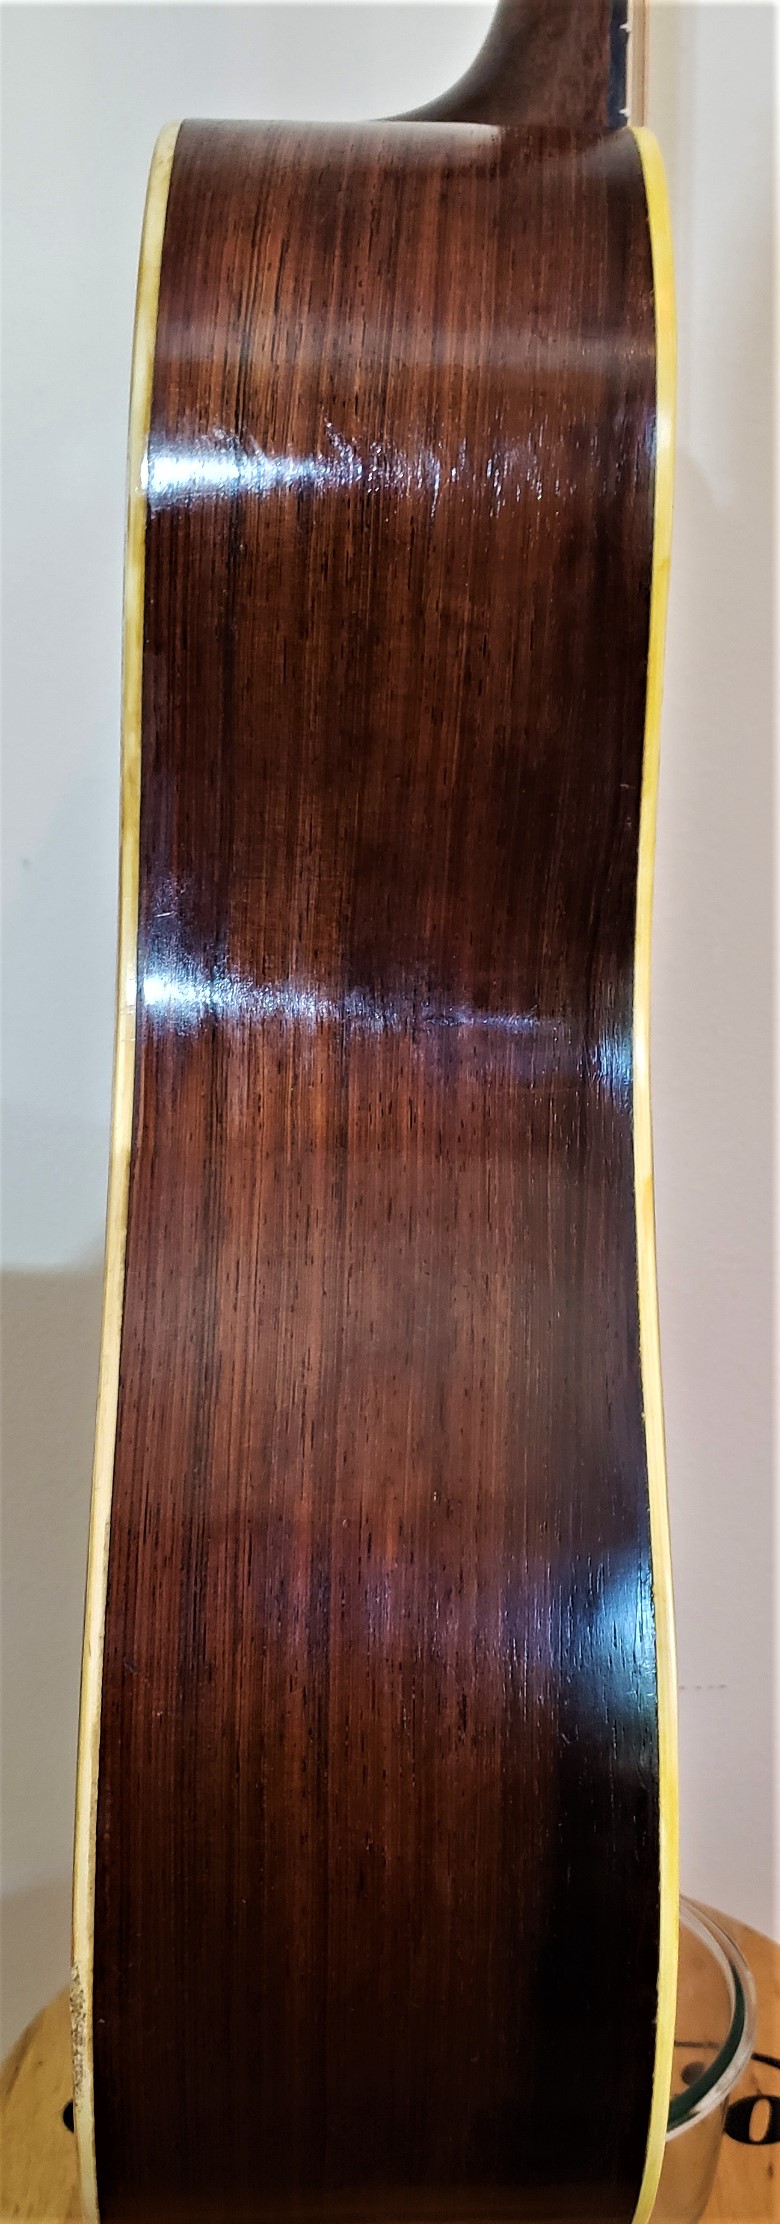
The bass side at the lower bout. This was the are of the worst charring. The binding here is blackened and not recoverable. Obviously, the lacquer has burned away, but the Rosewood is still sound though discolored.
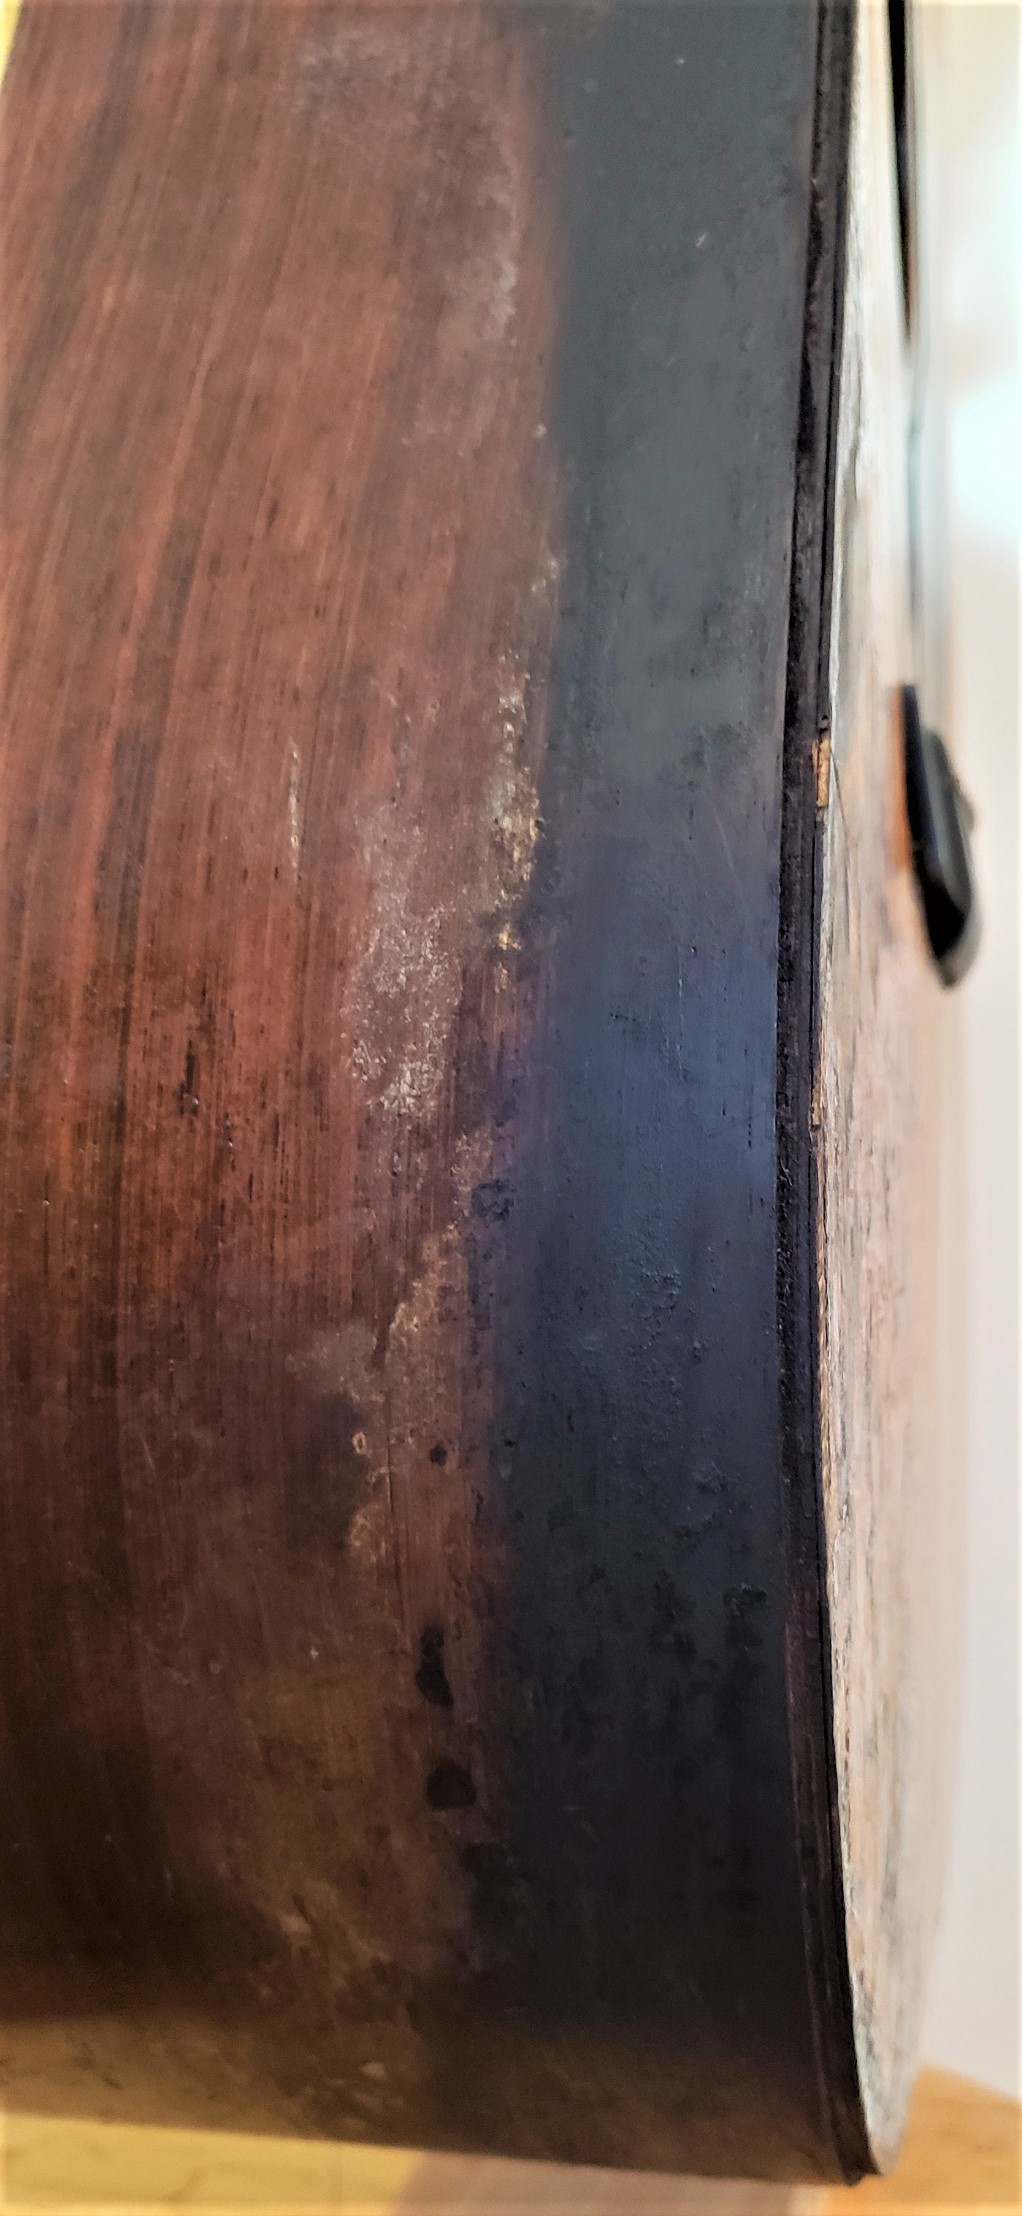
The upper bass side. Binding burned badly. The finish is dark and discolored from smoke.
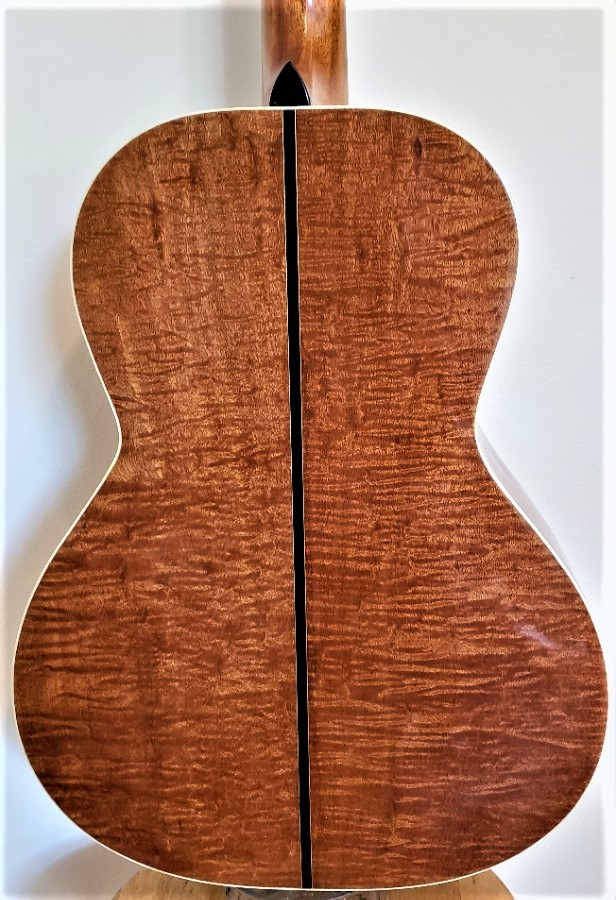
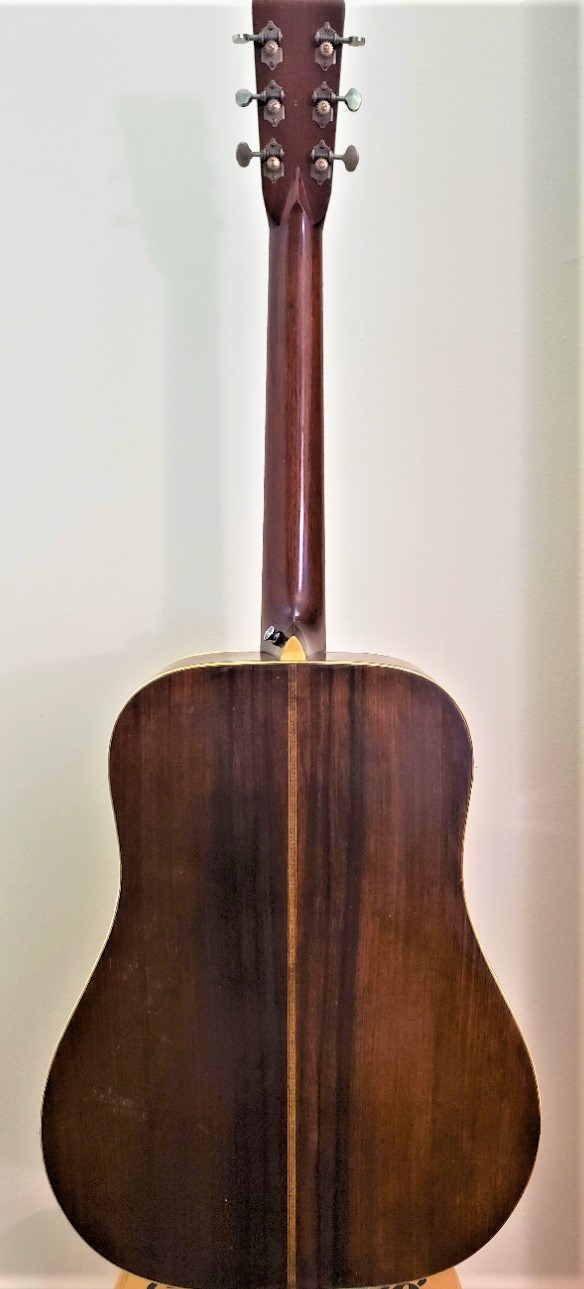
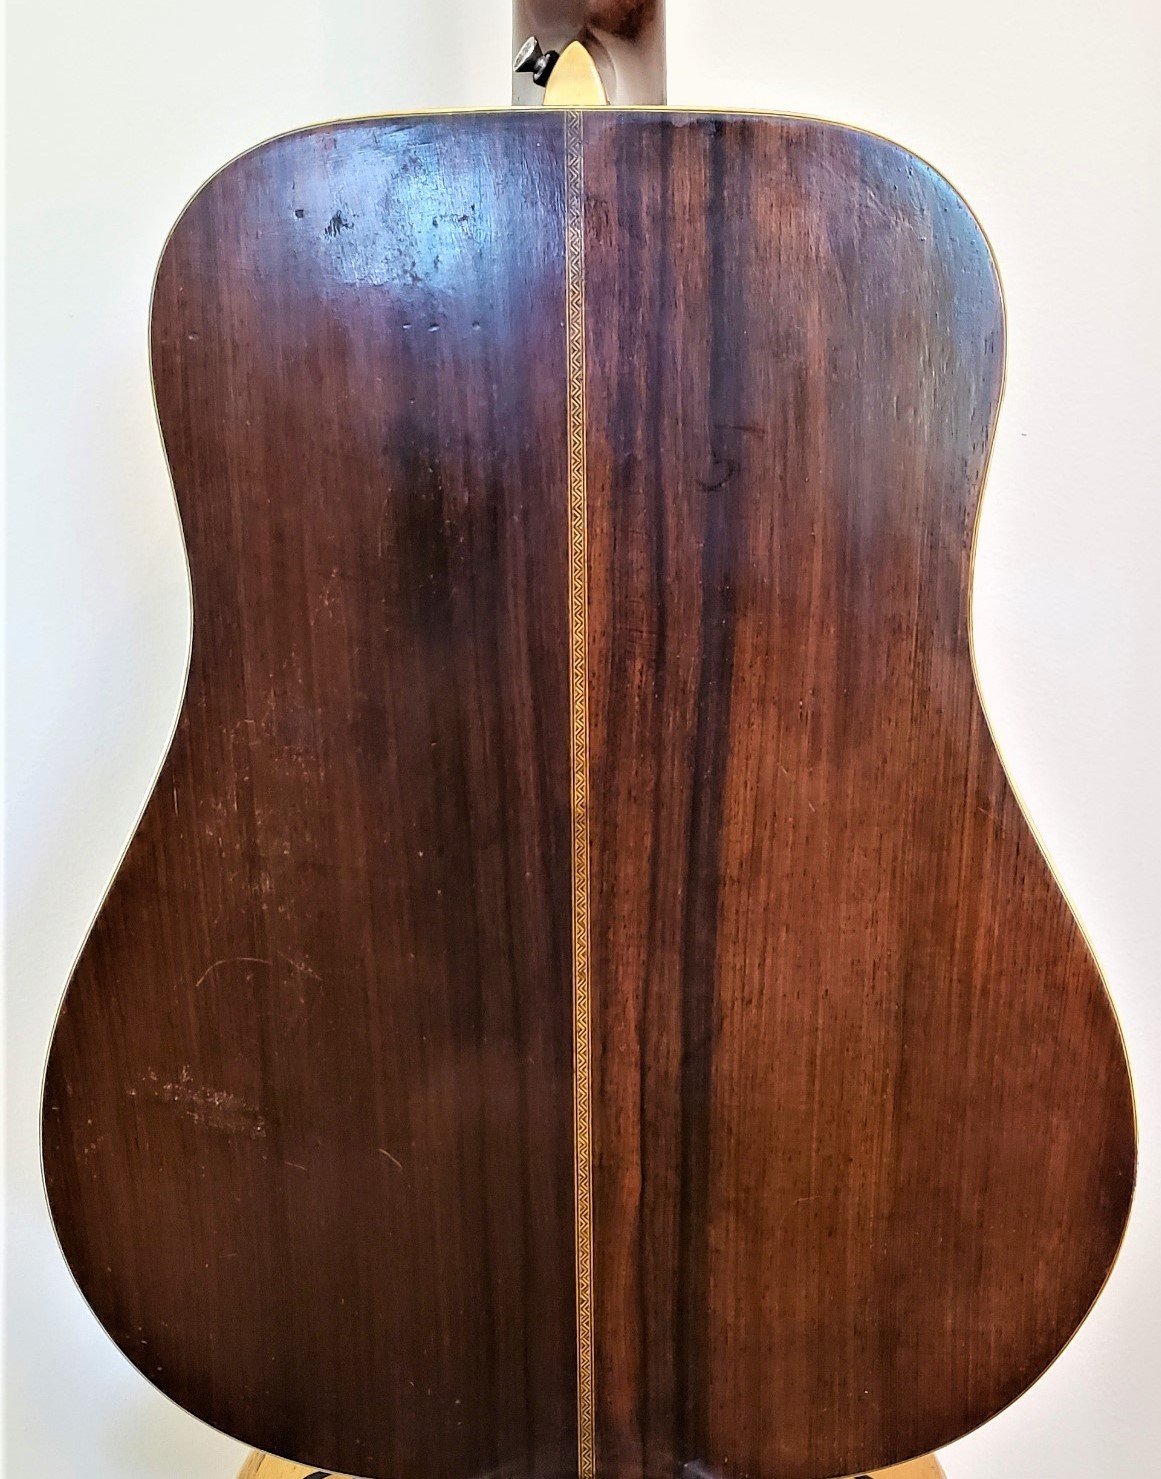
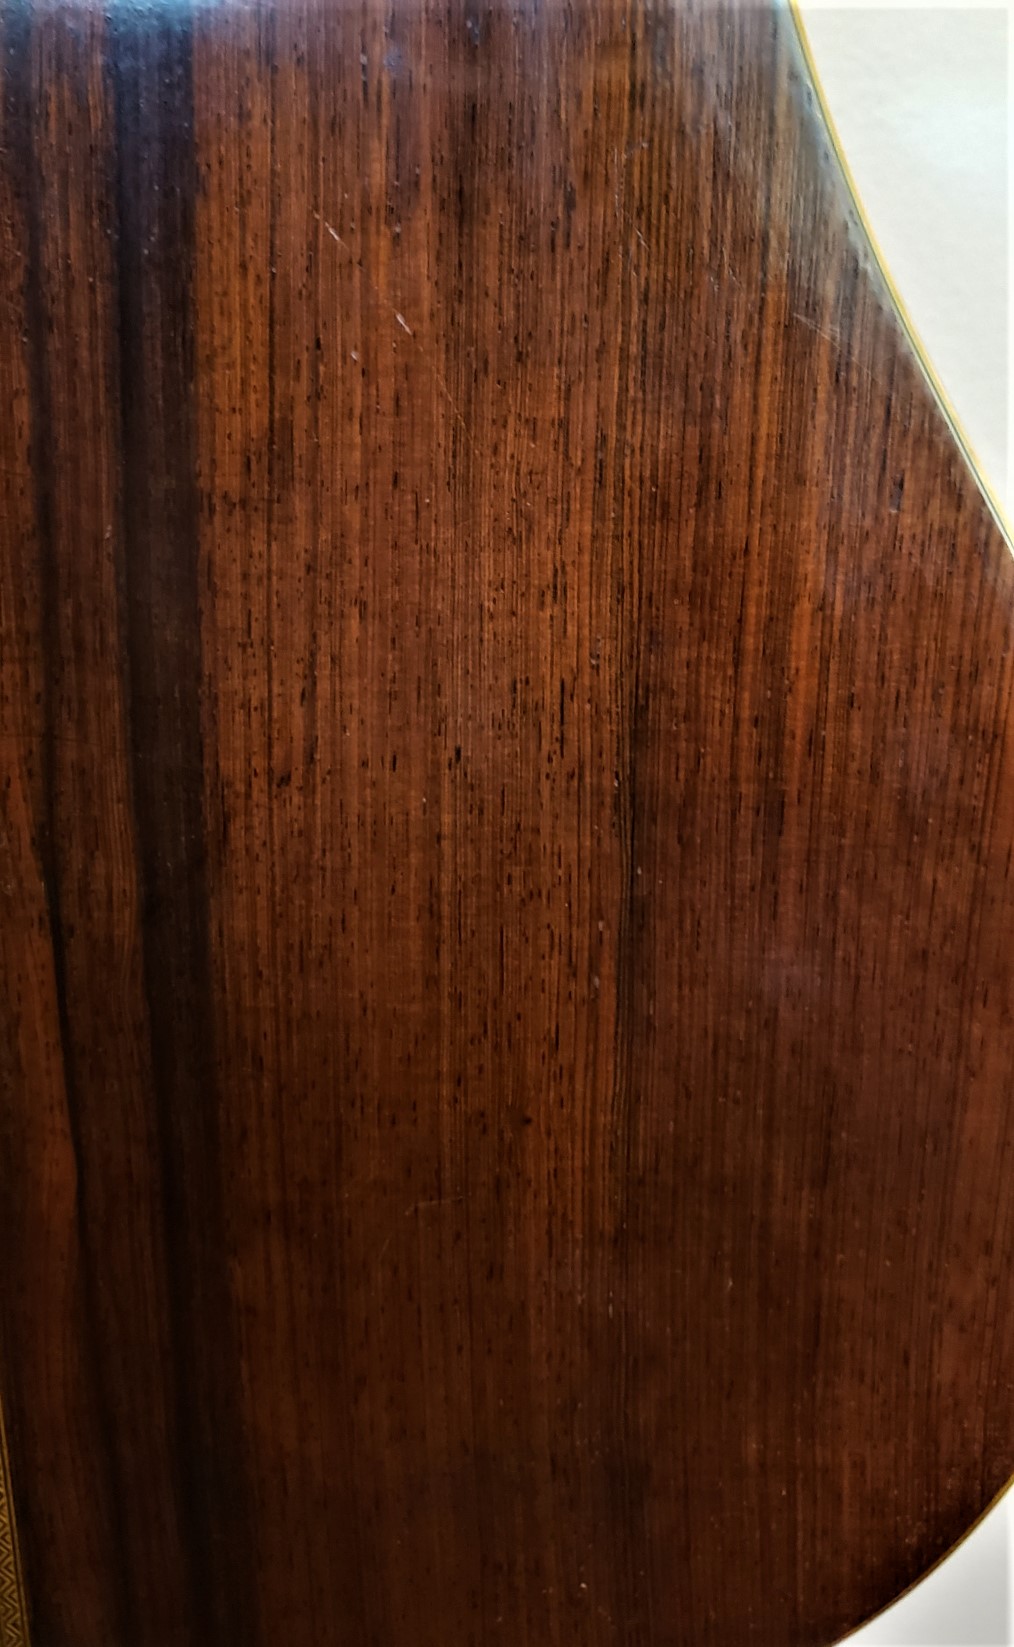
The back and upper treble side.
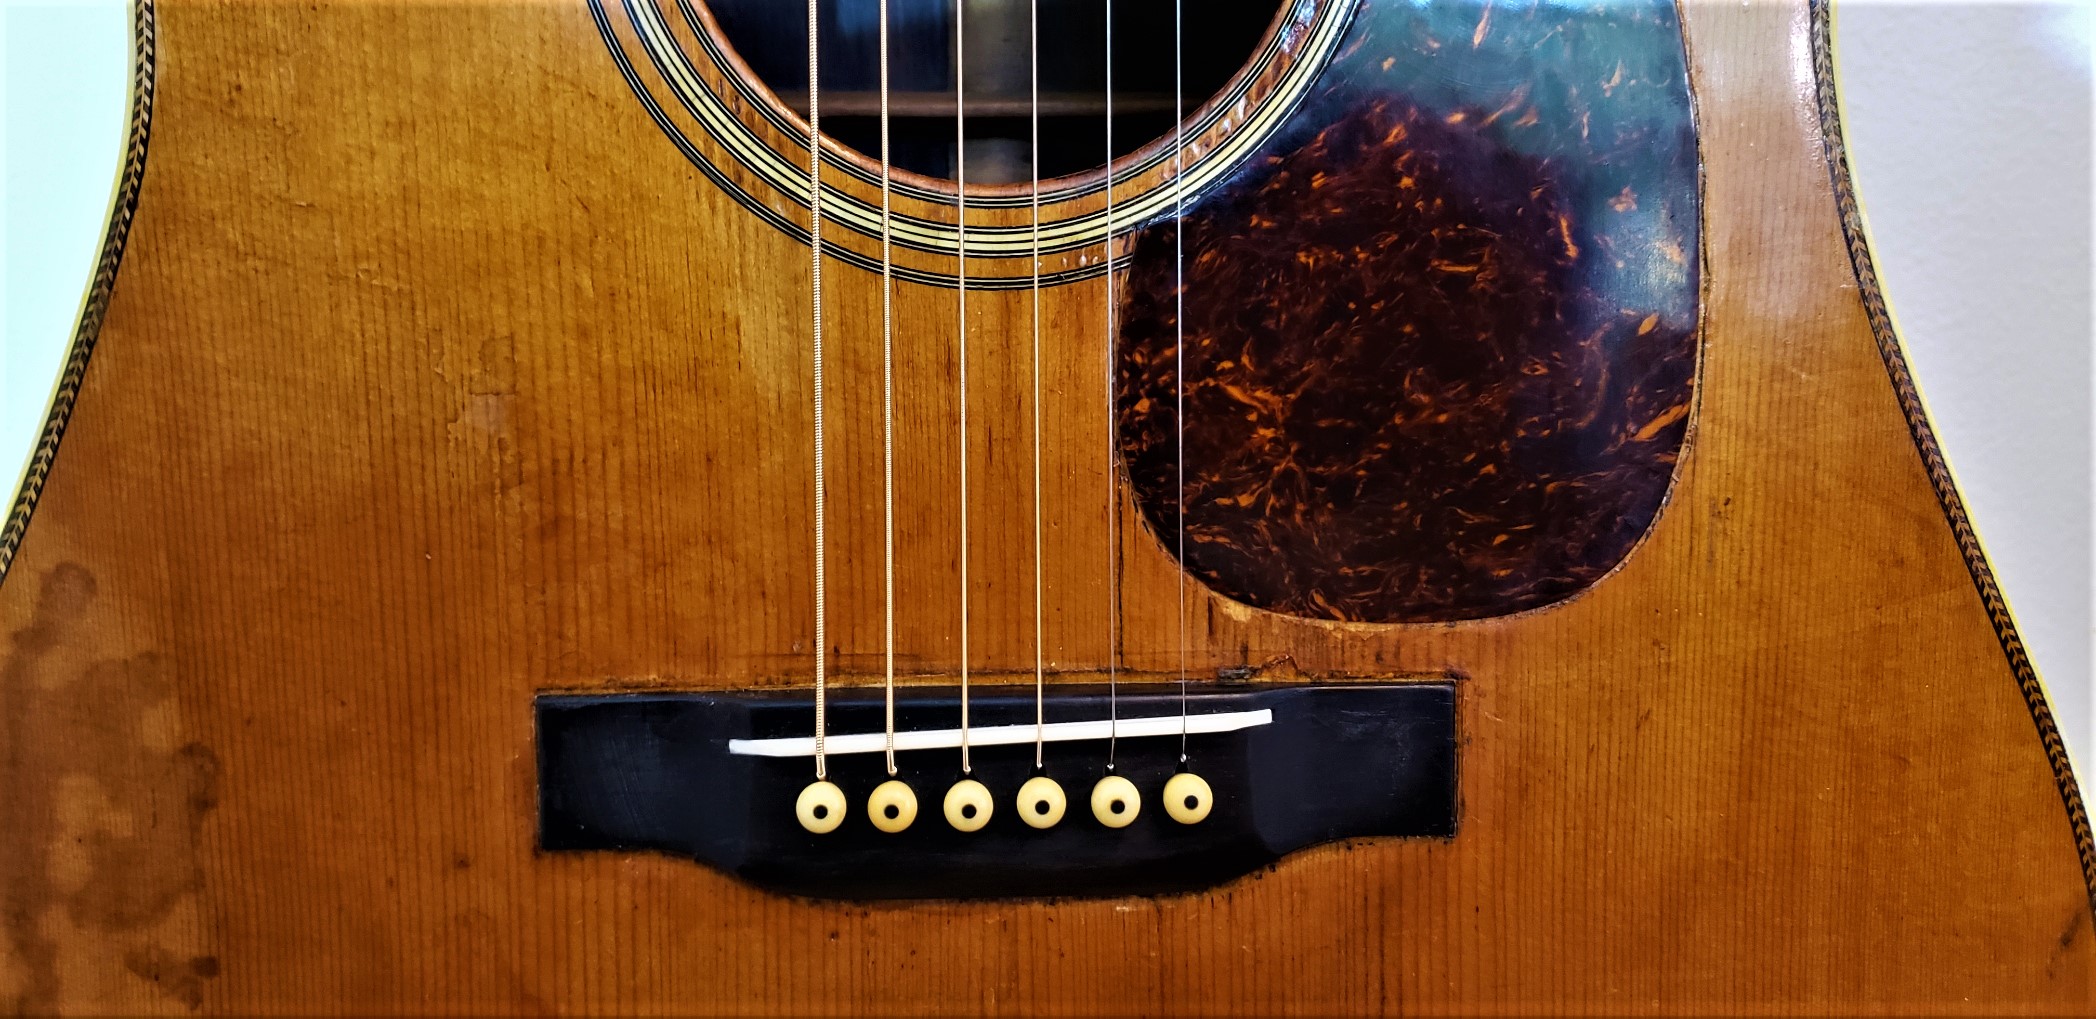
The bridge area.
Restoration Begins Contents
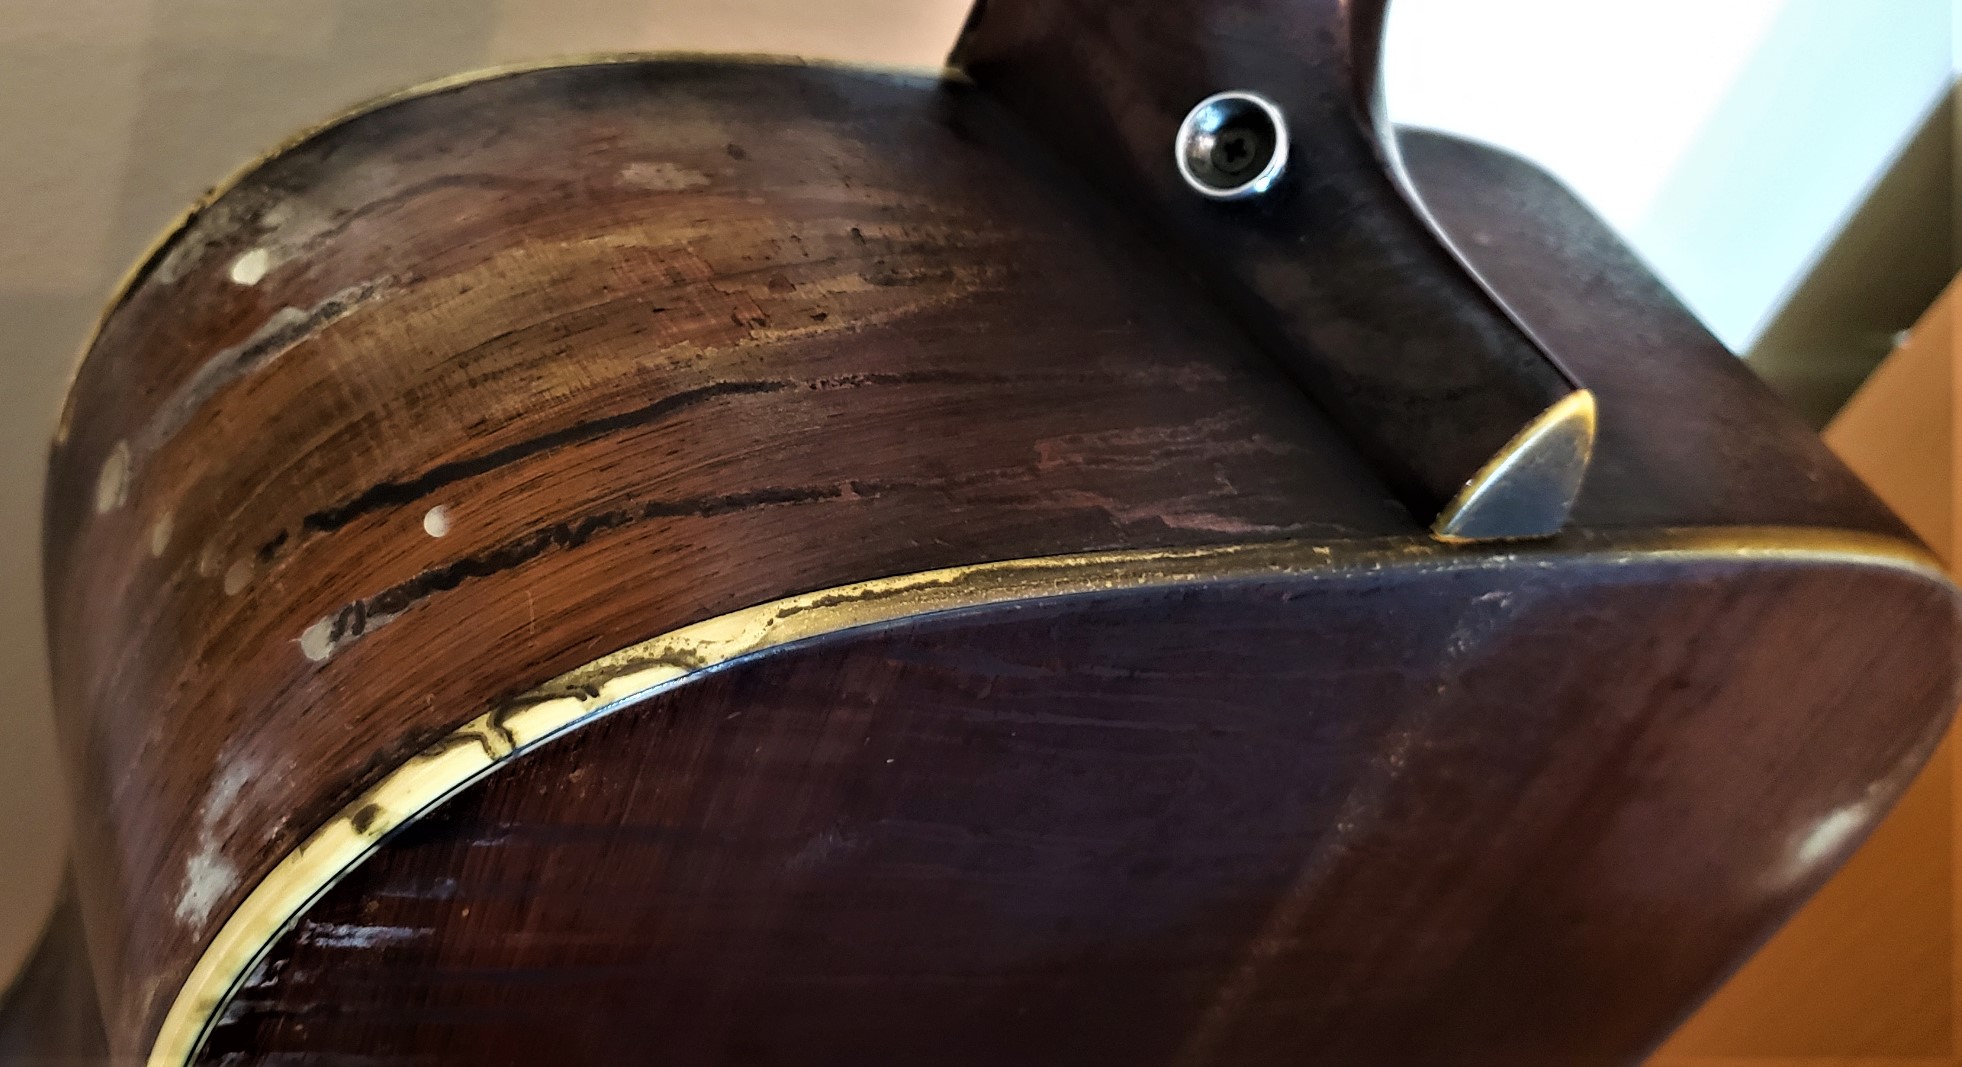
Work began with removal of the bridge and some serious clean up. The end graft area at the tail cleaned up especially well. There are places where I will have to remove the finish to get the black out of the finish. Some of it is superficial and some is into the wood, as in the photo above. It's important not to remove any more finish than necessary to remove the burn marks.
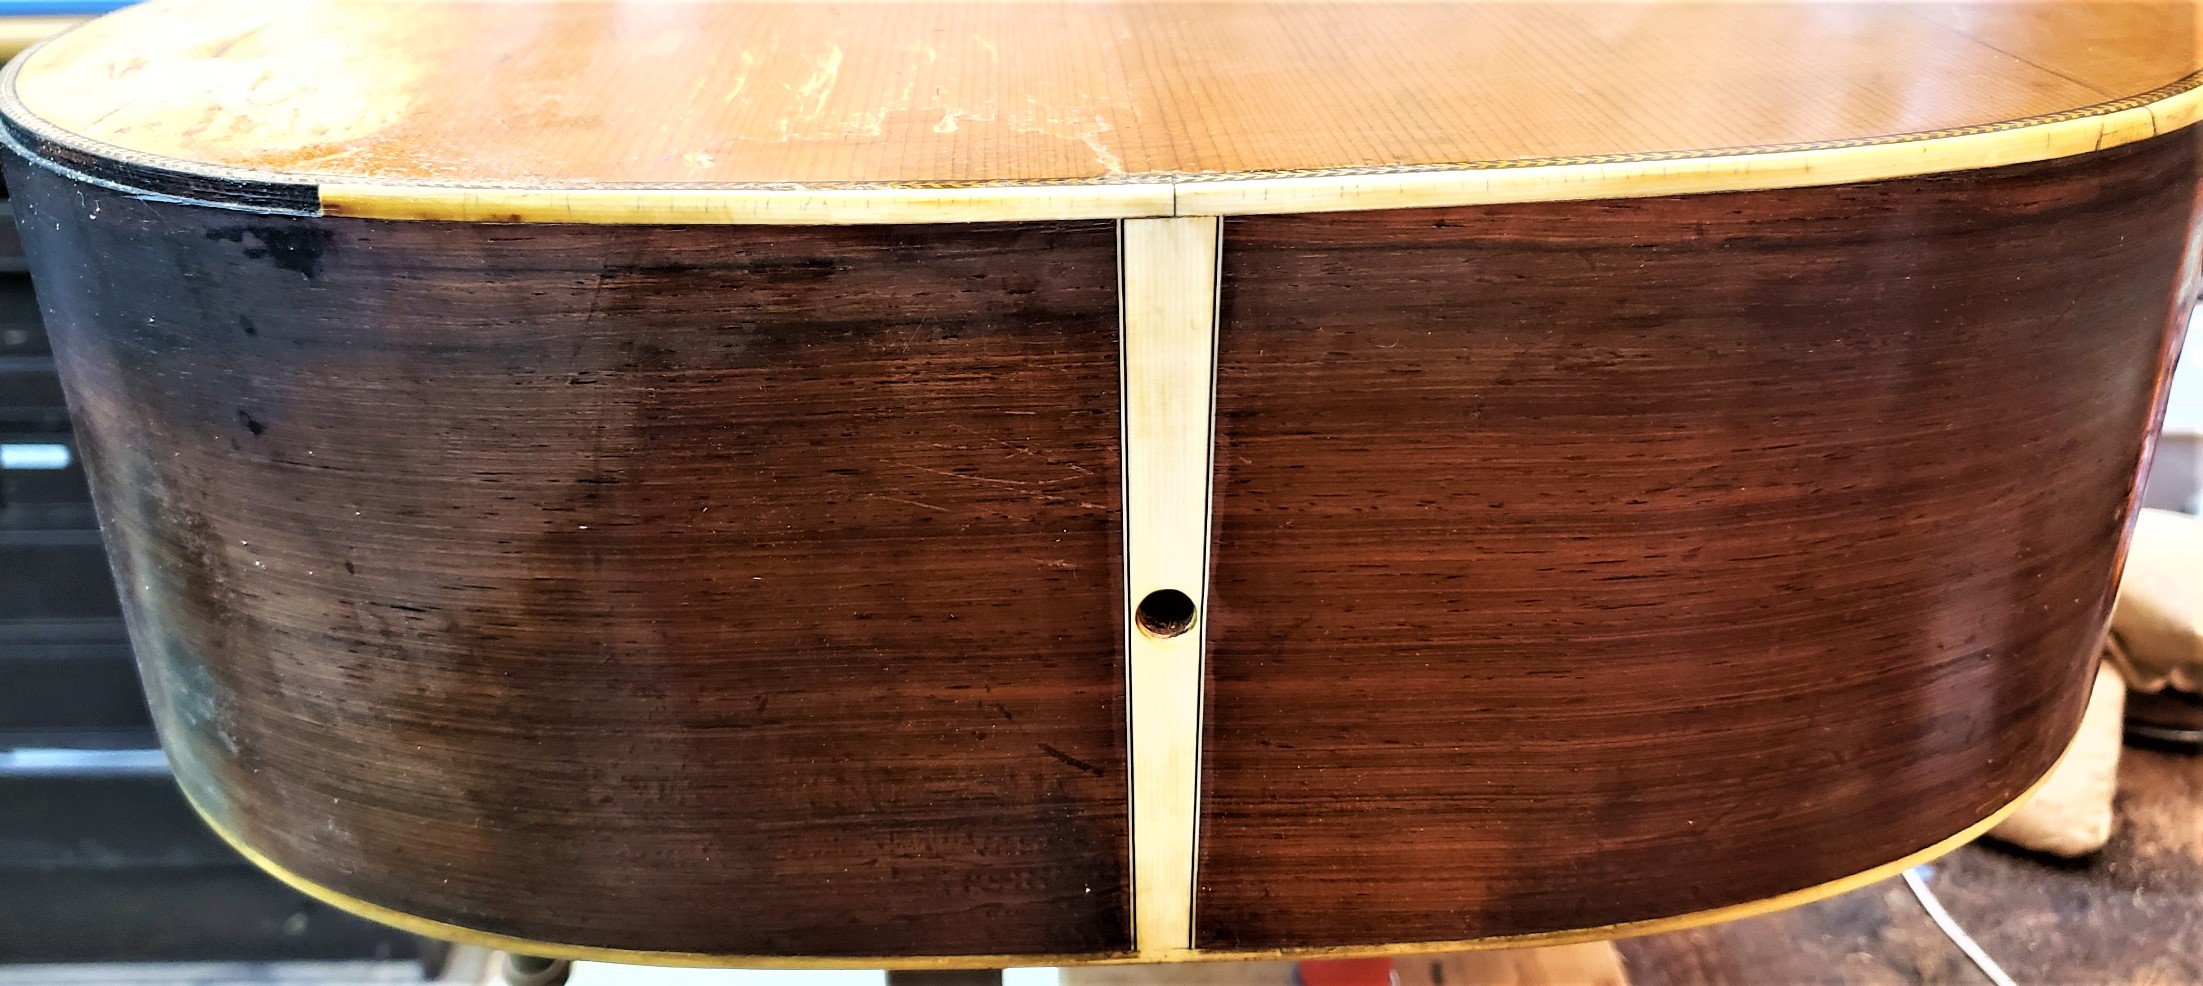
Here's the tail area before and after cleaning:
Before:
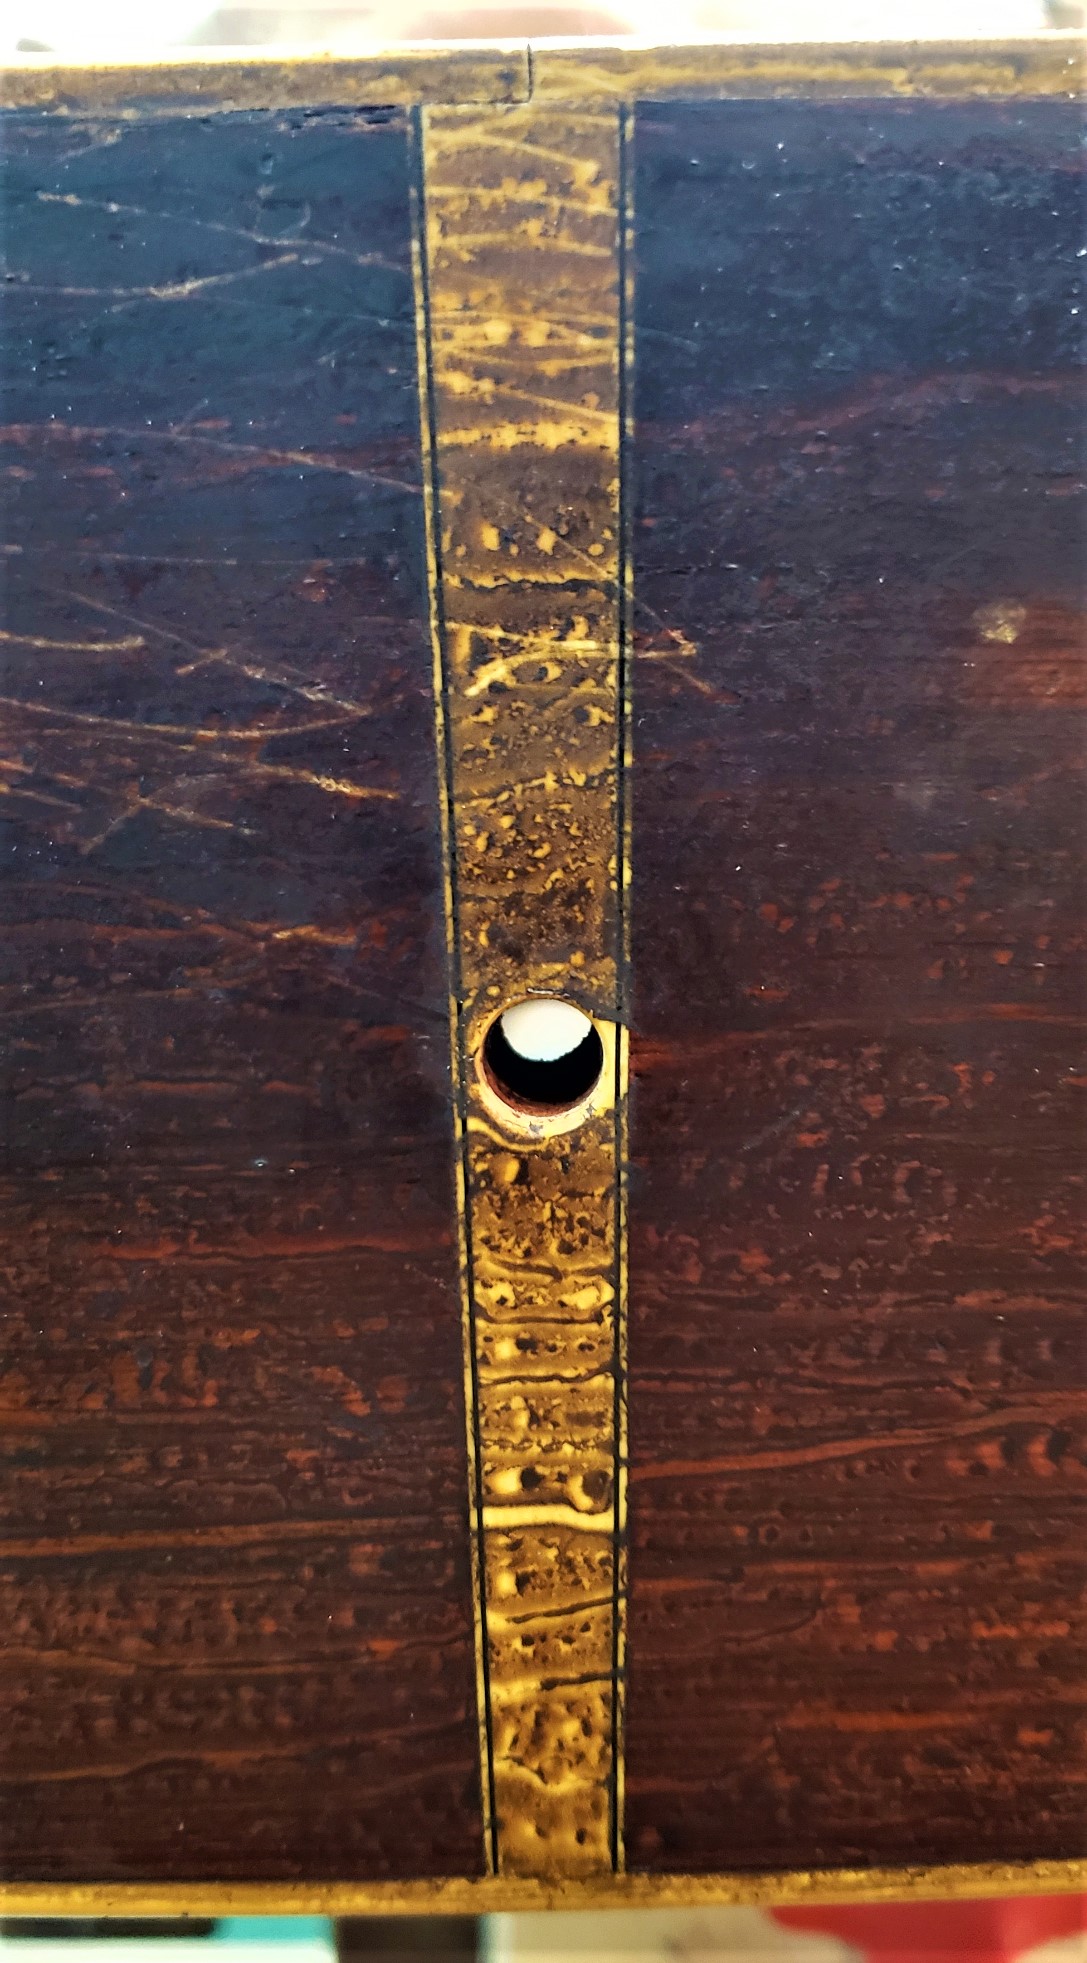
After:
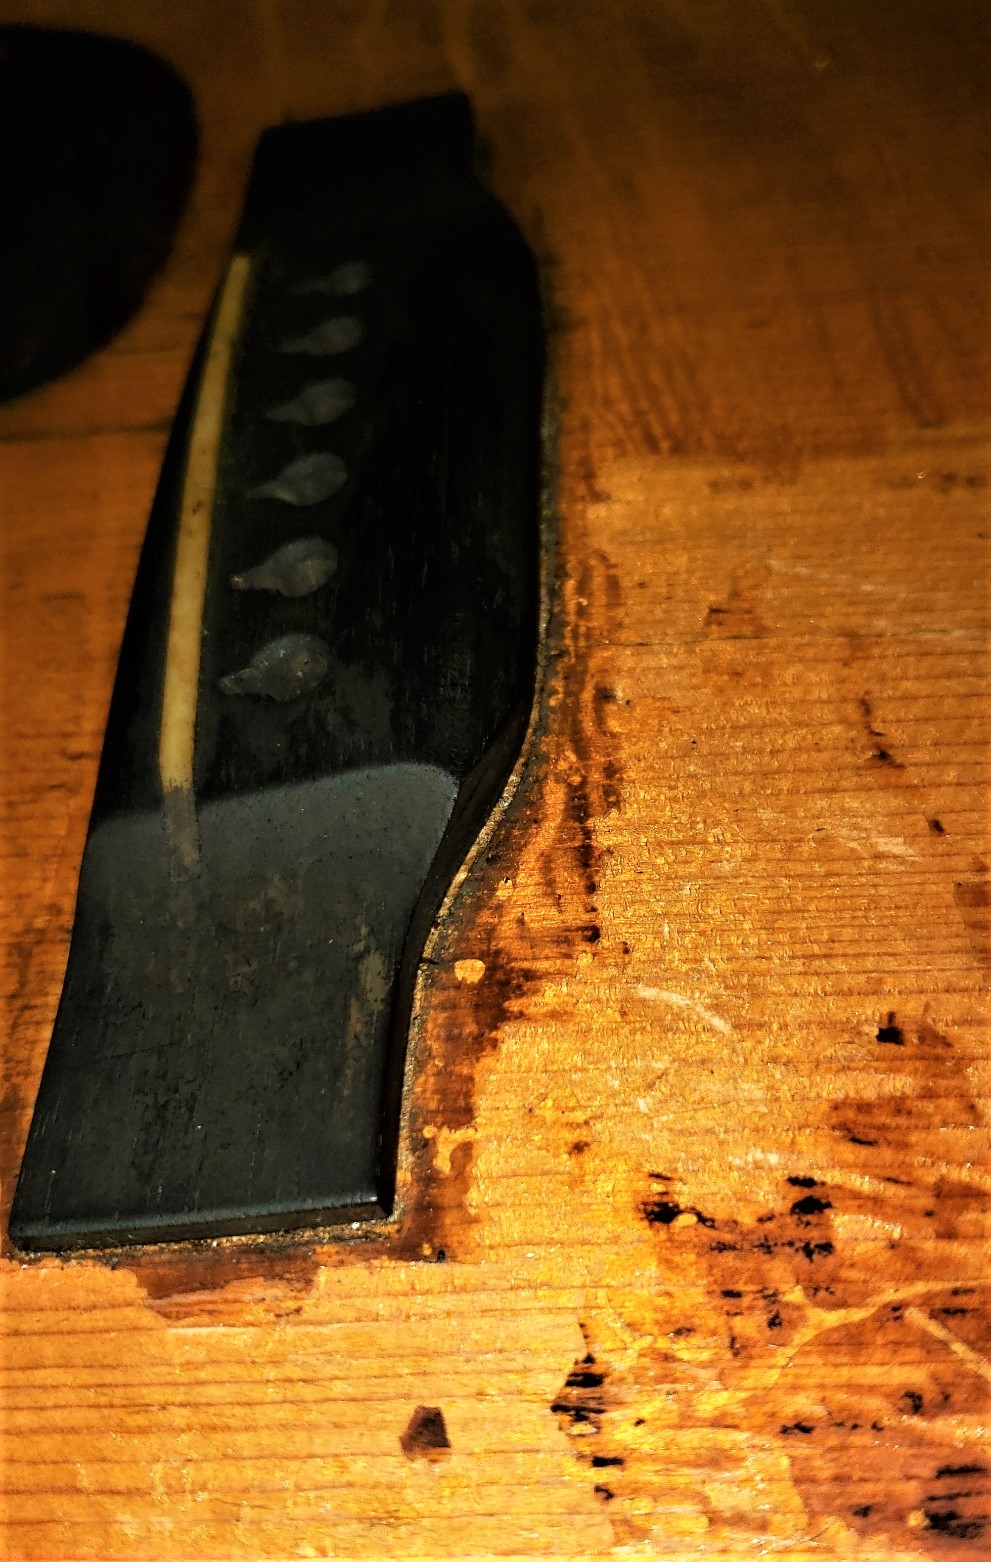
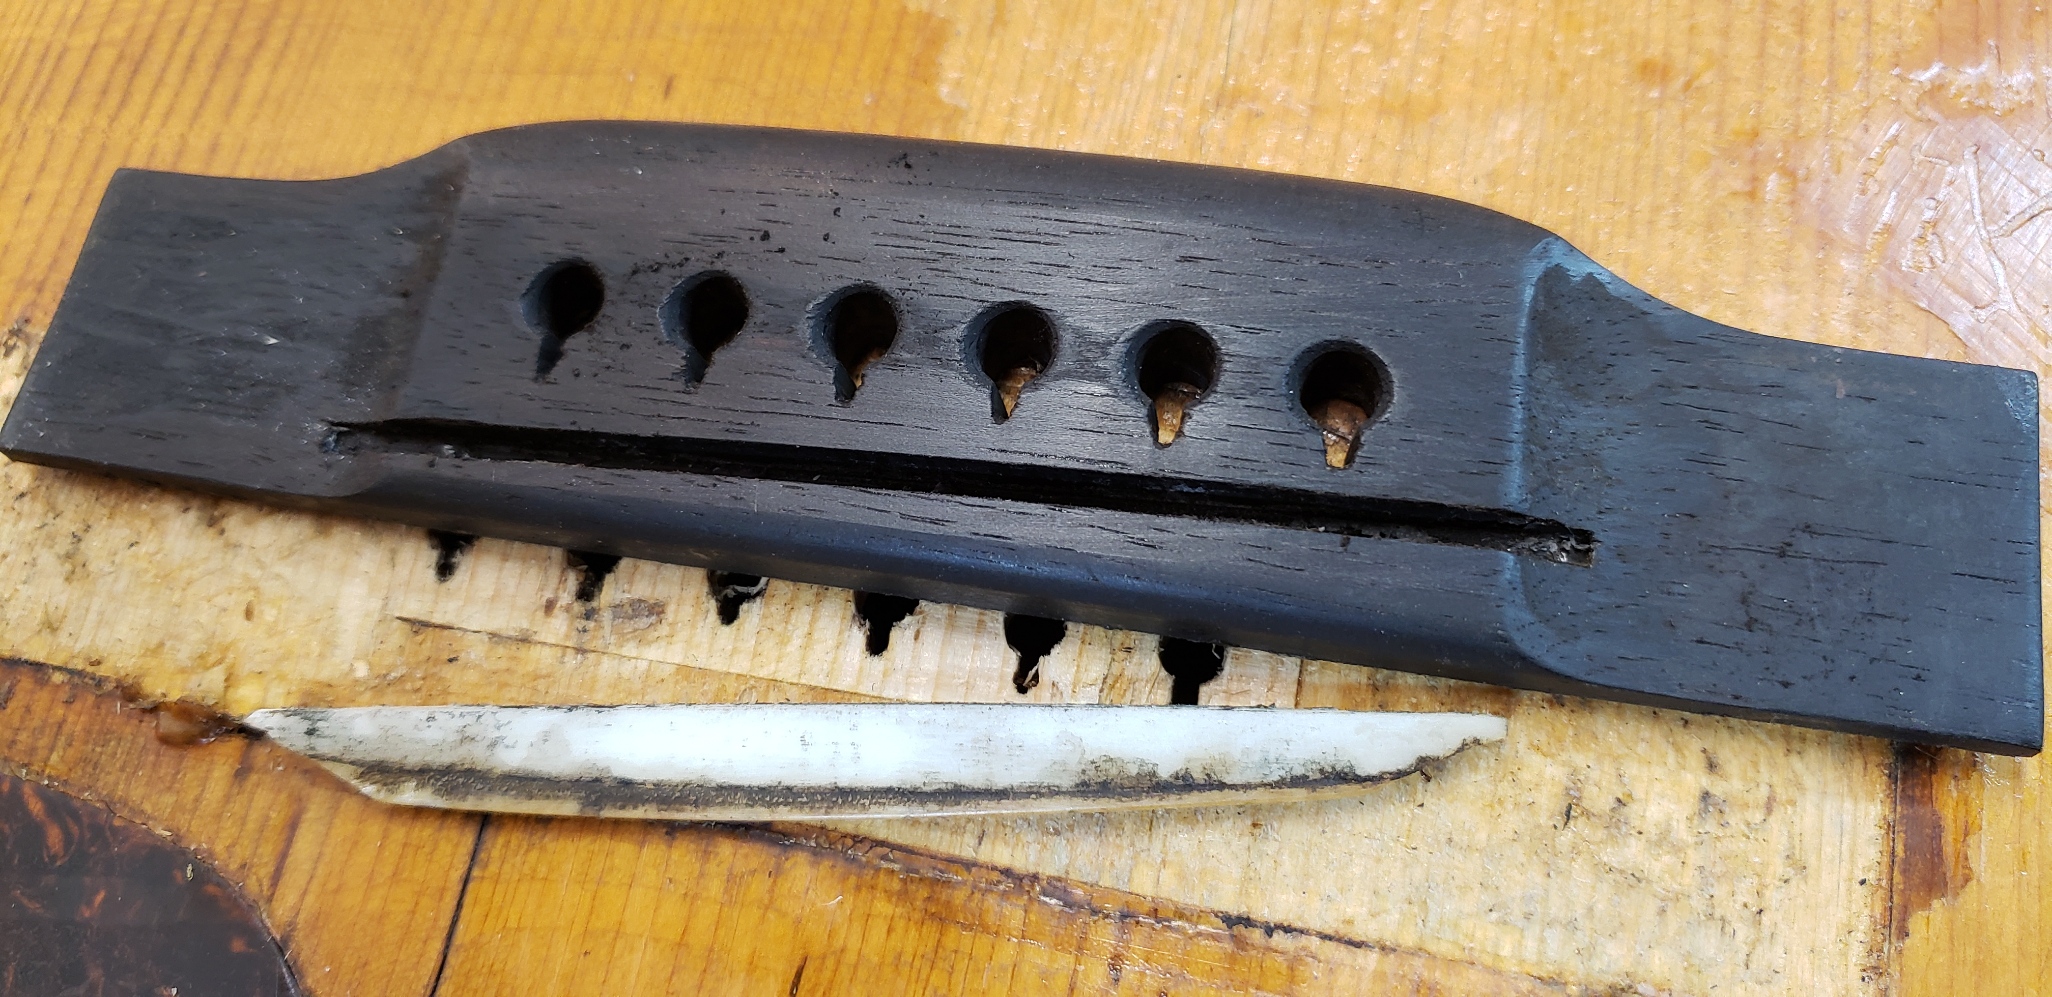
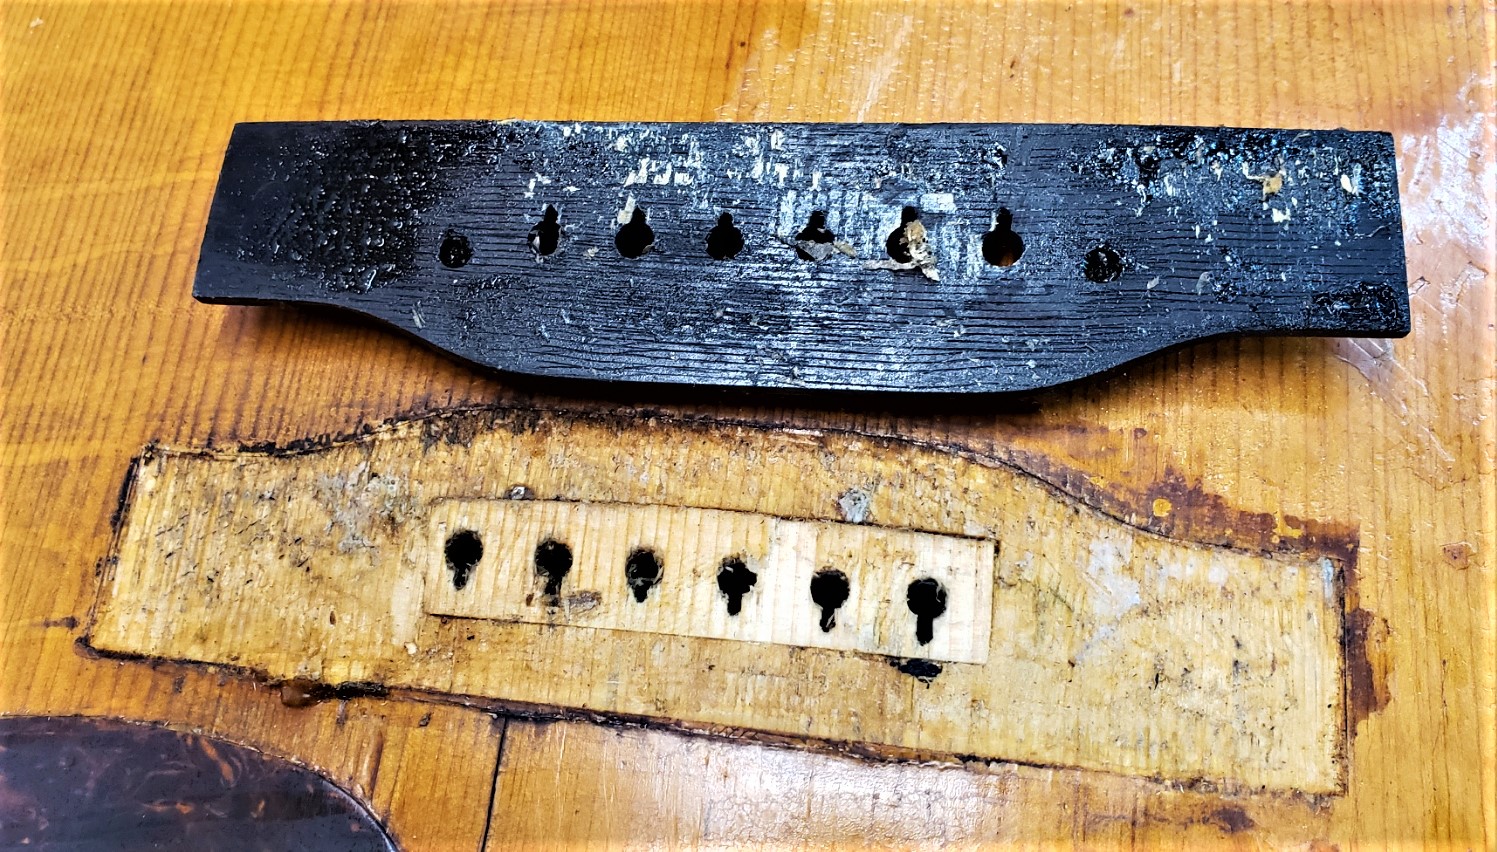
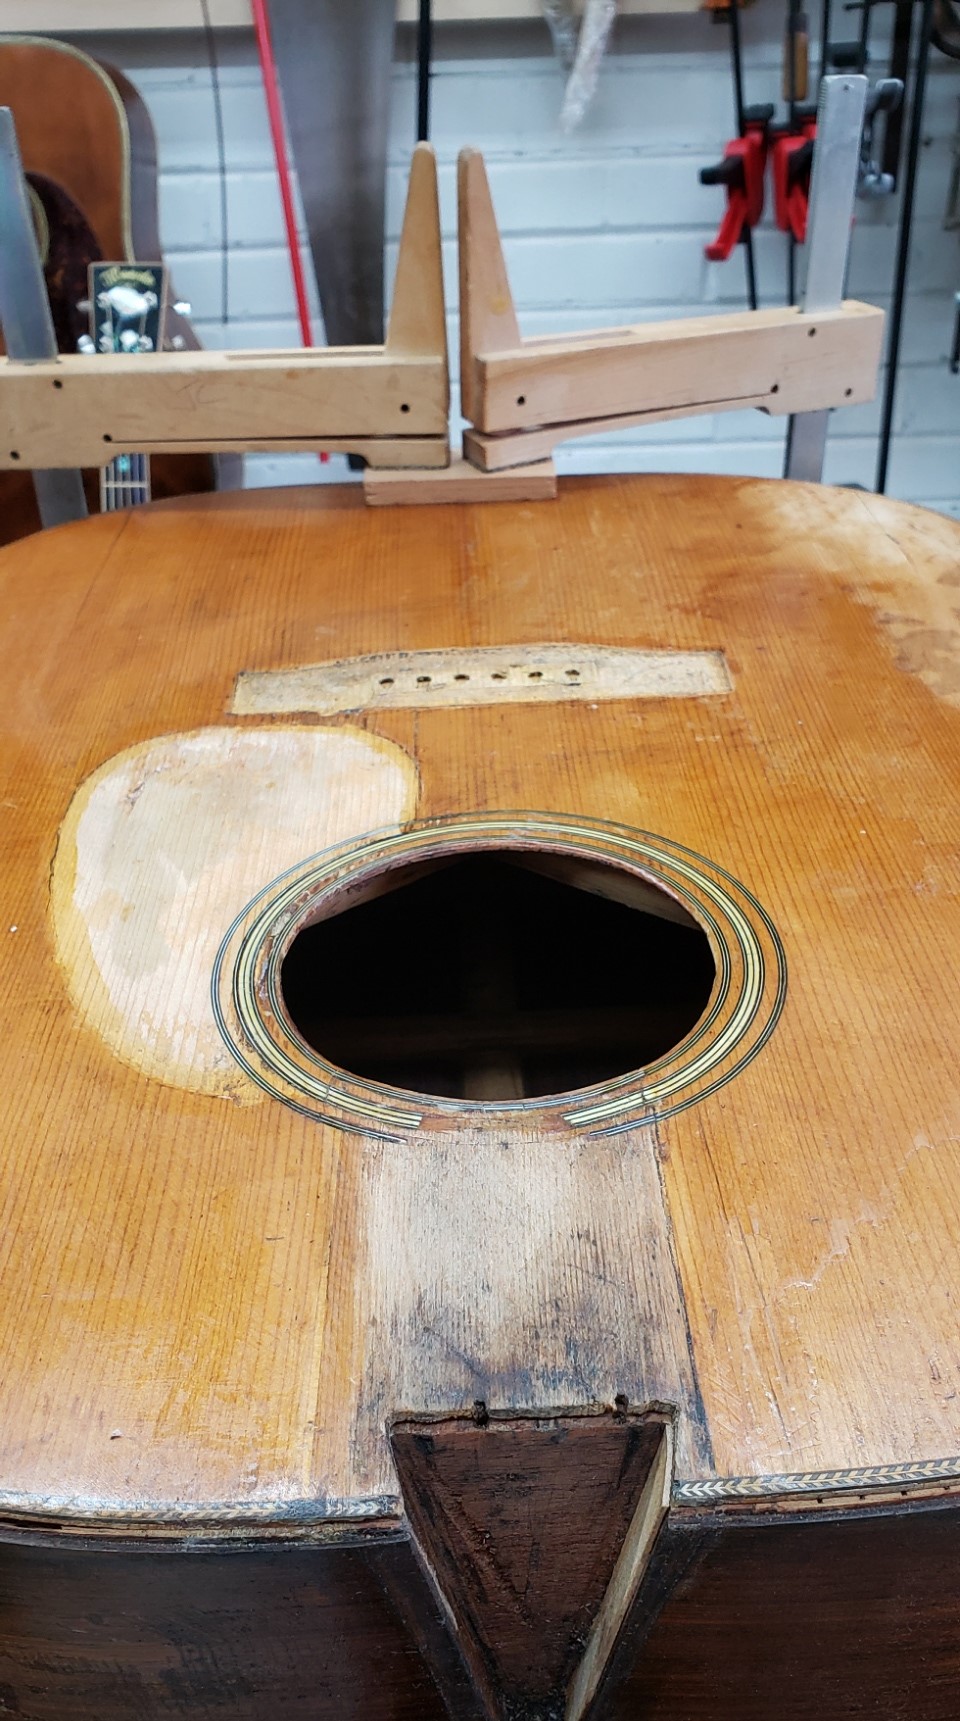
Removing the bridge revealed a prior repair that inserted a patch of new wood under the bridge. There is no reason to remove or alter this patch The bridge is not original, but is a decent replacement. The long saddle is not shaped like a 1930s saddle would have been, but more like a modern Martin through saddle, which is actually a drop in with squared off ends.
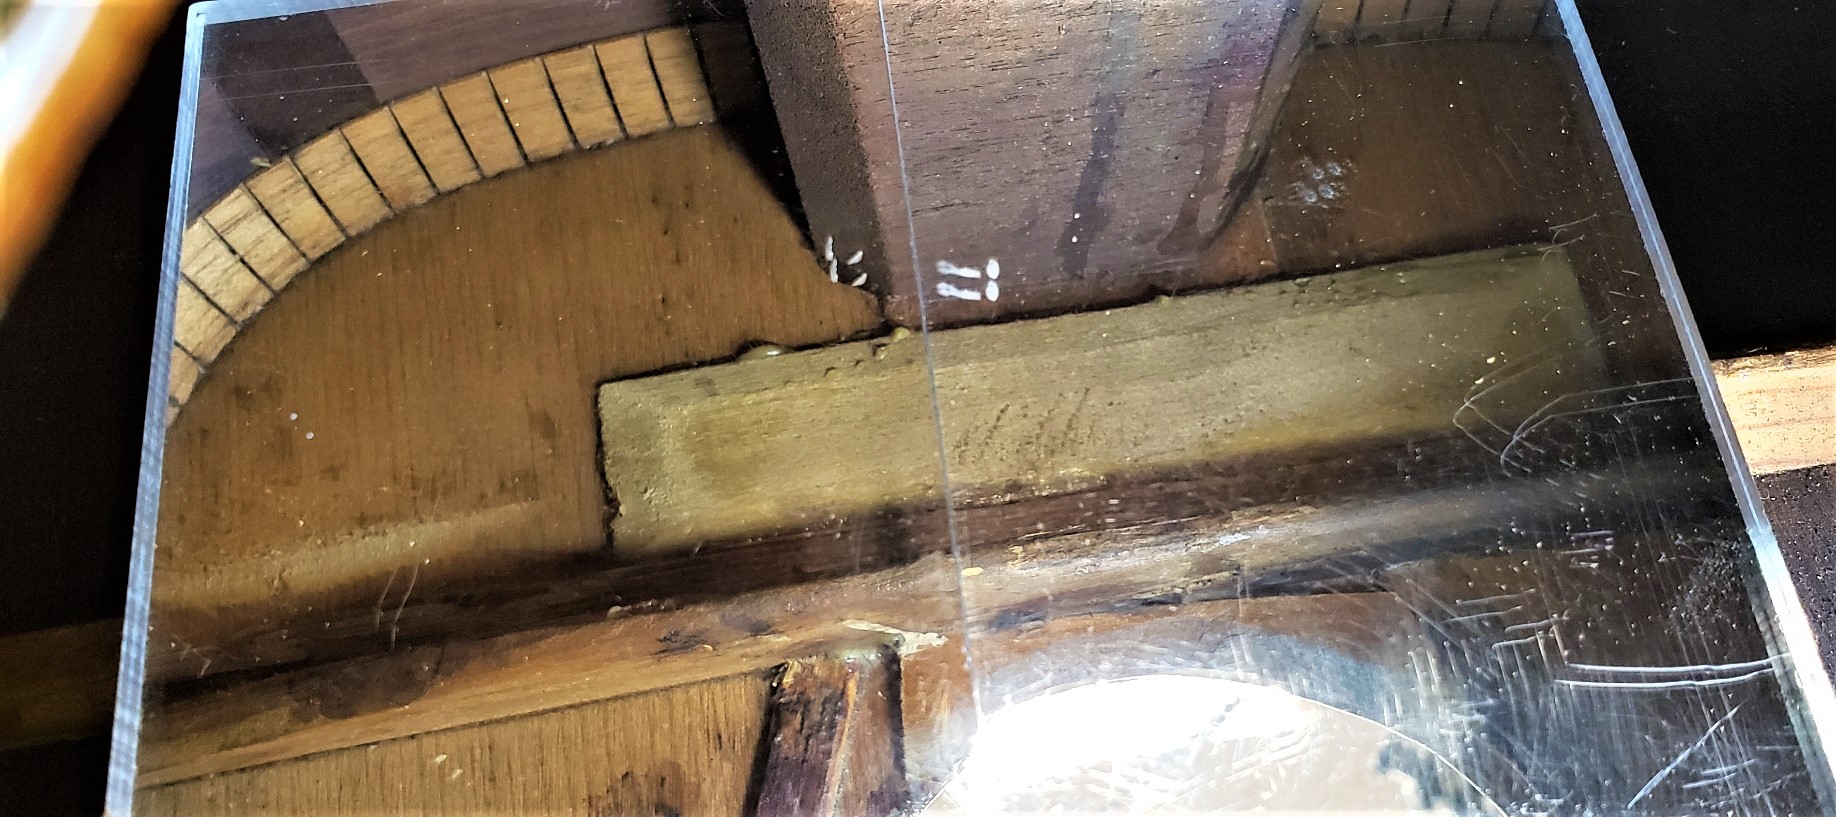
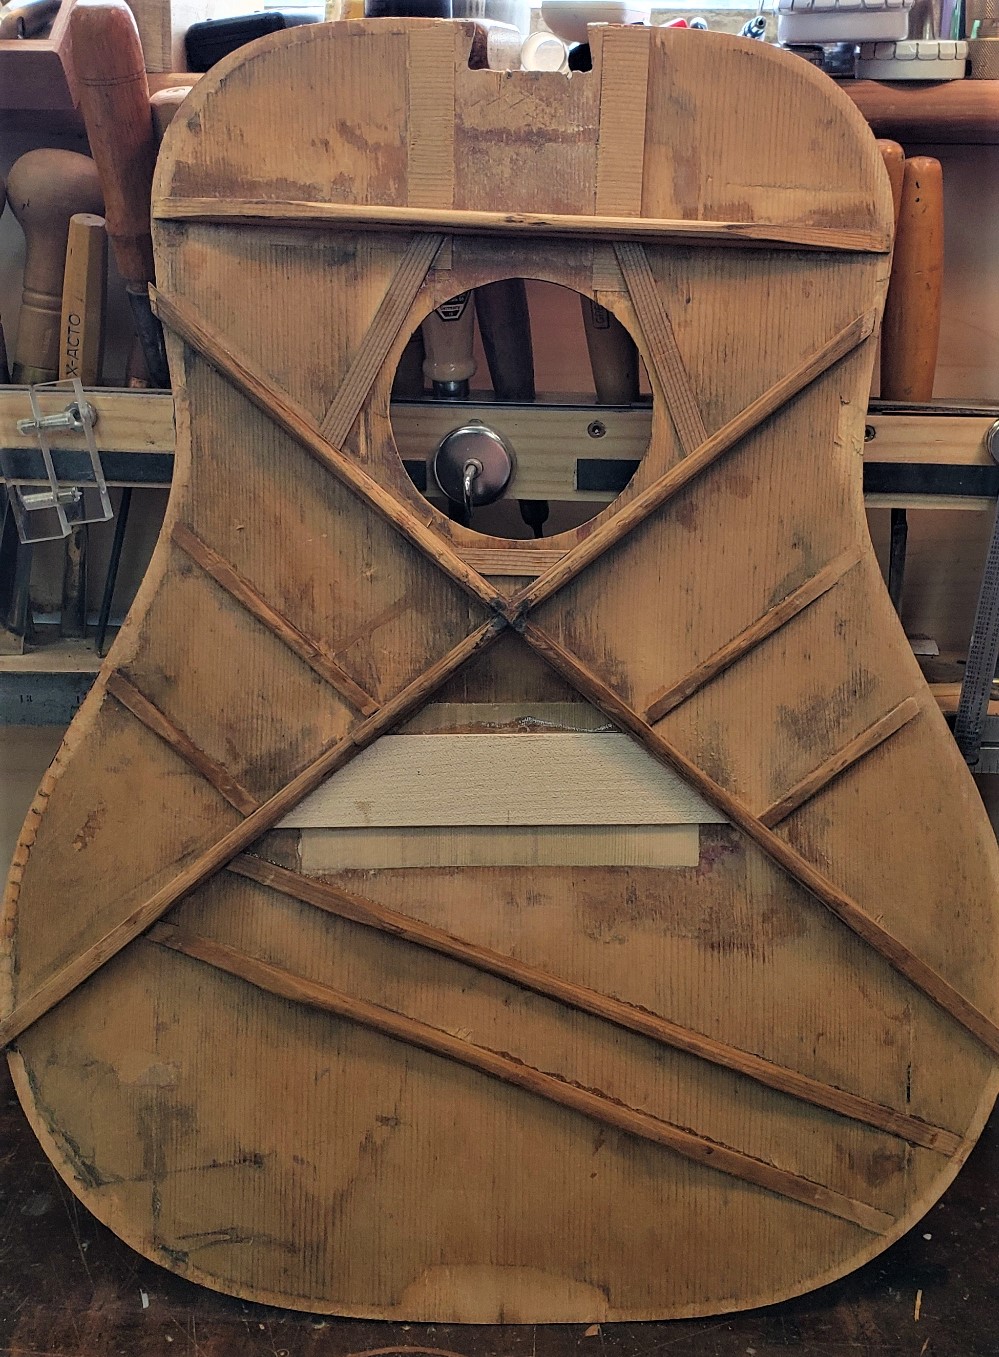
A "popsicle" brace, it's a weird one. It's not like the usual one that extends almost the full width of the top. But it's short and thick. I think it's actually to shore up the top at the fretboard extension. It looks like maybe the neck collapsed into the body at some time. I'm not sure if Martin used a popsicle brace in the 1930s. I think they did not. Maybe you know if they did or didn't.
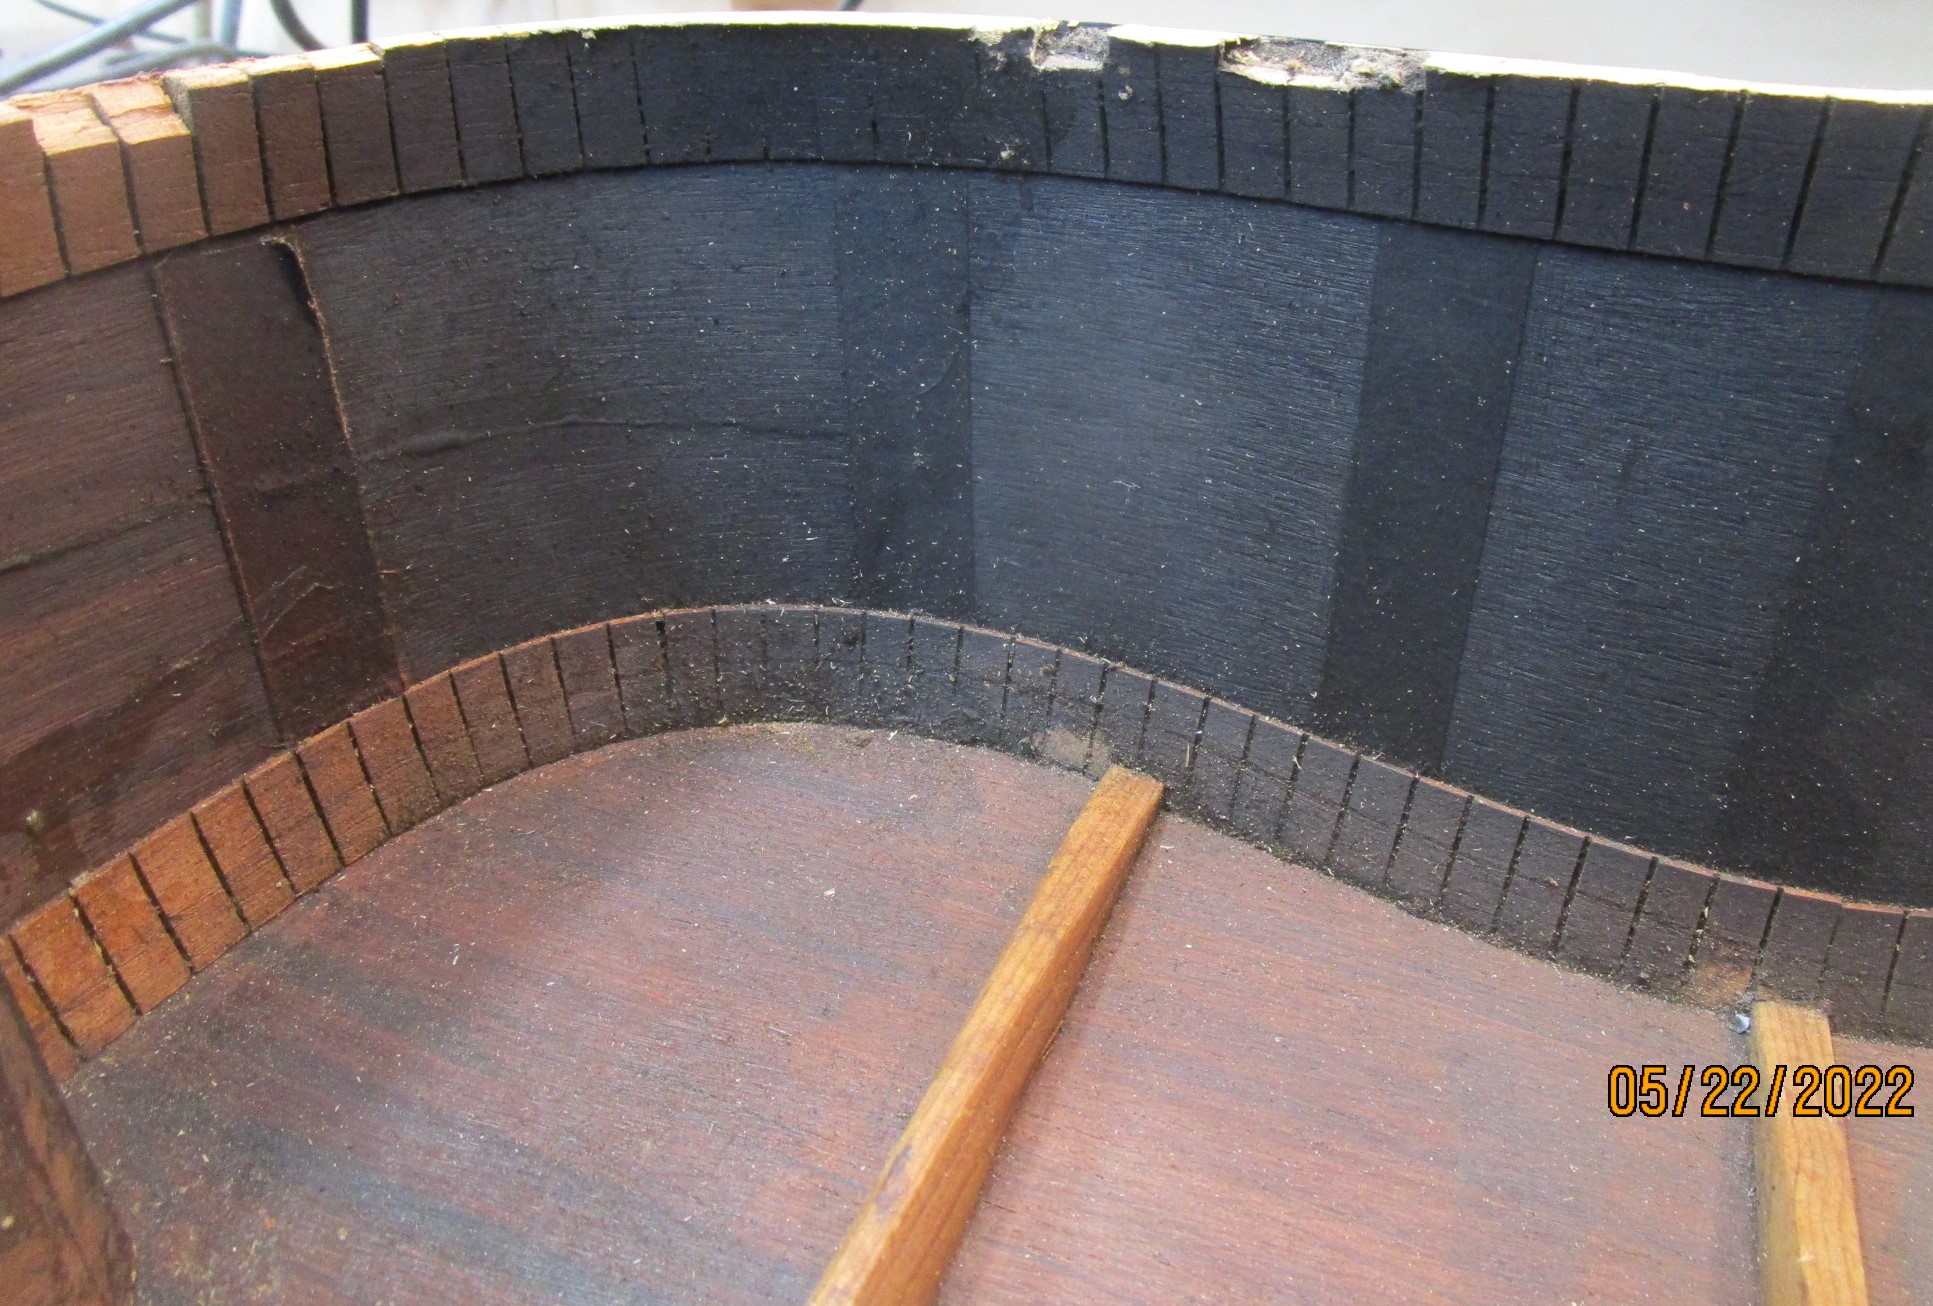
Anyway, this can all be corrected if I remove the top, and I still think that is indicated here. There's a lot of glue inside and that can all be cleaned and the braces reglued using the original bracing of course. I can remove that weird popsicle brace and reinforce that area in a better way if necessary. I can't tell if any braces are loose, but the geometry of the top is not right. These photos are taken with a mirror showing the inside top. Note how black the sides are.
I started cleaning up the worst area of the top. Some of the finish has already been removed. Most of the smoke staining was in the lacquer but also in the wood somewhat. Here's a before and after of that work:
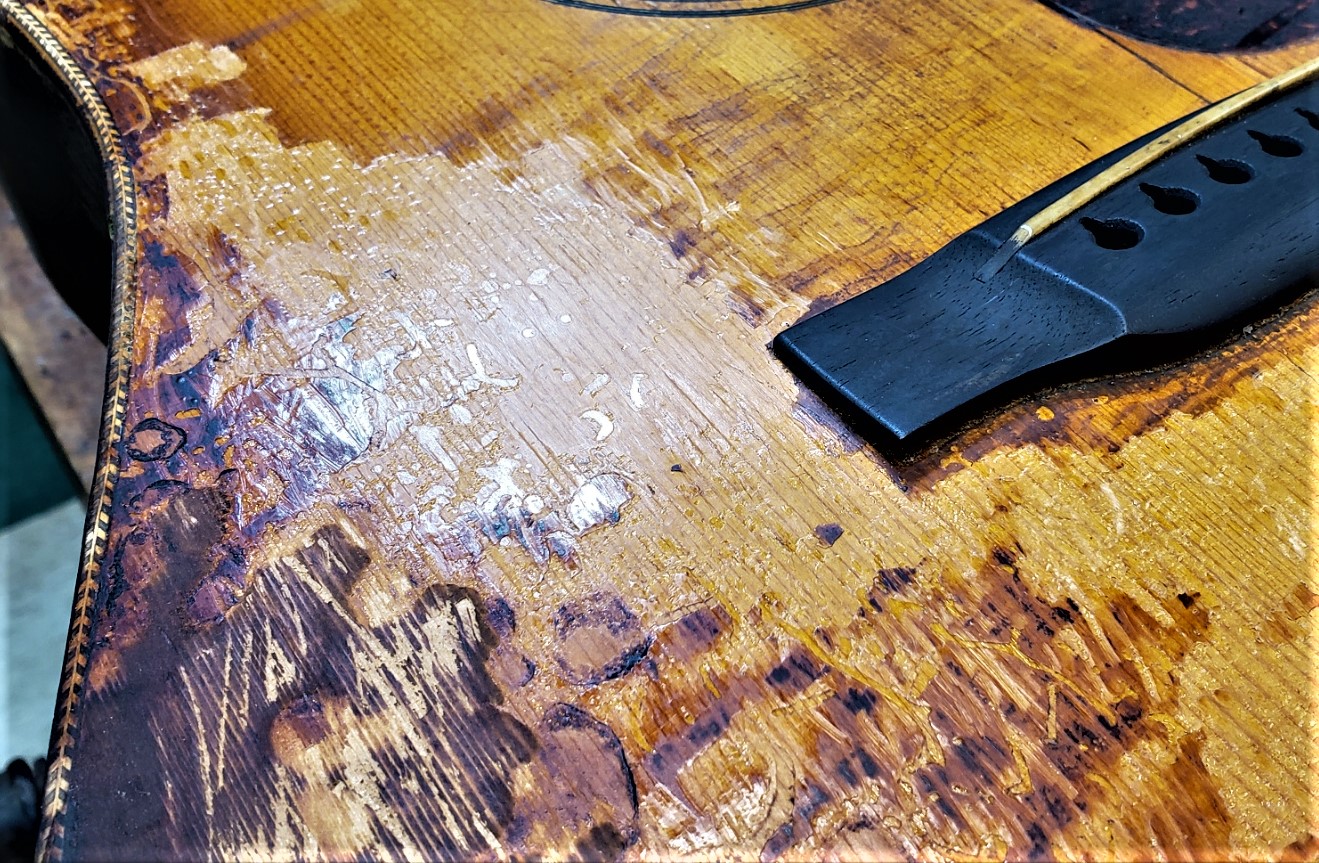
So it's cleaning up pretty well. It's going to look old, but much of the fire evidence should be greatly reduced if not removed altogether.
Disassembly / Cleaning / Top Restoration Contents
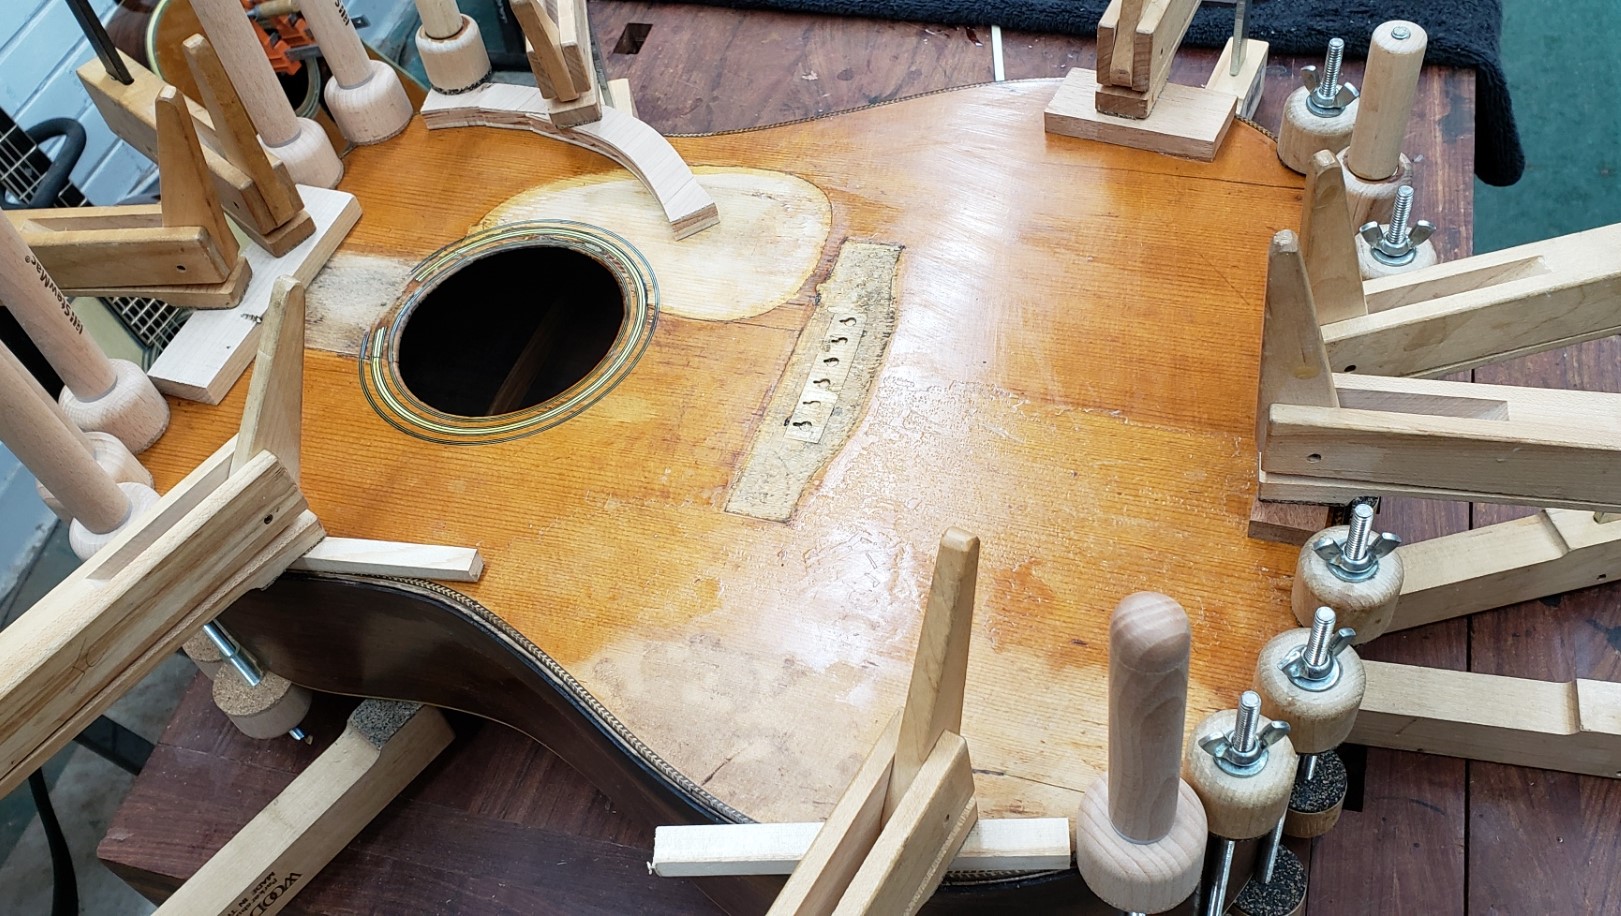
The top is caved in at the soundhole and bellied up severely at the bridge. The only way to make this top have the correct radius (dome) is to remove the braces and re-glue them to the top in a dished work board with a 25' radius. To do this I have to remove the neck and then the top. These photos document that process.
This photo shows the sunken area of the top. This was at least partially cause by the neck/fretboard collapsing forward. The top is cracked on both sides where the fretboard joins the body.
This photo shows the telltale deformation of the top where the fretboard collapsed forward. Three bad repairs were done to this part of the top as later photos show.
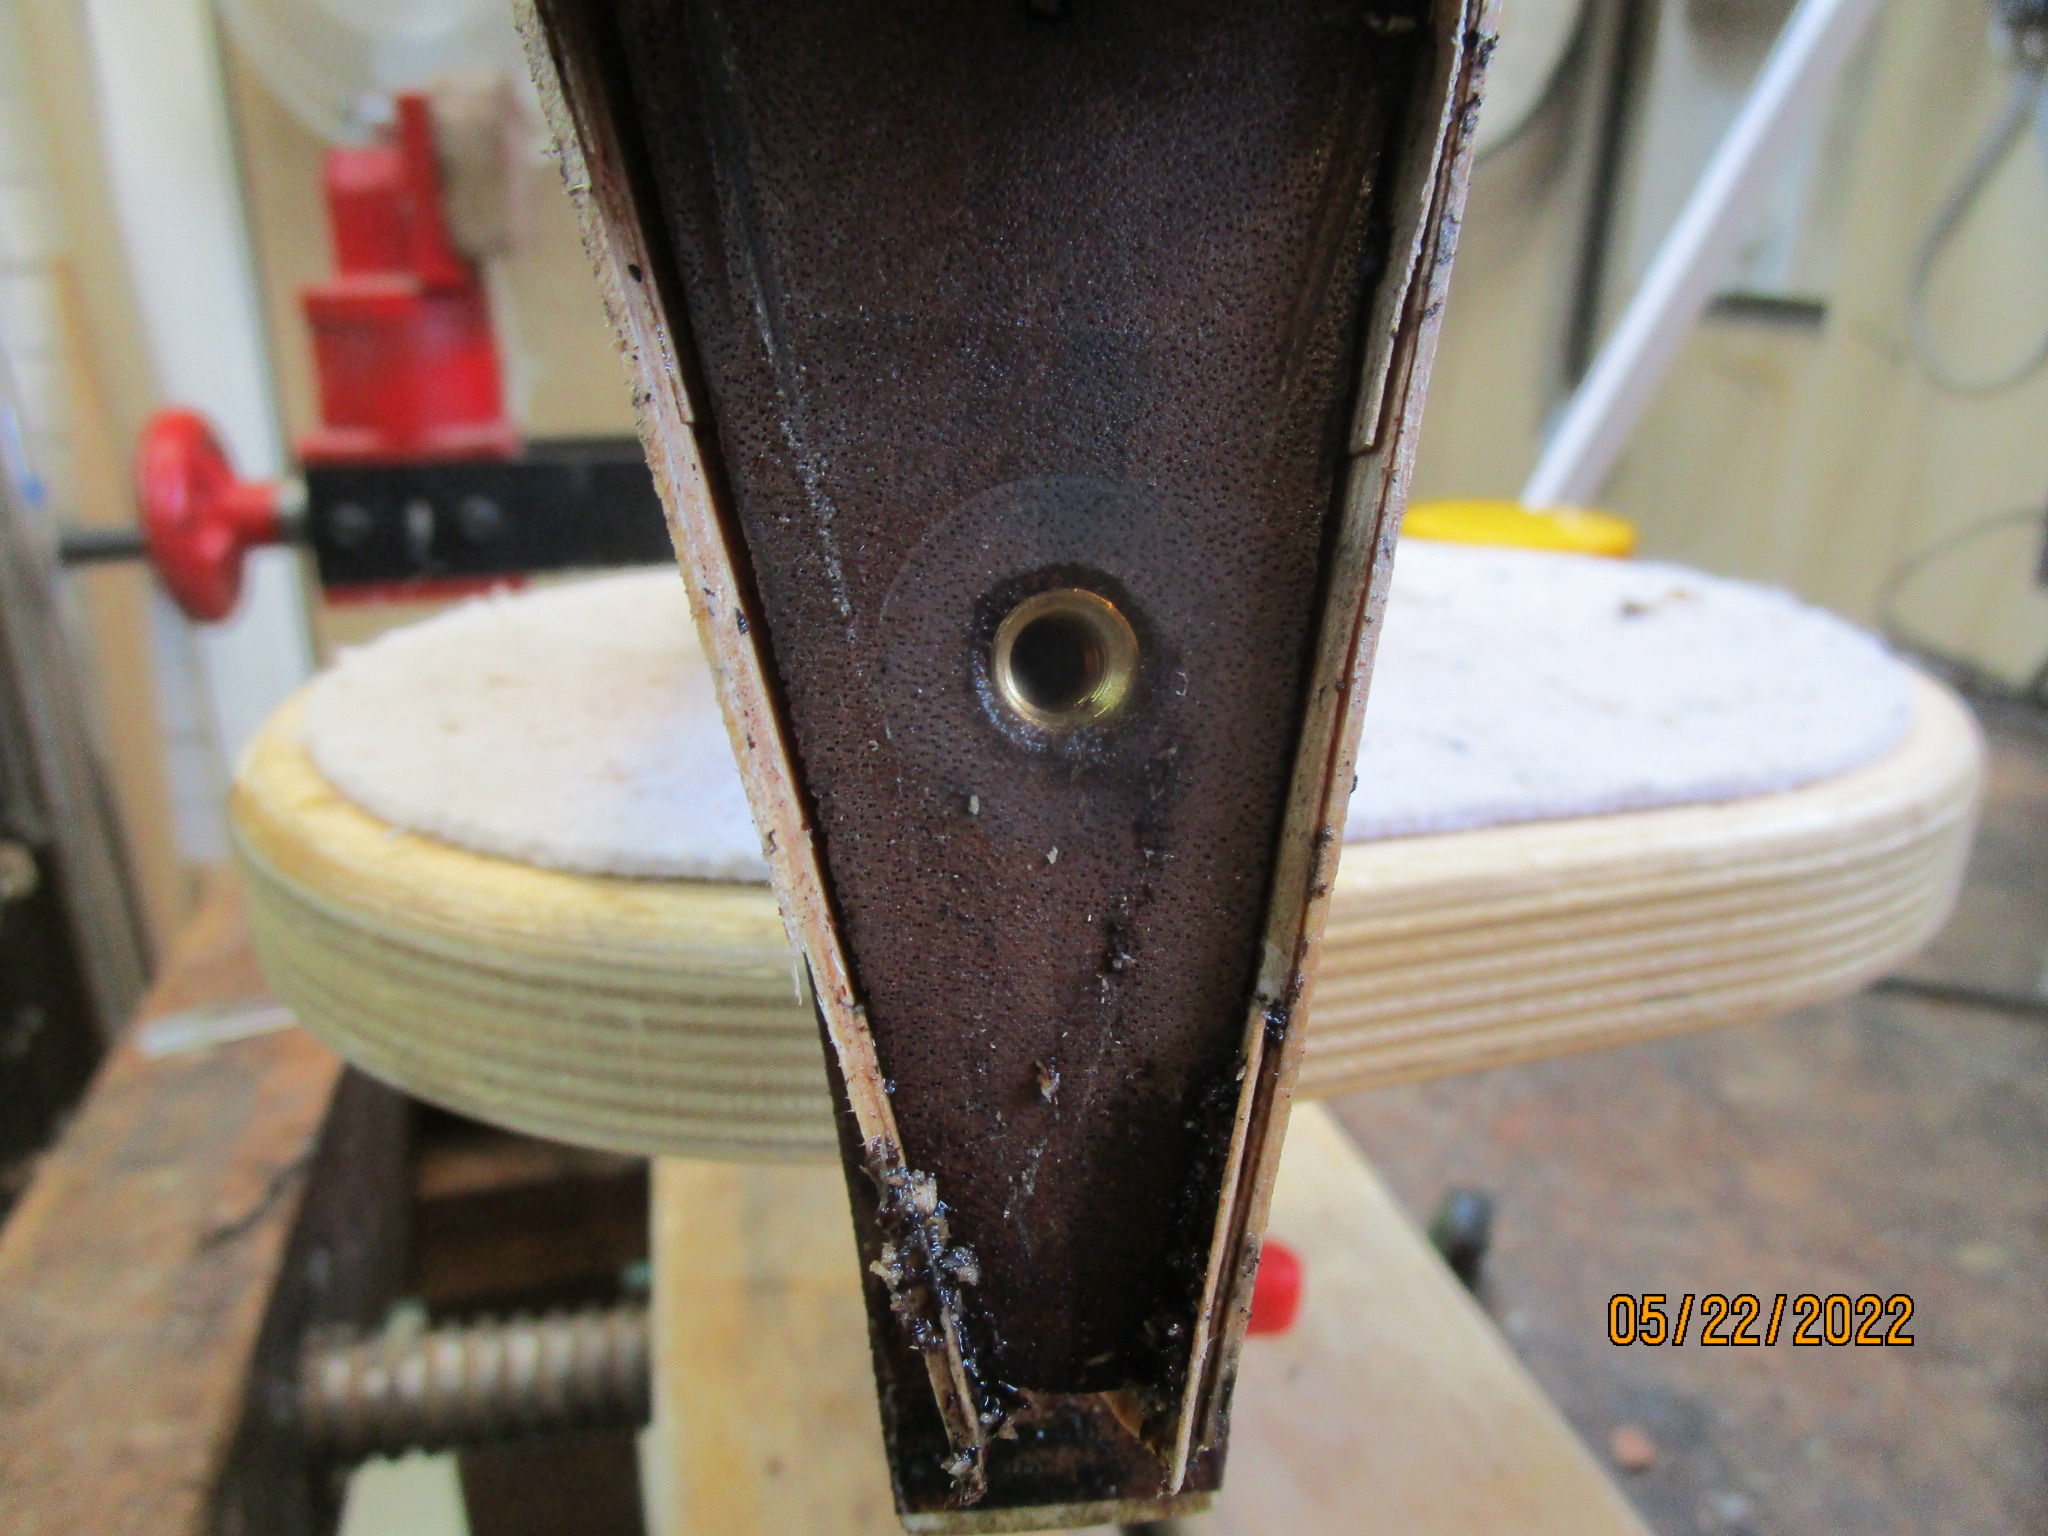
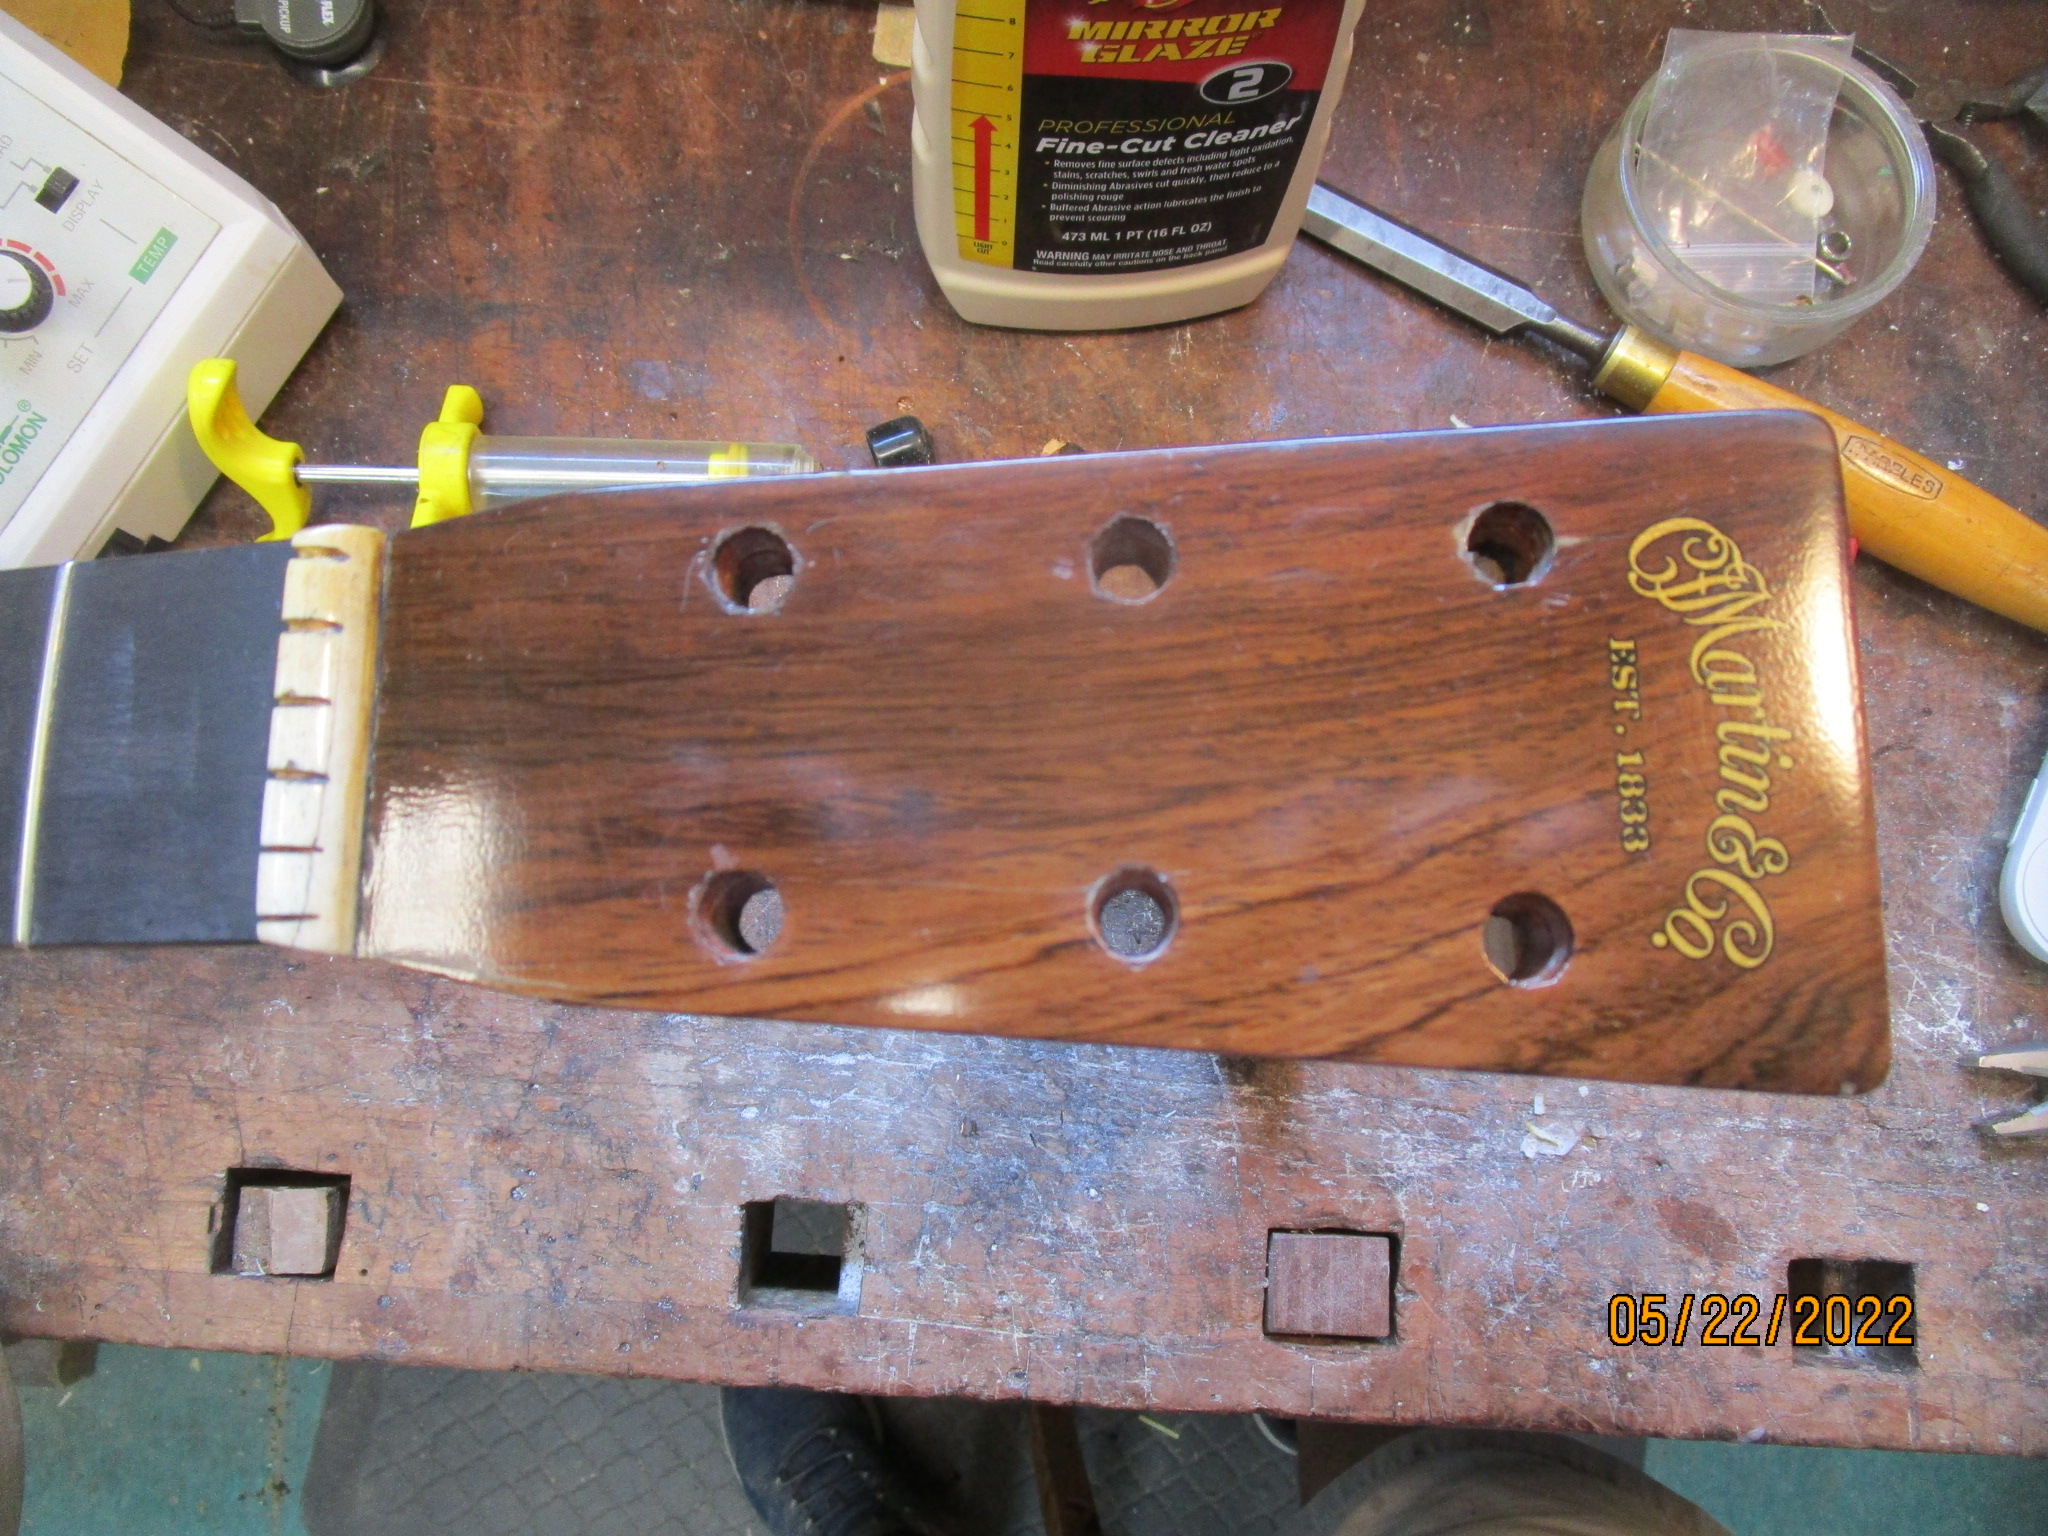
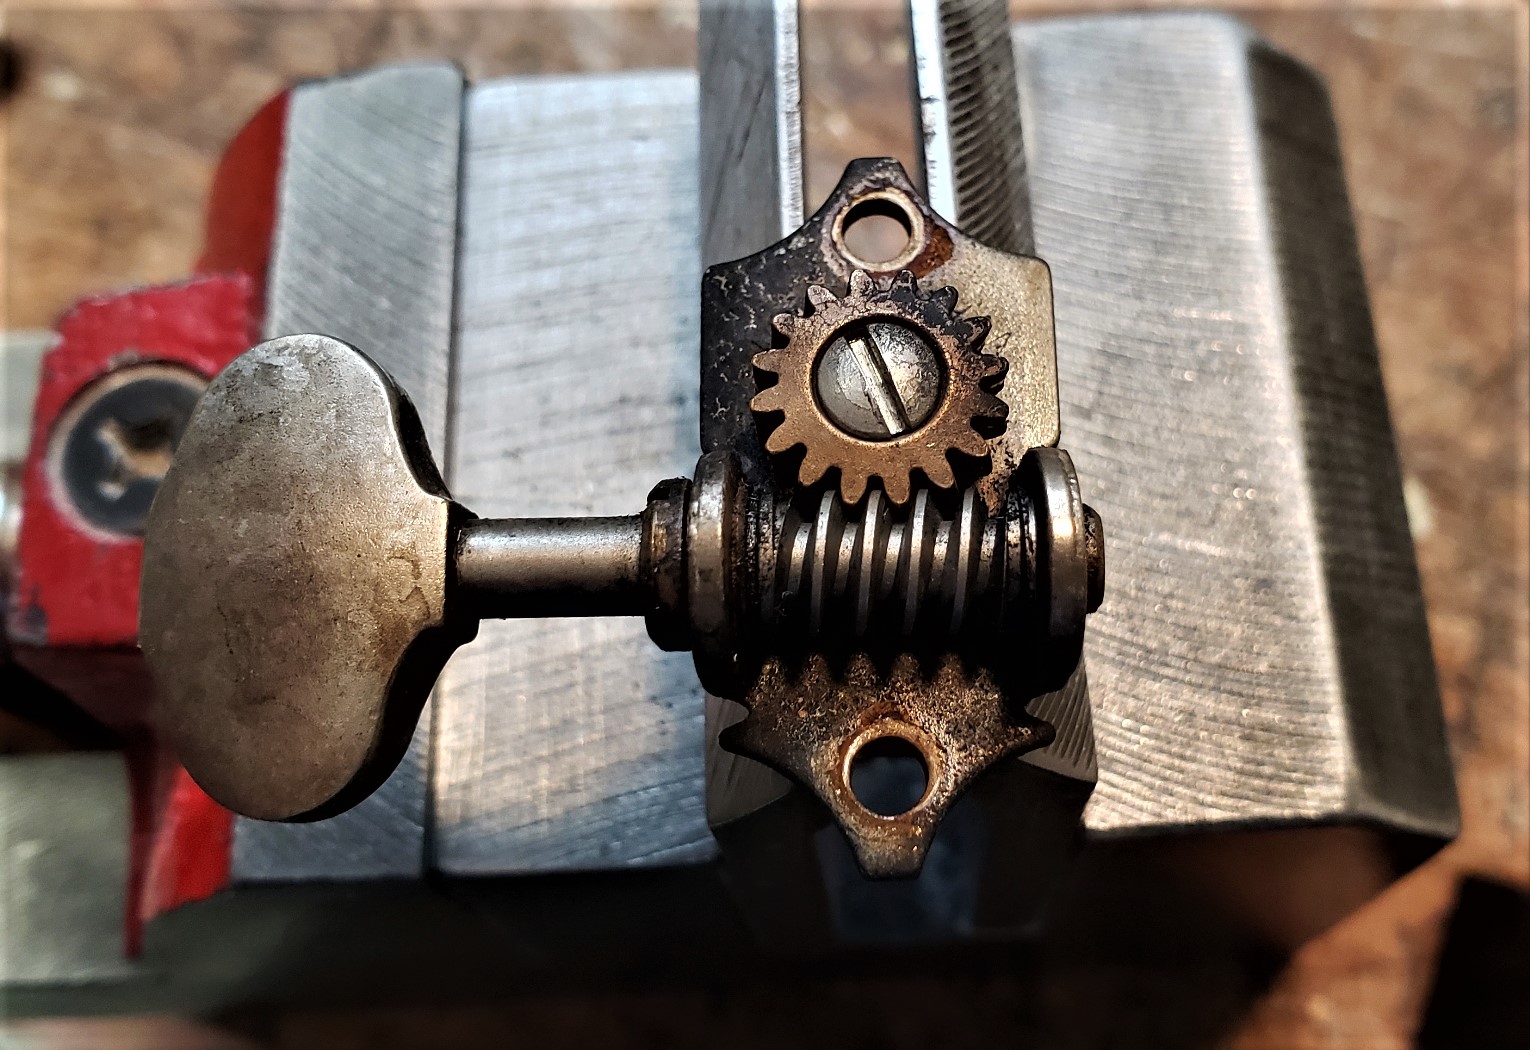
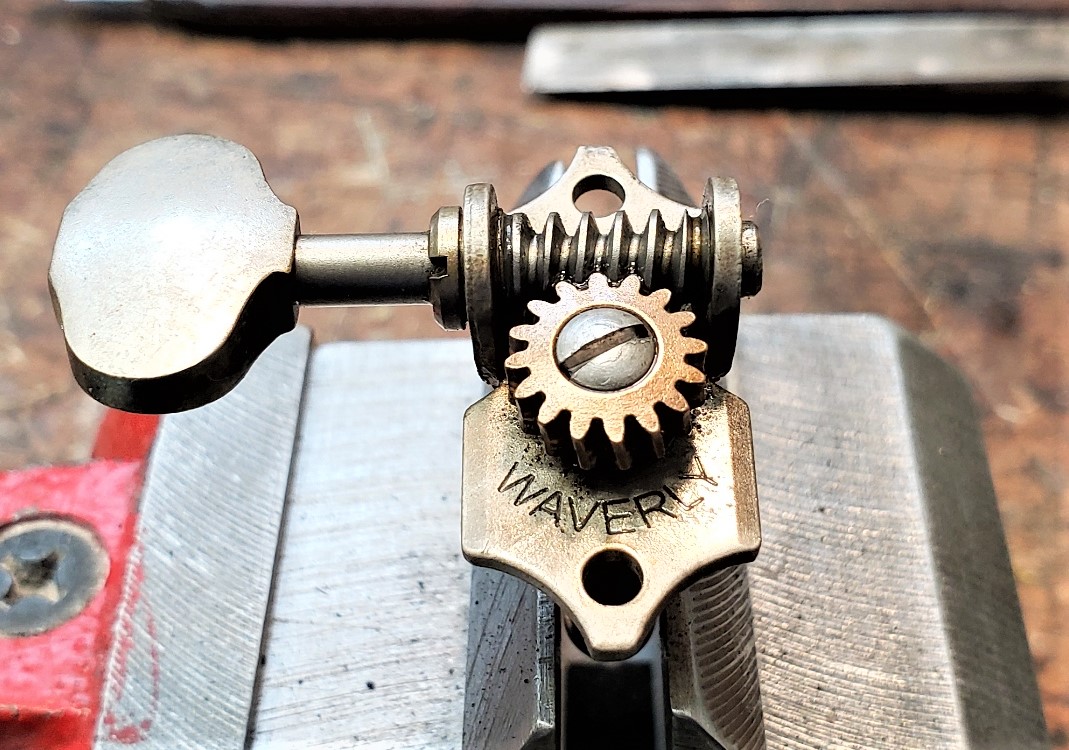
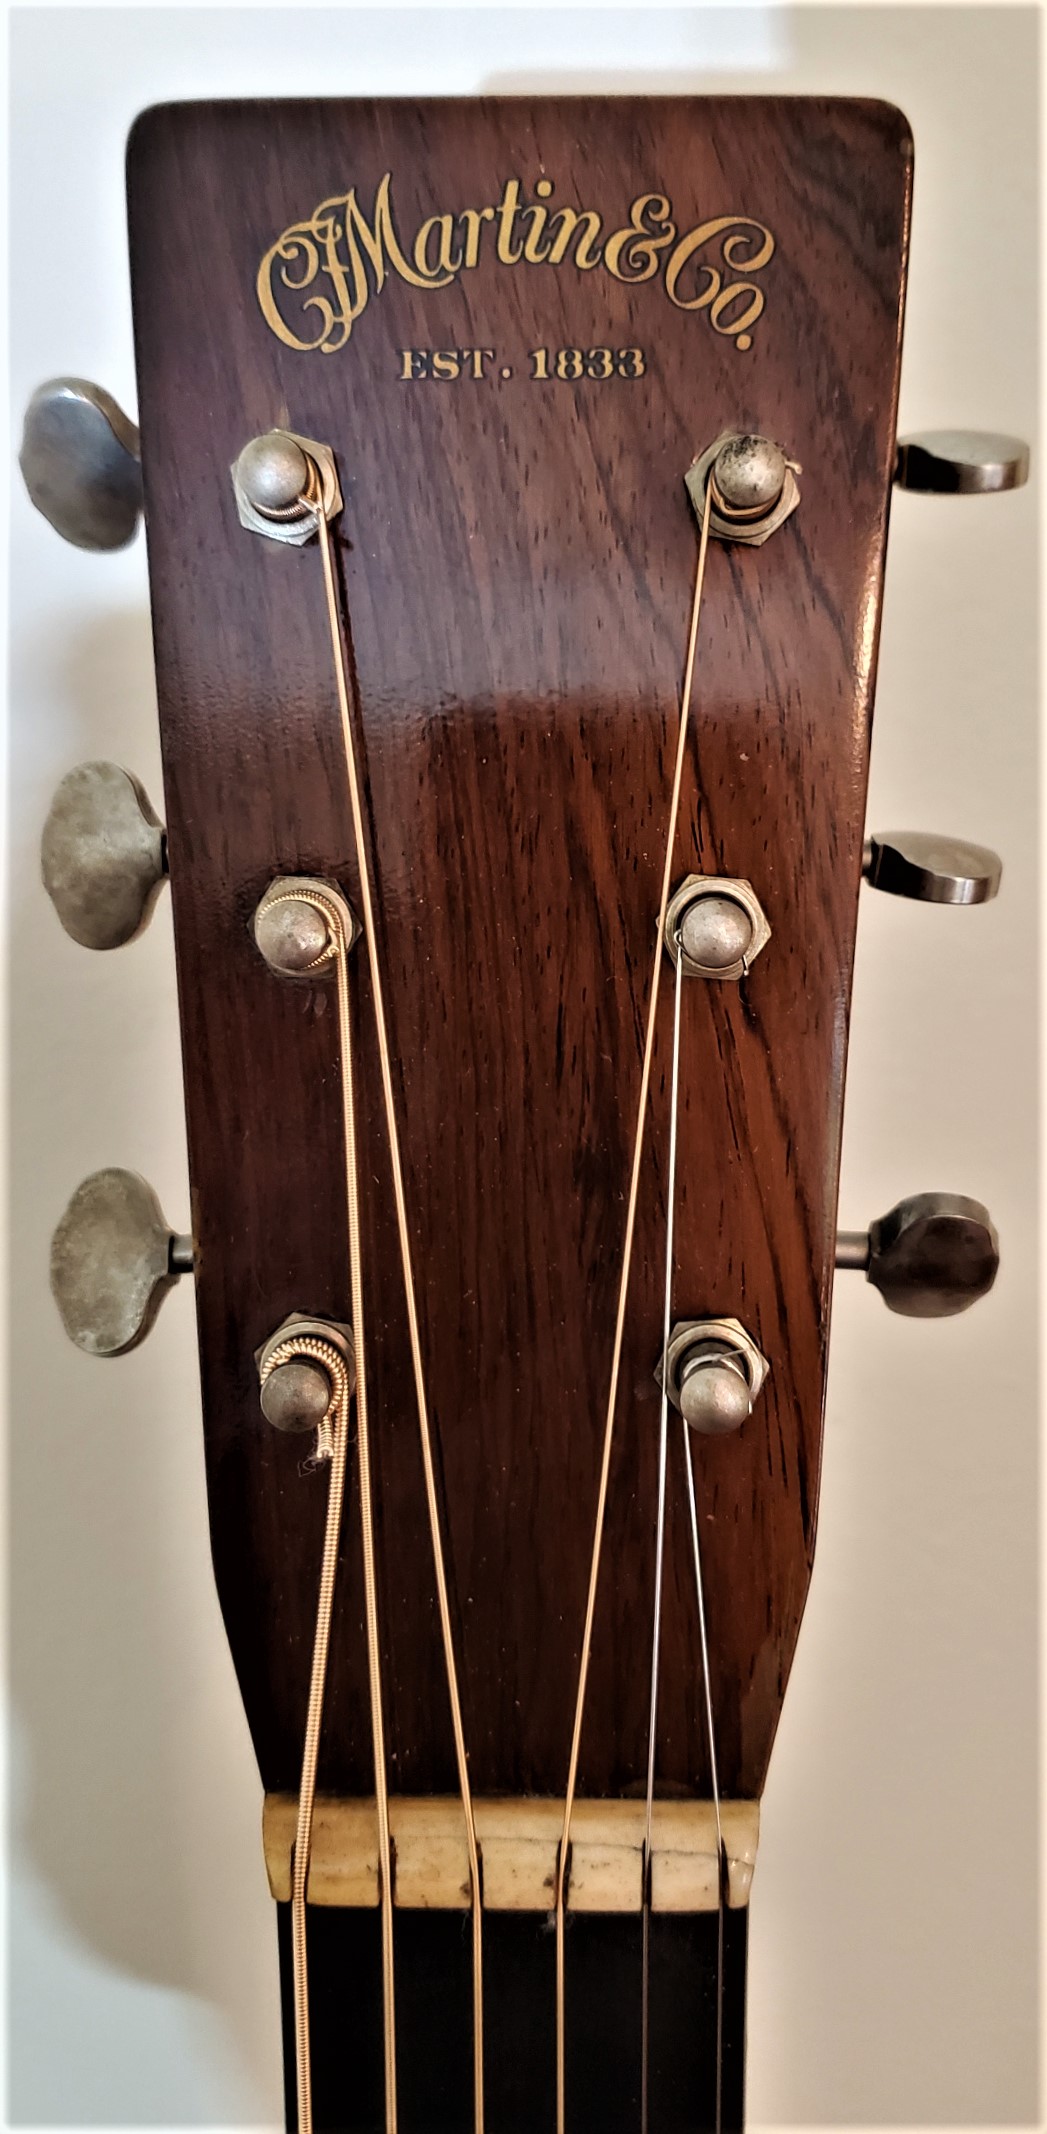
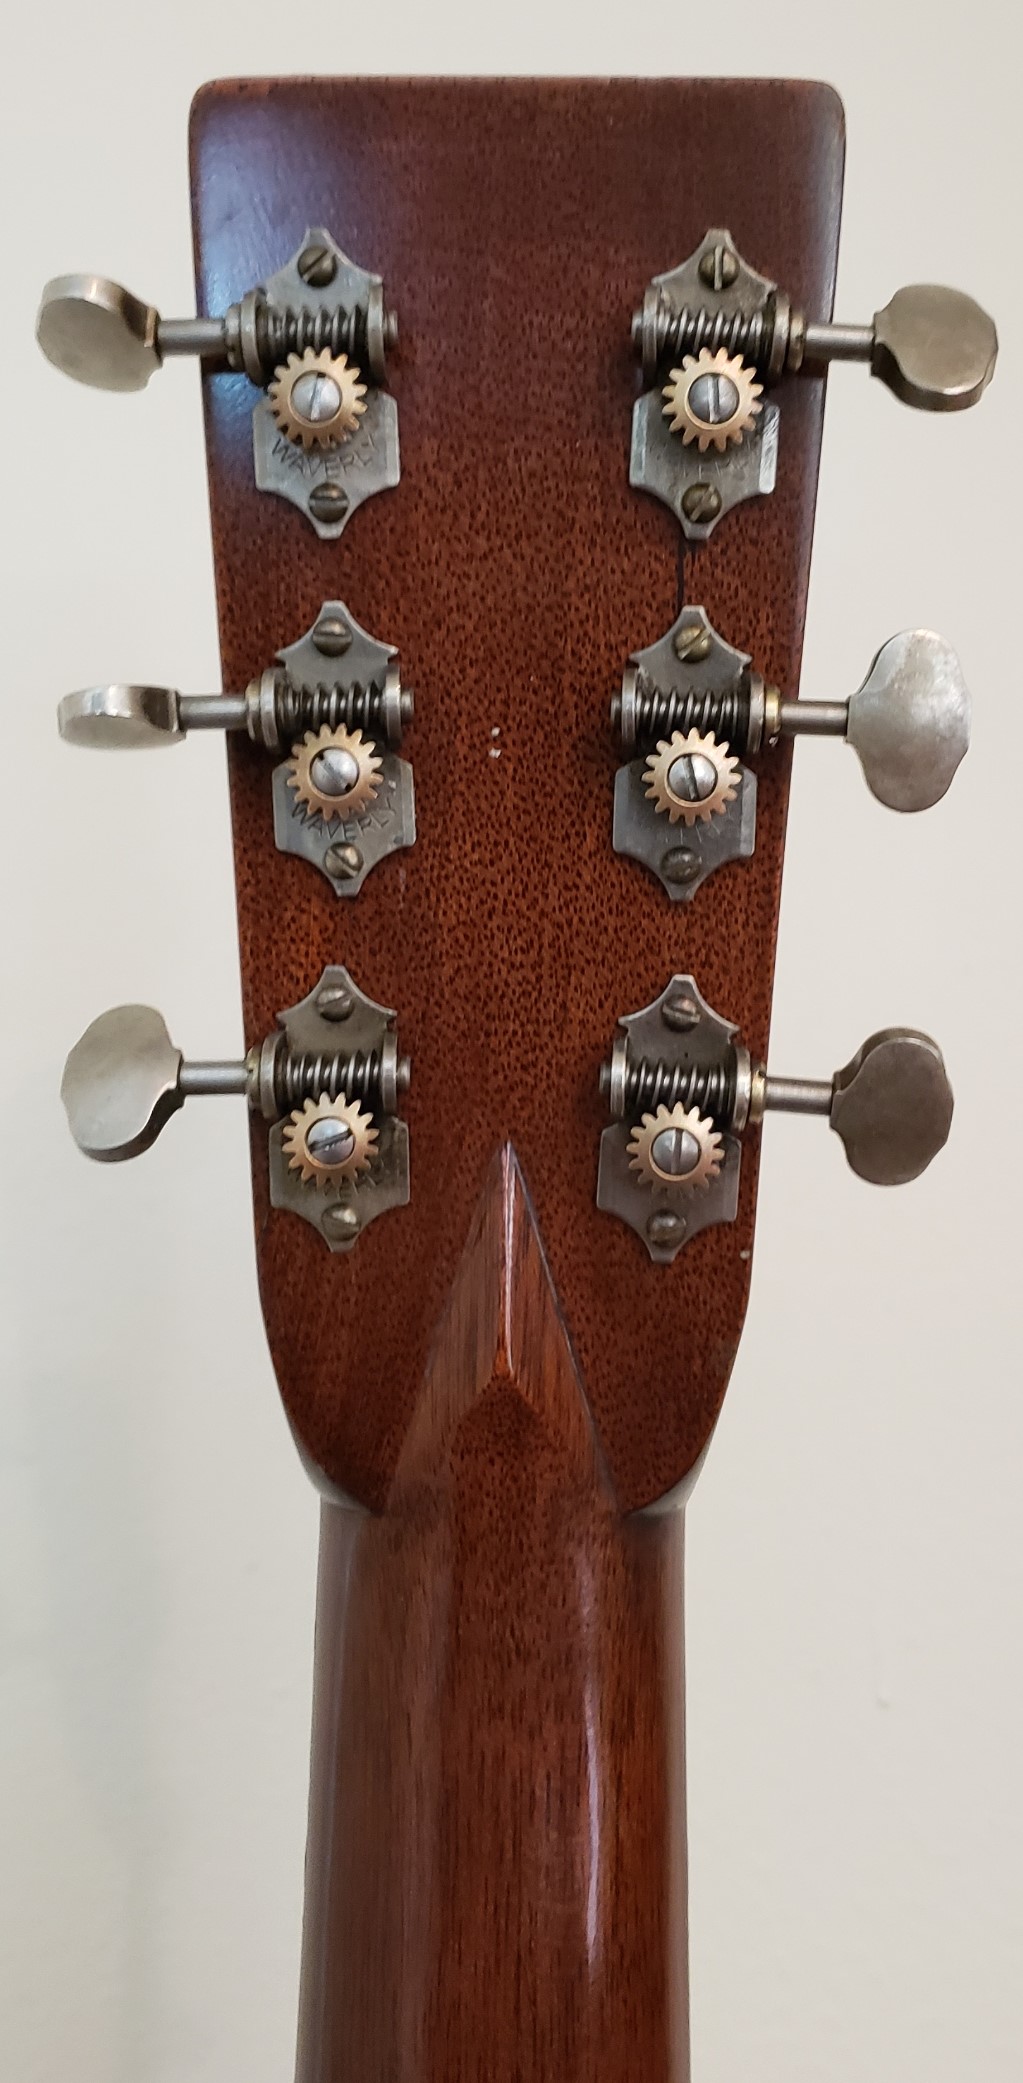
The neck is in very good shape and does not show any real fire damage. It is not original -- it has a threaded insert in the dovetail. The tuners, like most everything on this guitar, Old Smokey, need to be cleaned.The back of the peghead showed some soot, but cleaned up nicely. The front of the peghead looks good after cleaning.
The Waverly tuners are modern replacements. They appear to be "relic" versions, made to appear old. After the fire, they really appear old. They will need to be cleaned.
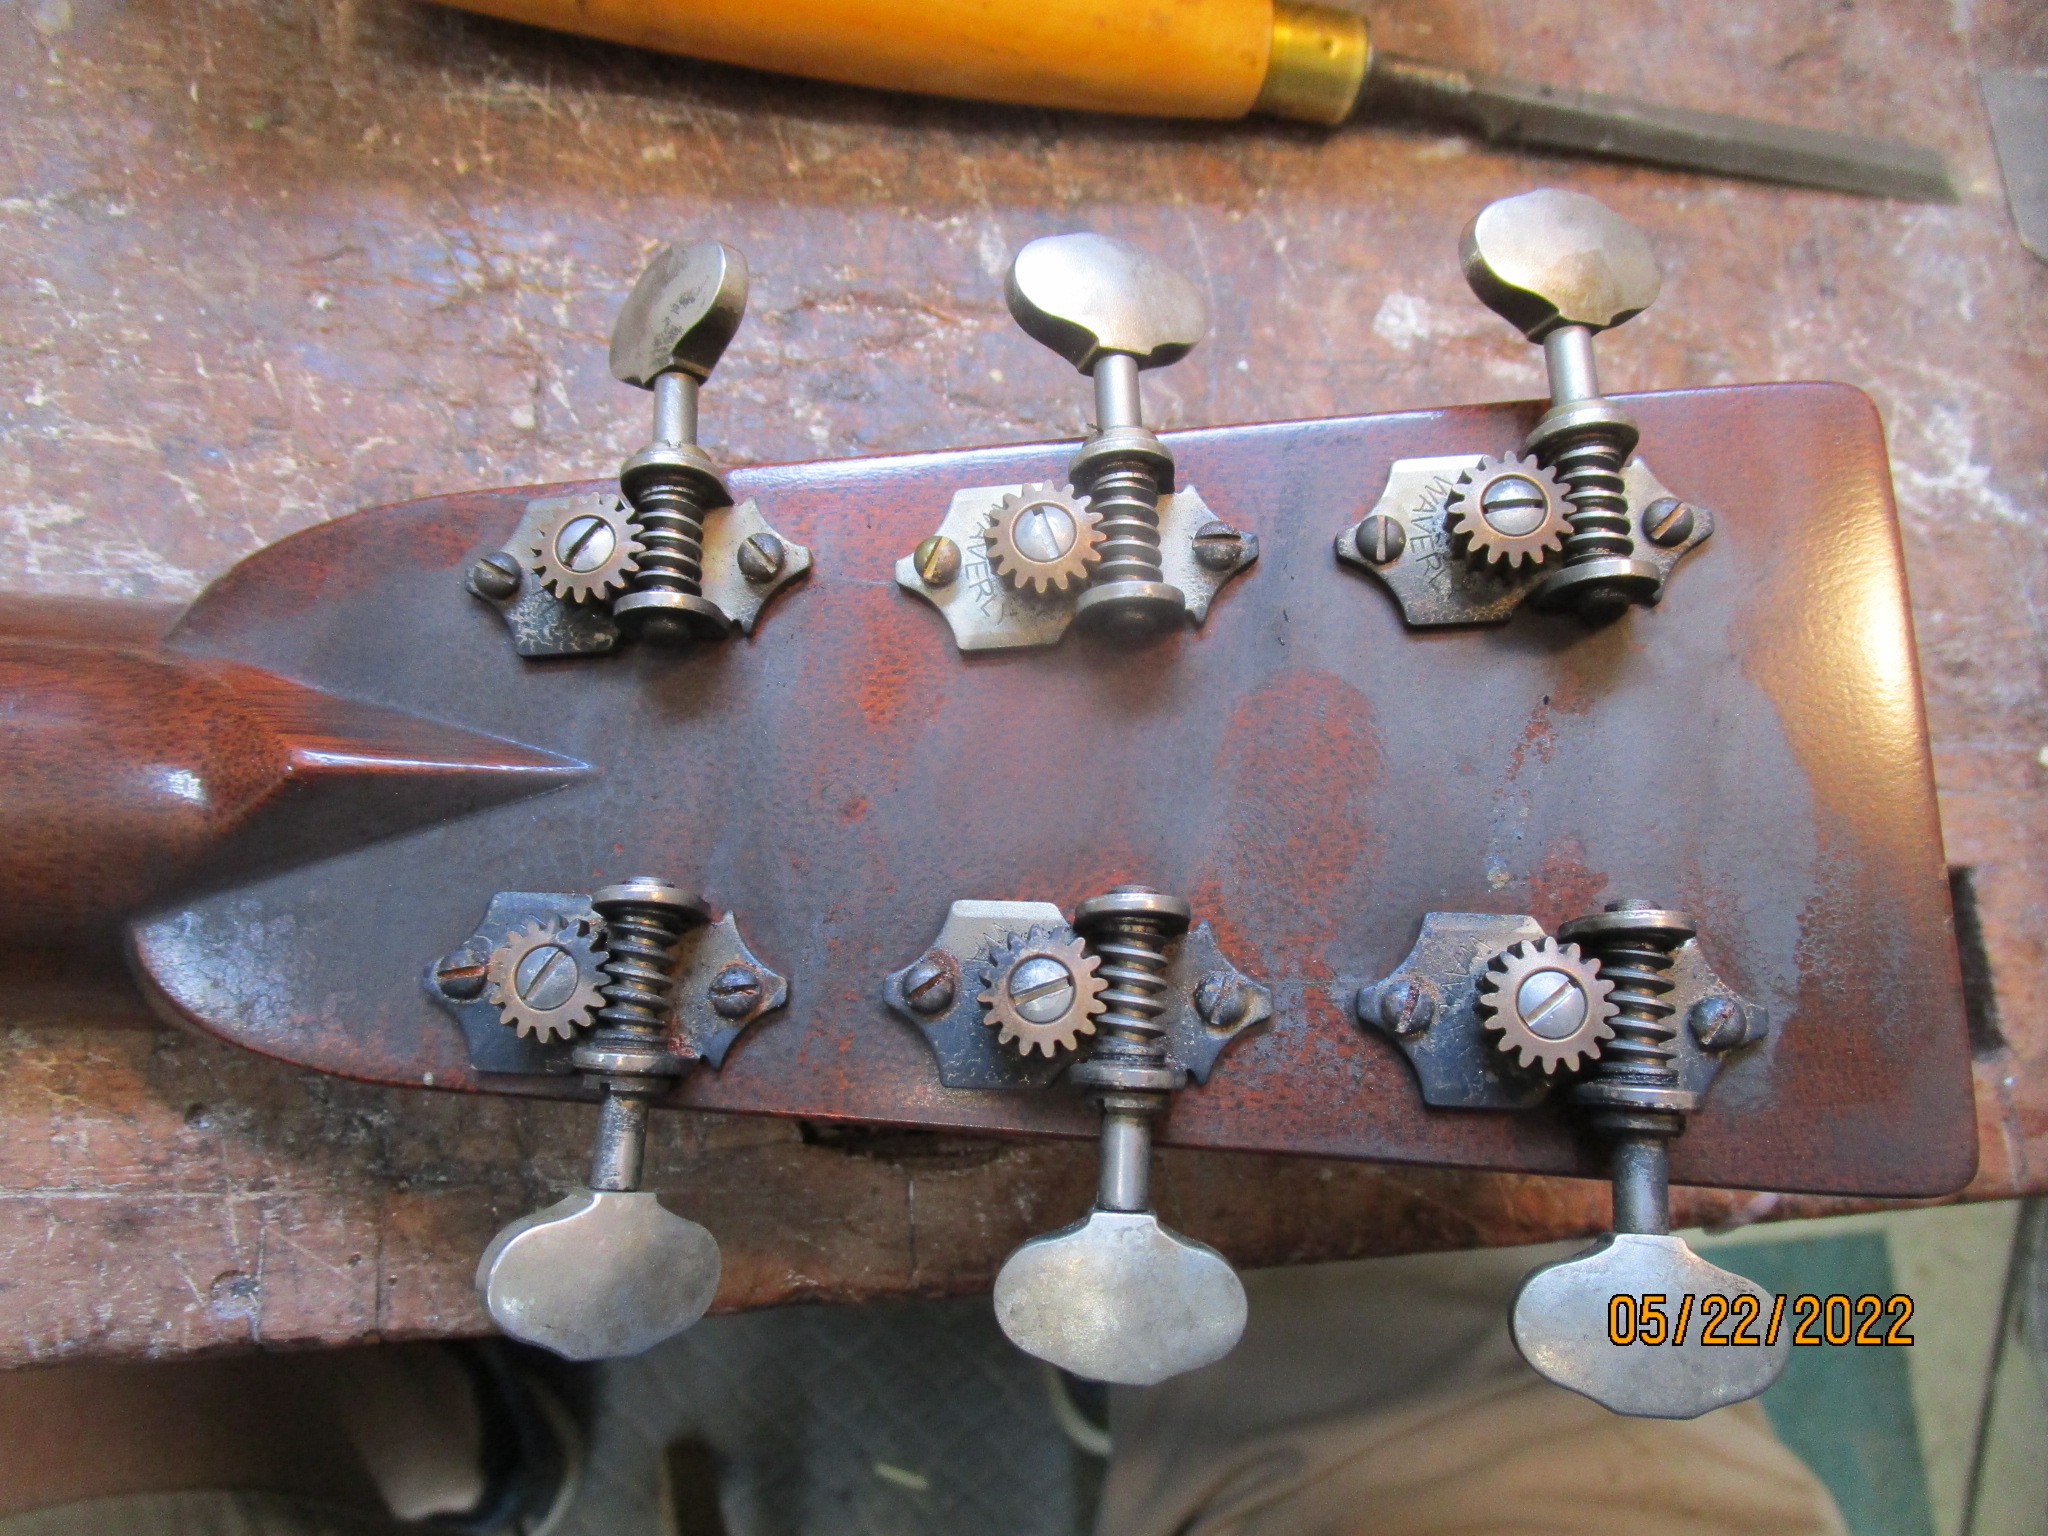
The peghead was not seriously damaged an cleaned up well.
The top was removed carefully using a seam separation tool and came off cleanly with no loss of wood. A little alcohol was used to weaken the hide glue joints without affecting the lacquer--an old violin repair trick.

Removal of the top showed several issues with the back and sides. No cracks anywhere, but some sloppy glue drips, discoloration from smoke, and several back braces had come loose on the ends. These were glued.
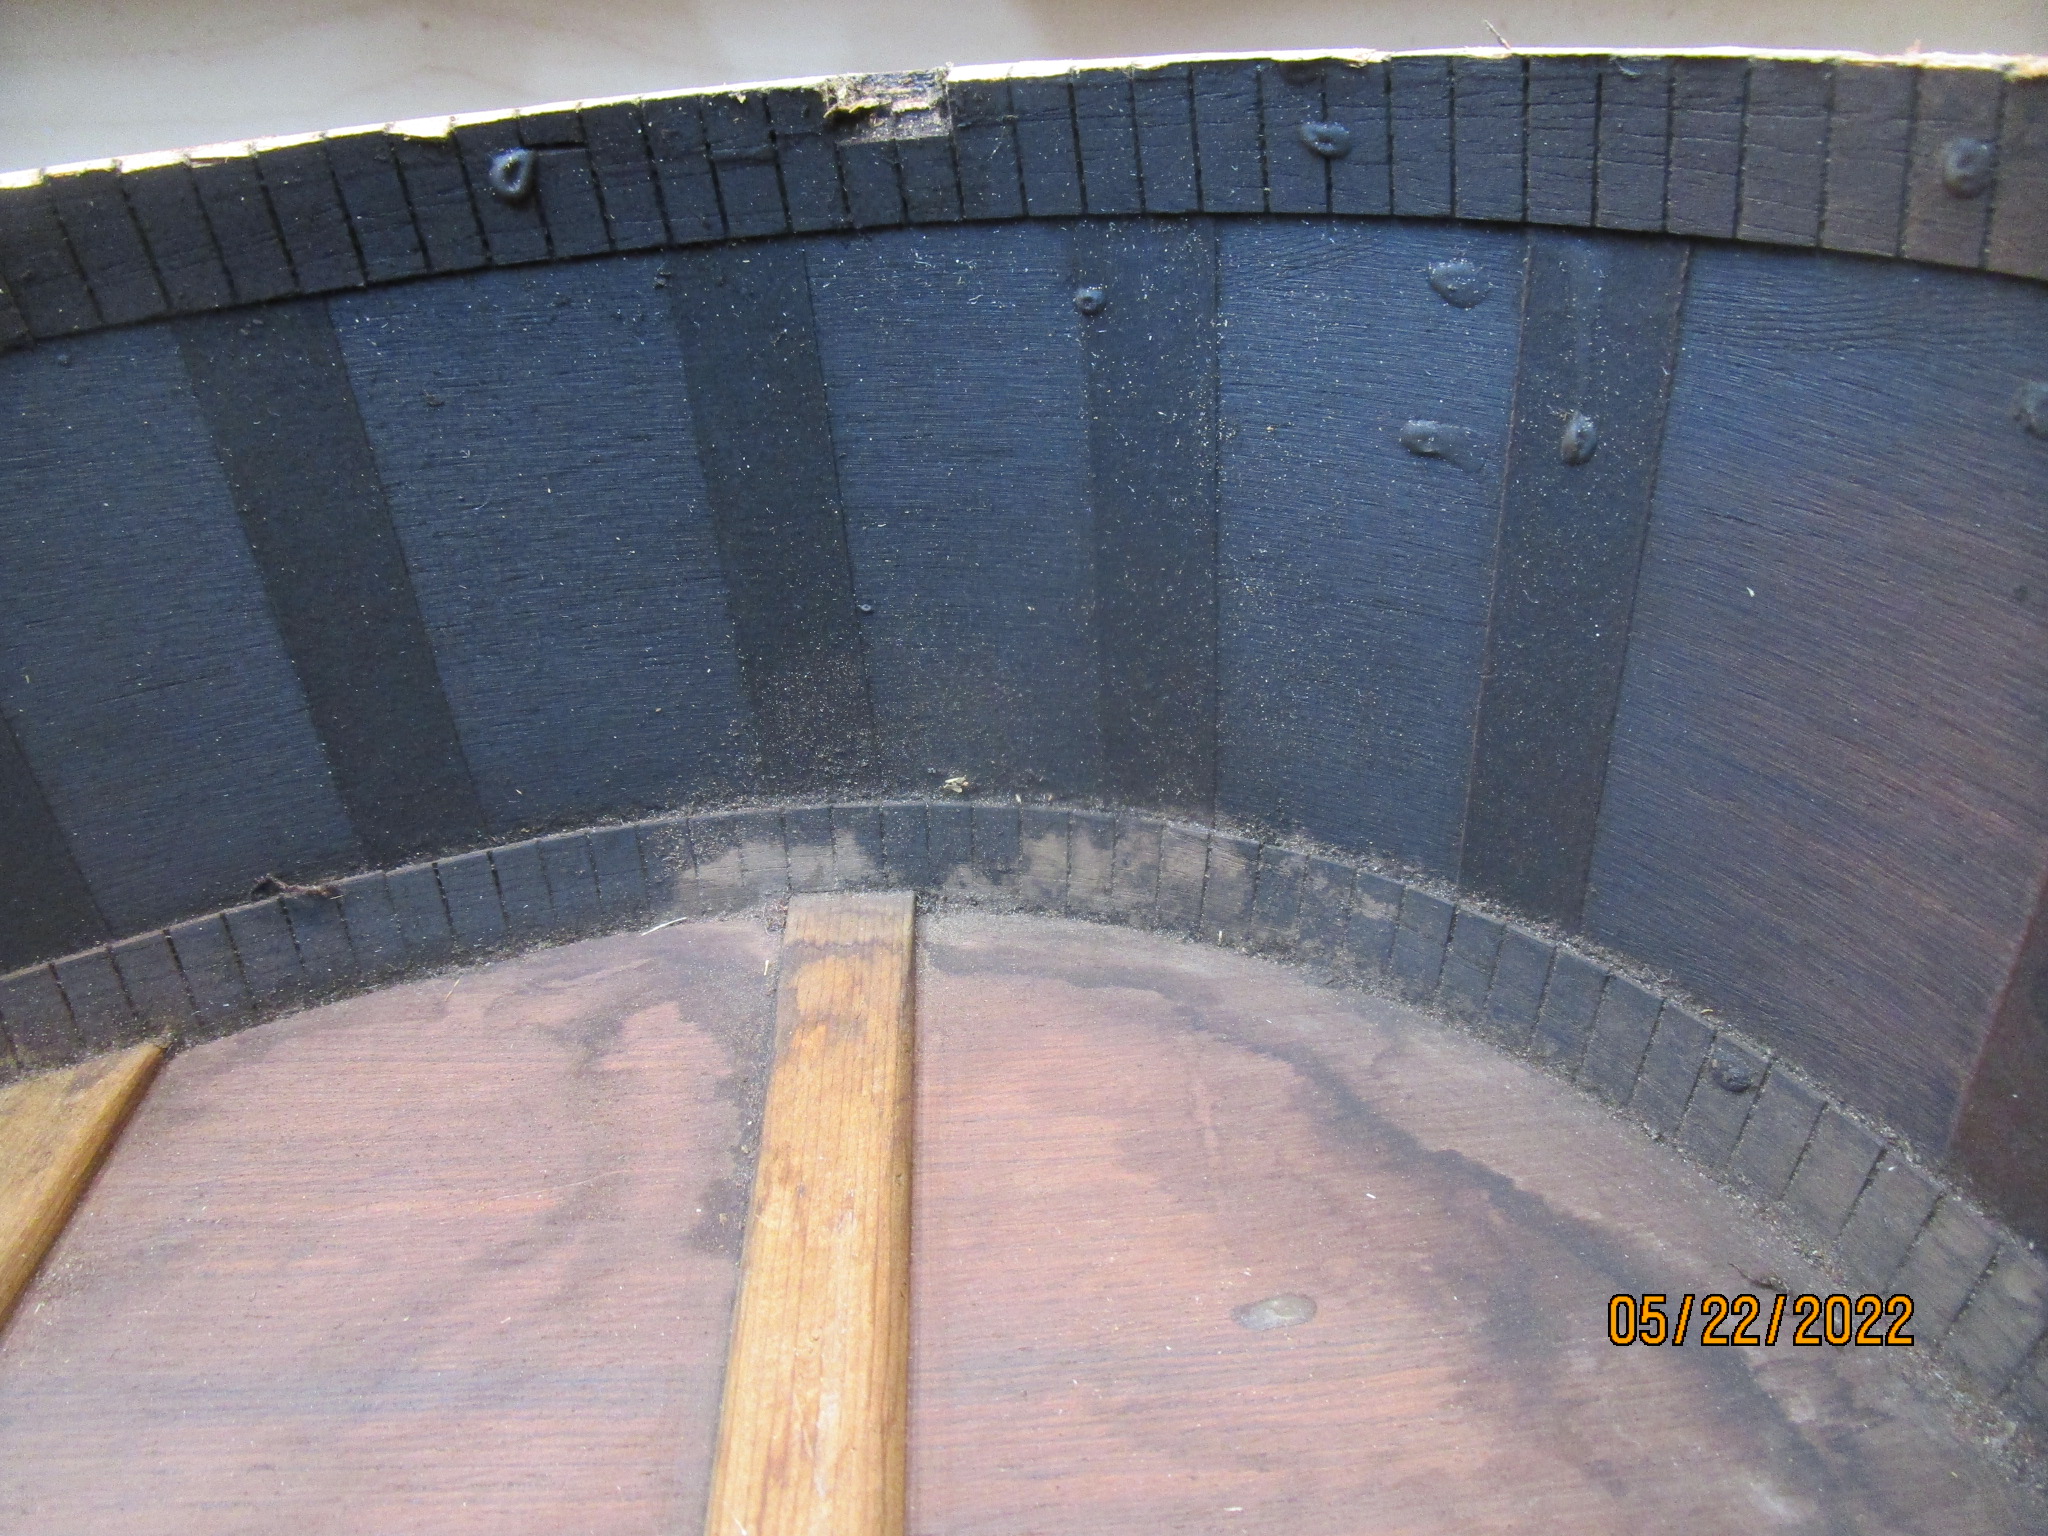
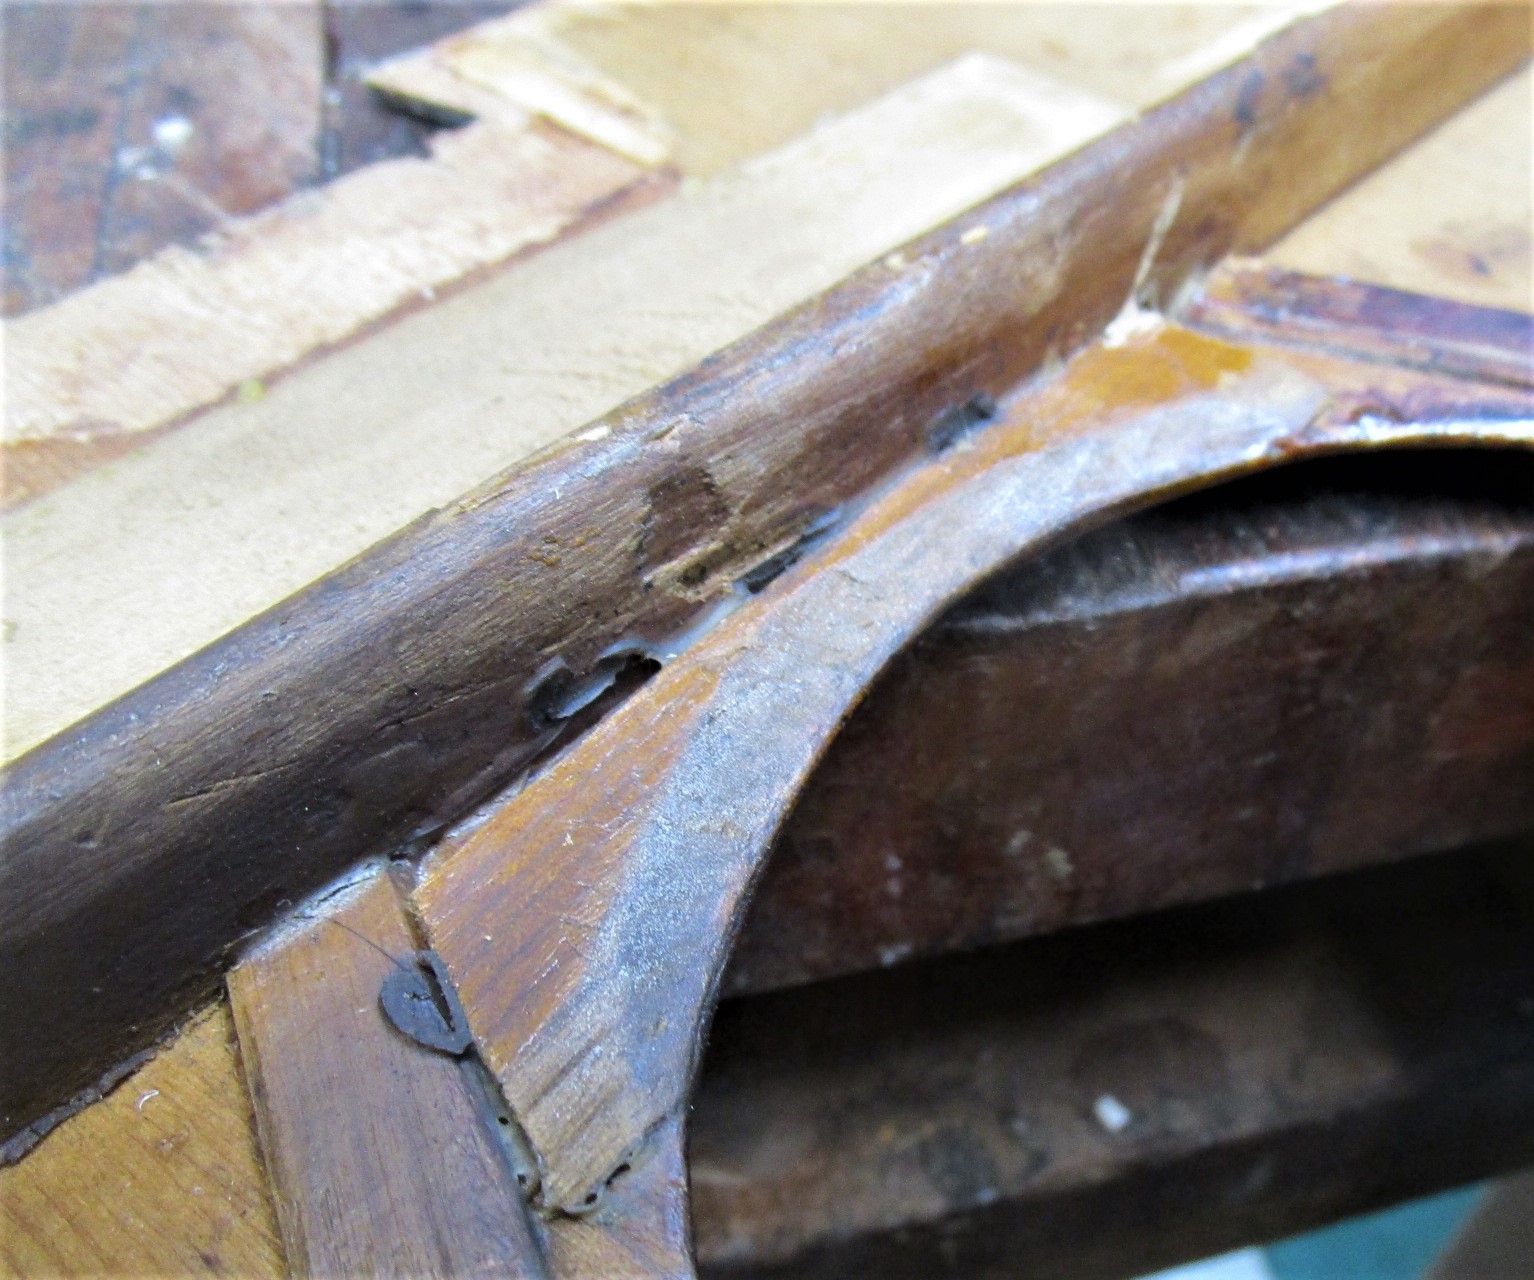
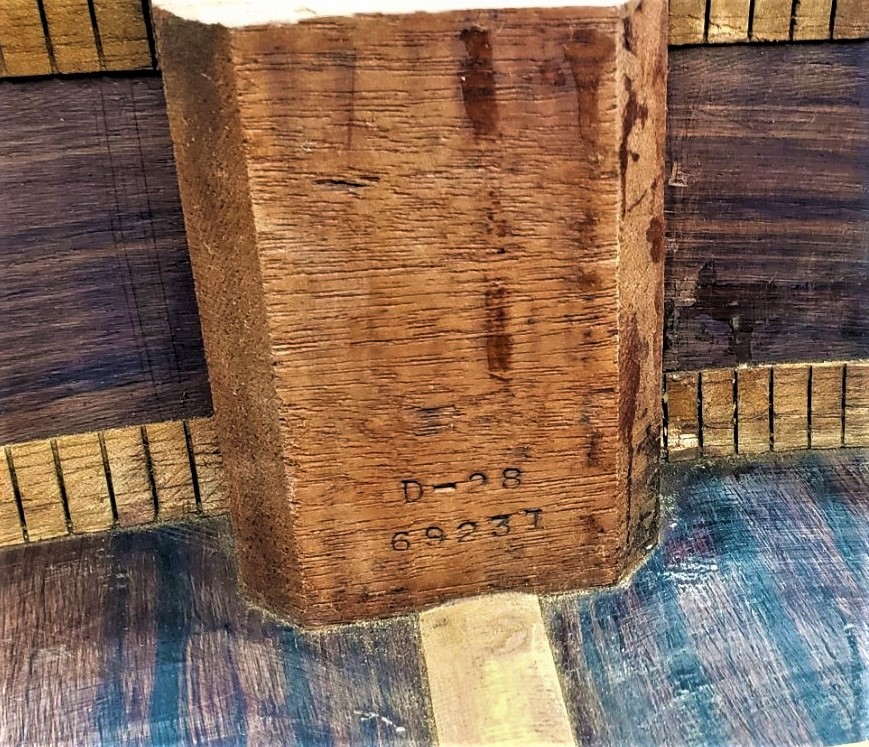
Glue residue on the neck block from several repair attempts where the neck caved in. Loose back braces, all on the side where the outer wood is charred. In the second loose brace photo the charring from fire has penetrated the wood near the top side and forced out some of the resin in the wood.. The top braces were pretty much intact and of the original size (except for the wood added during previous repair attempts), but there was a crack in one X brace that likely contributed to the sunken top. The brace will be repaired and reinforced during rebuilding.

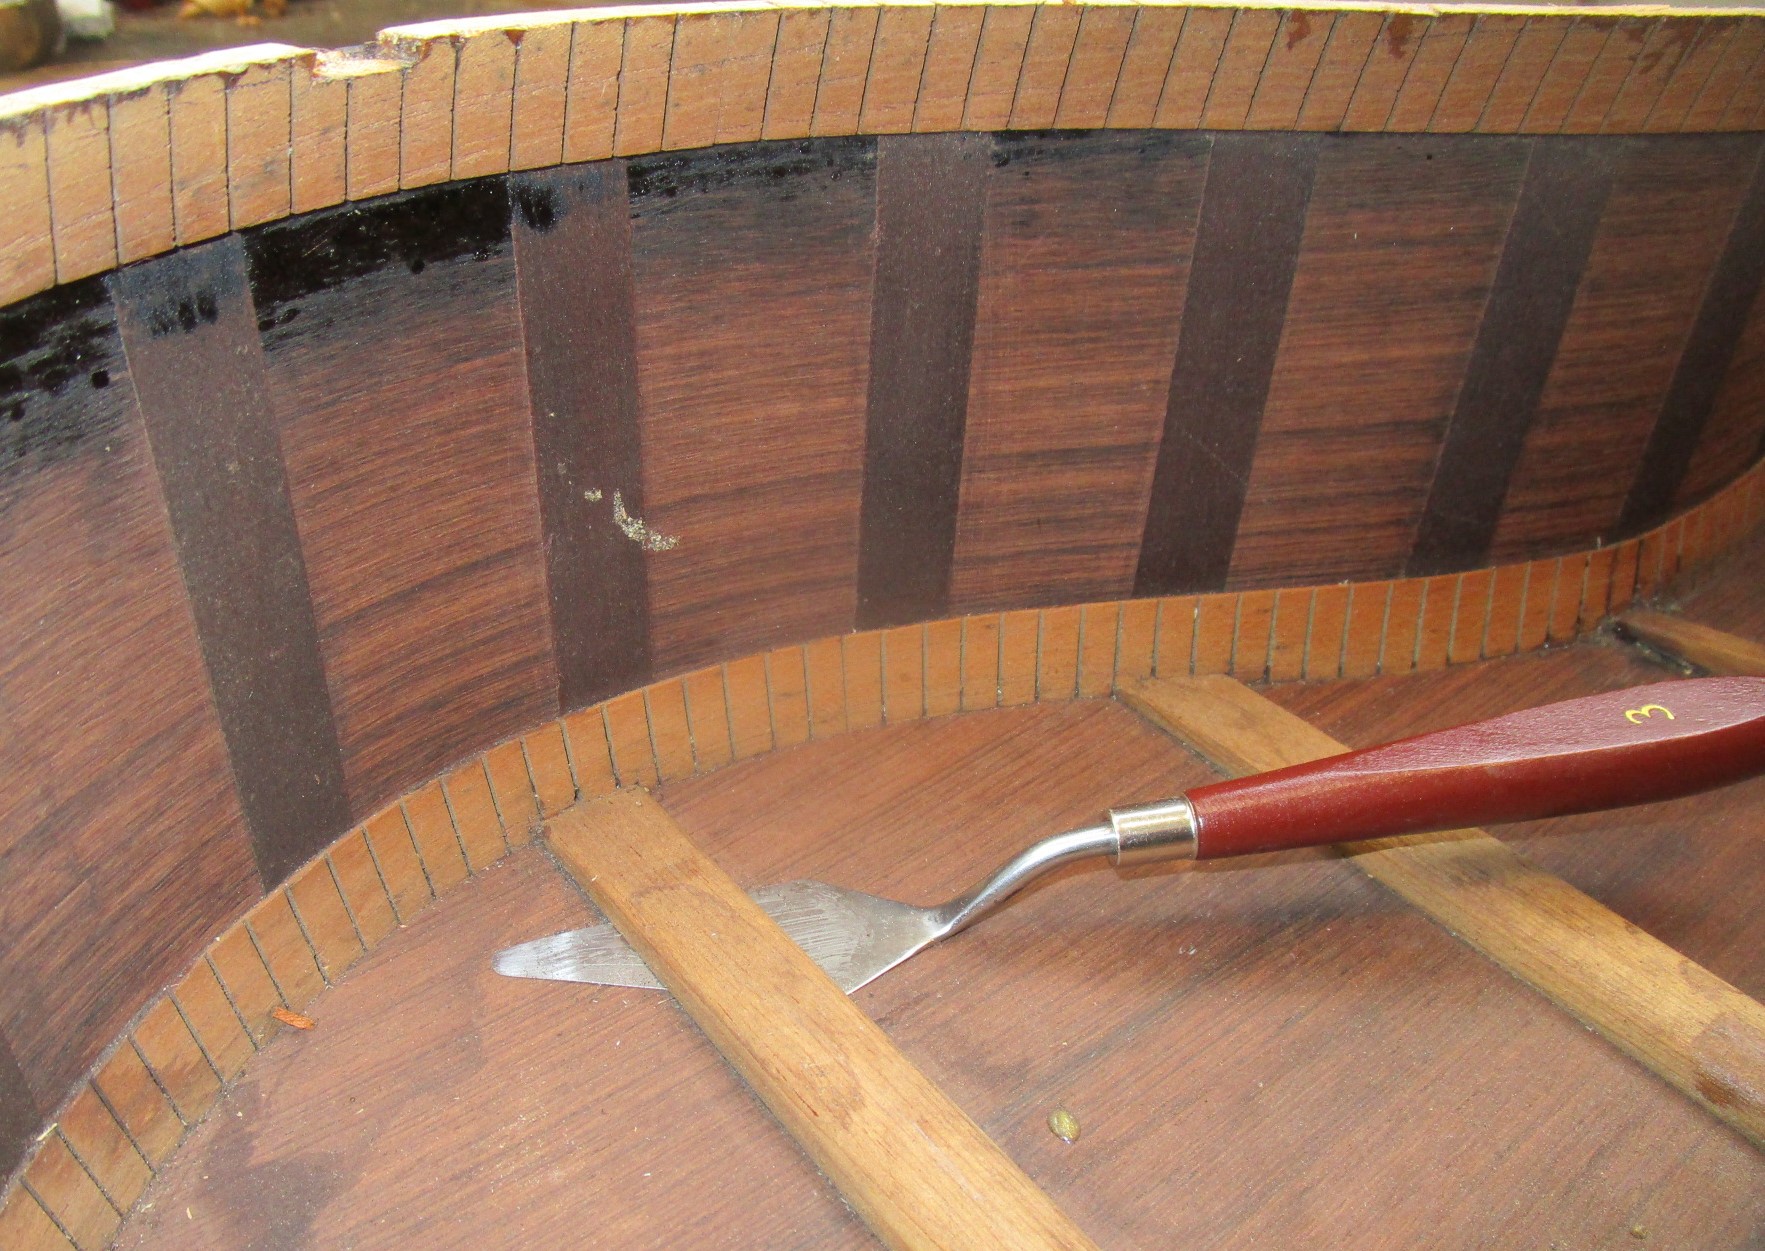
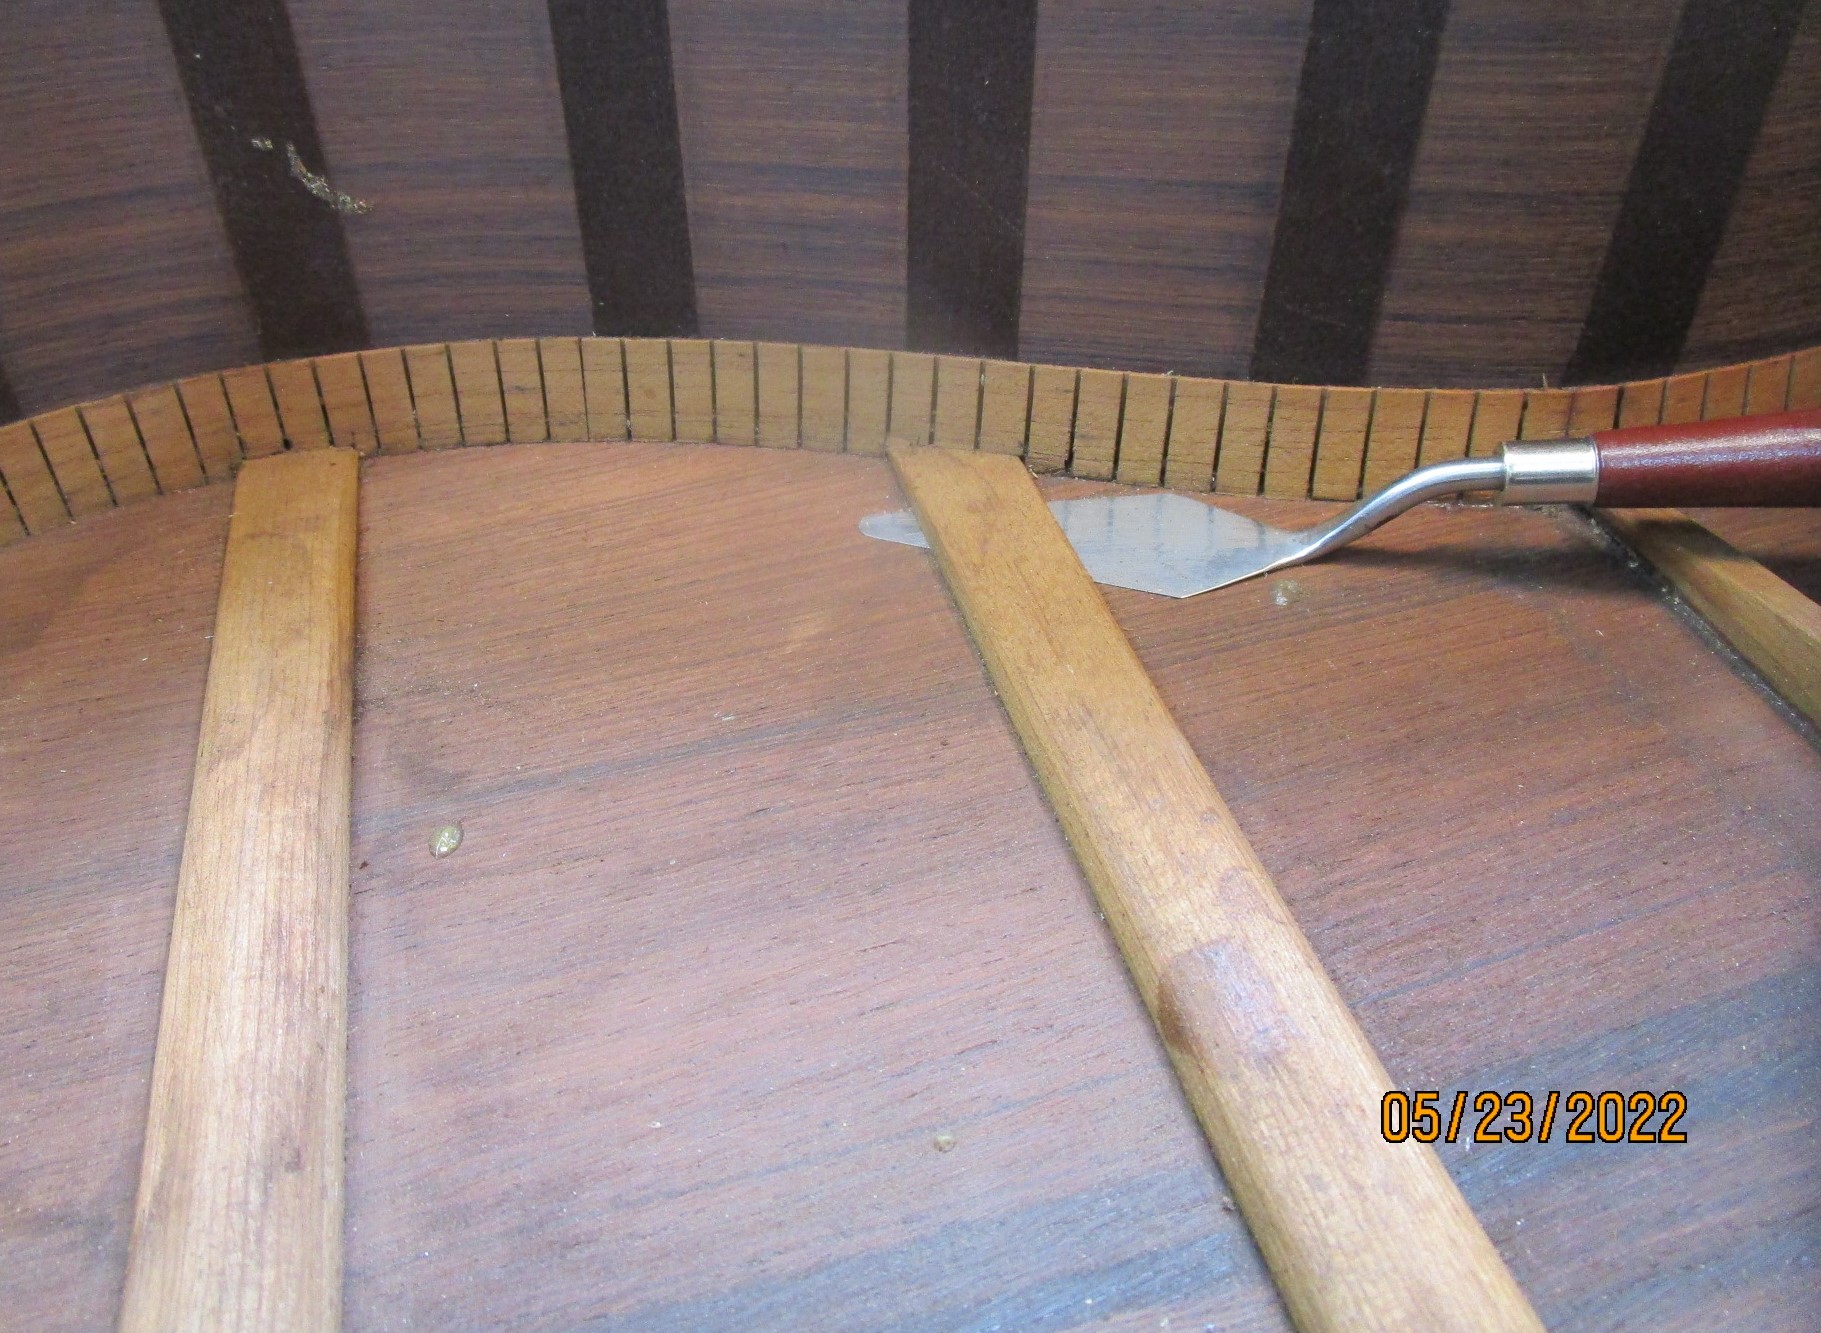
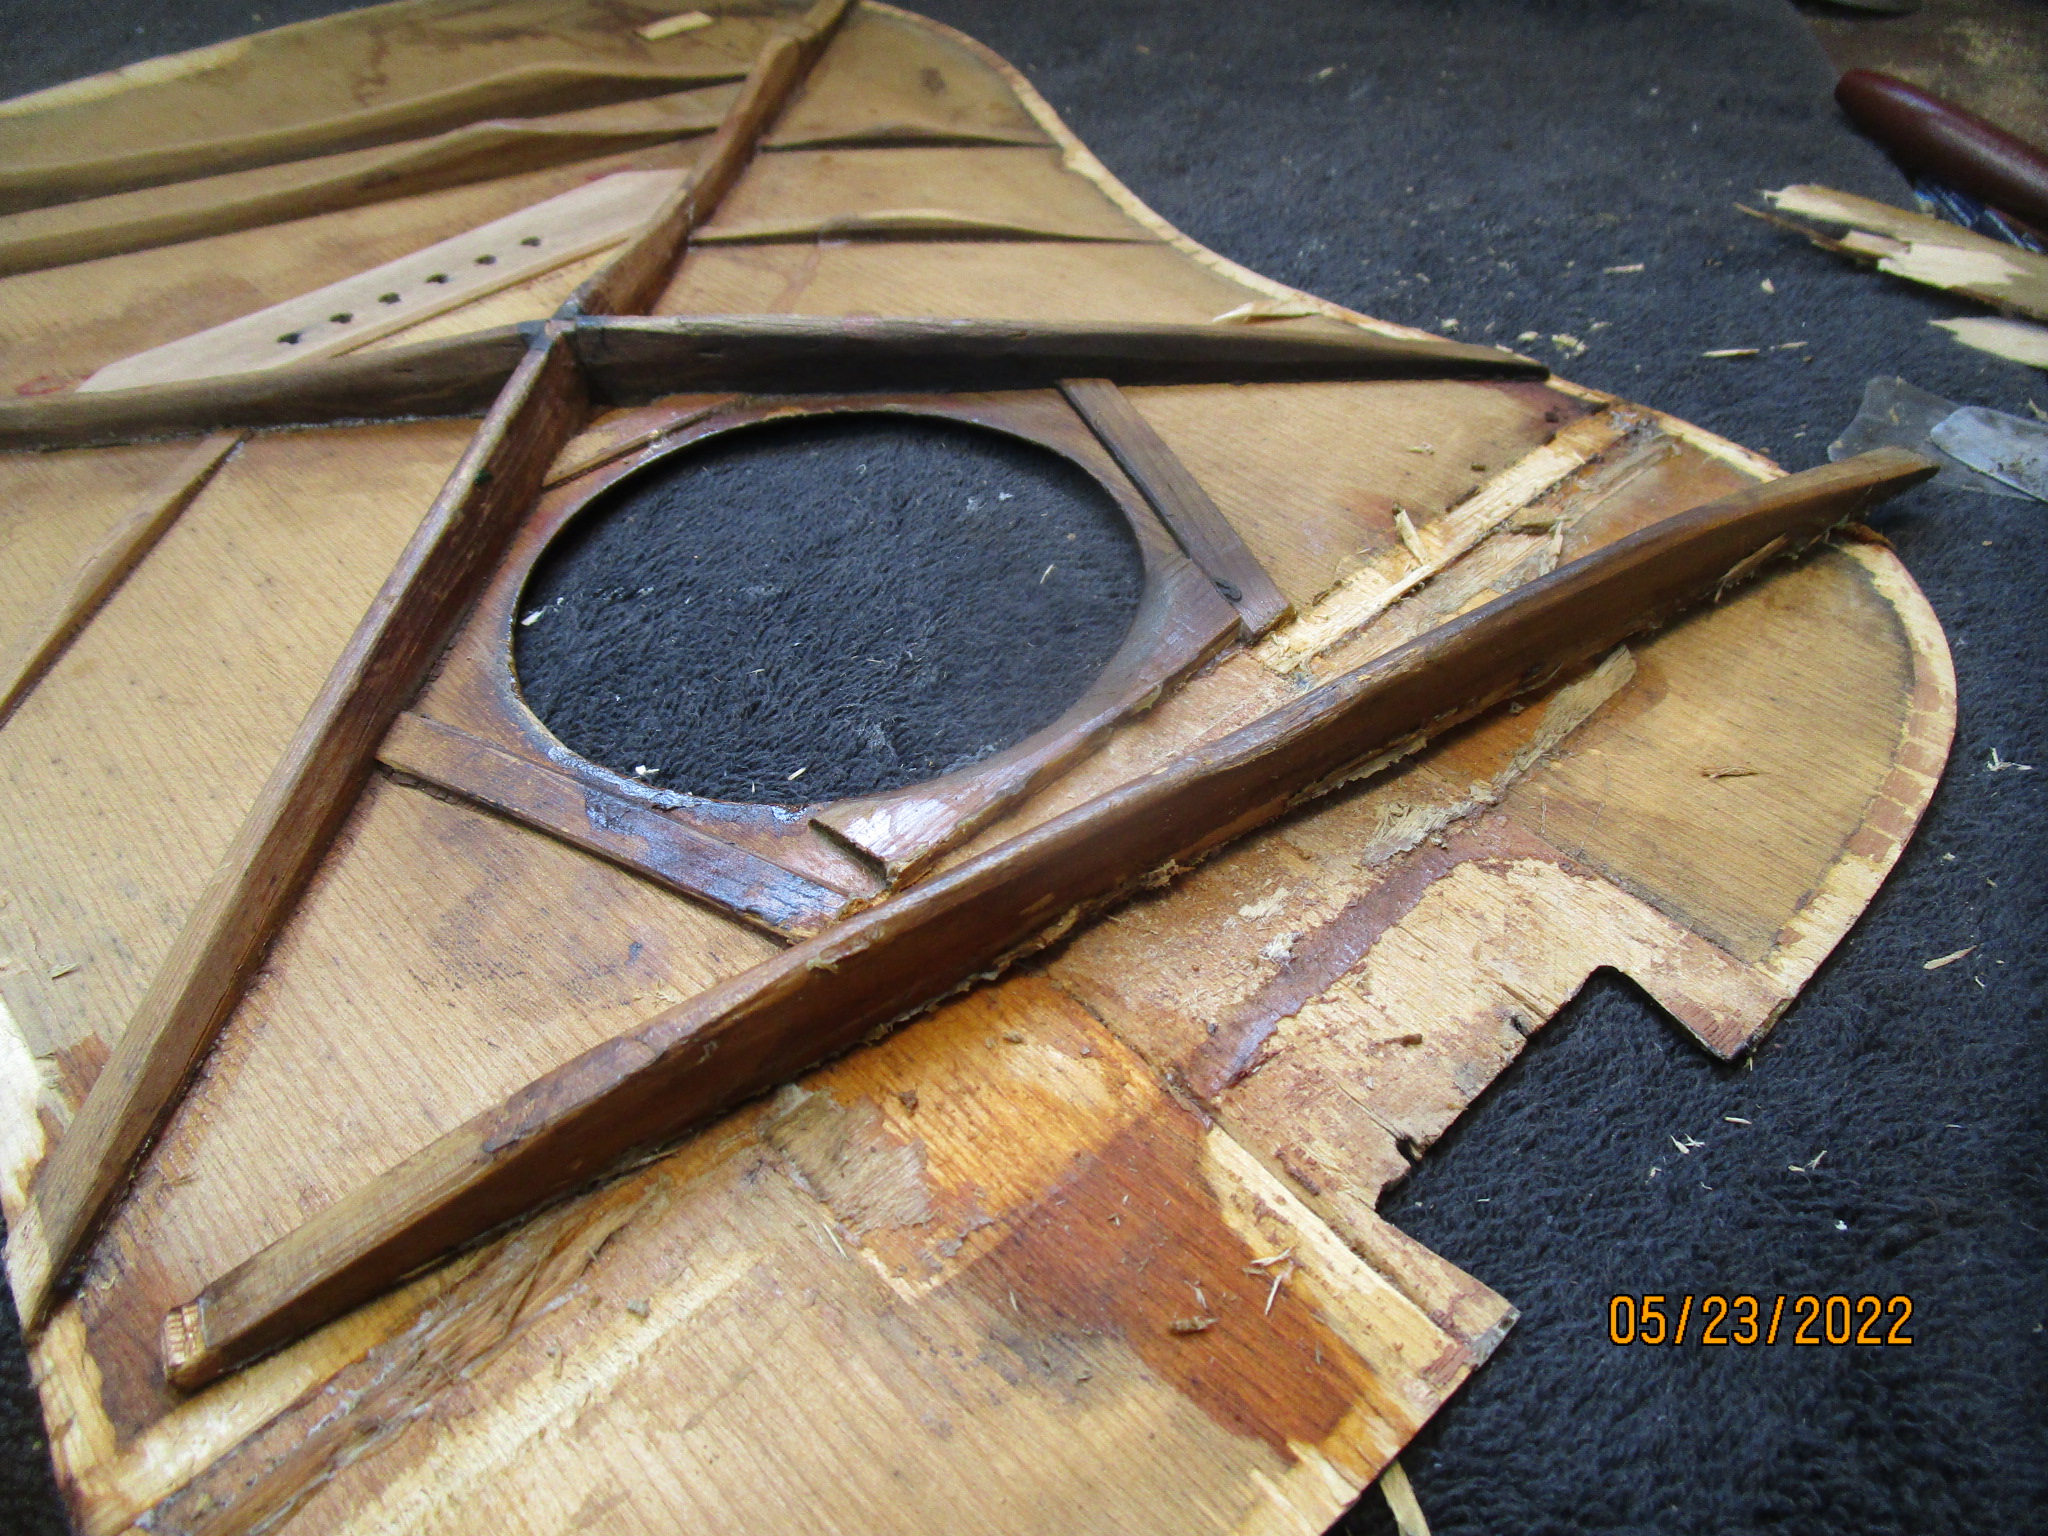
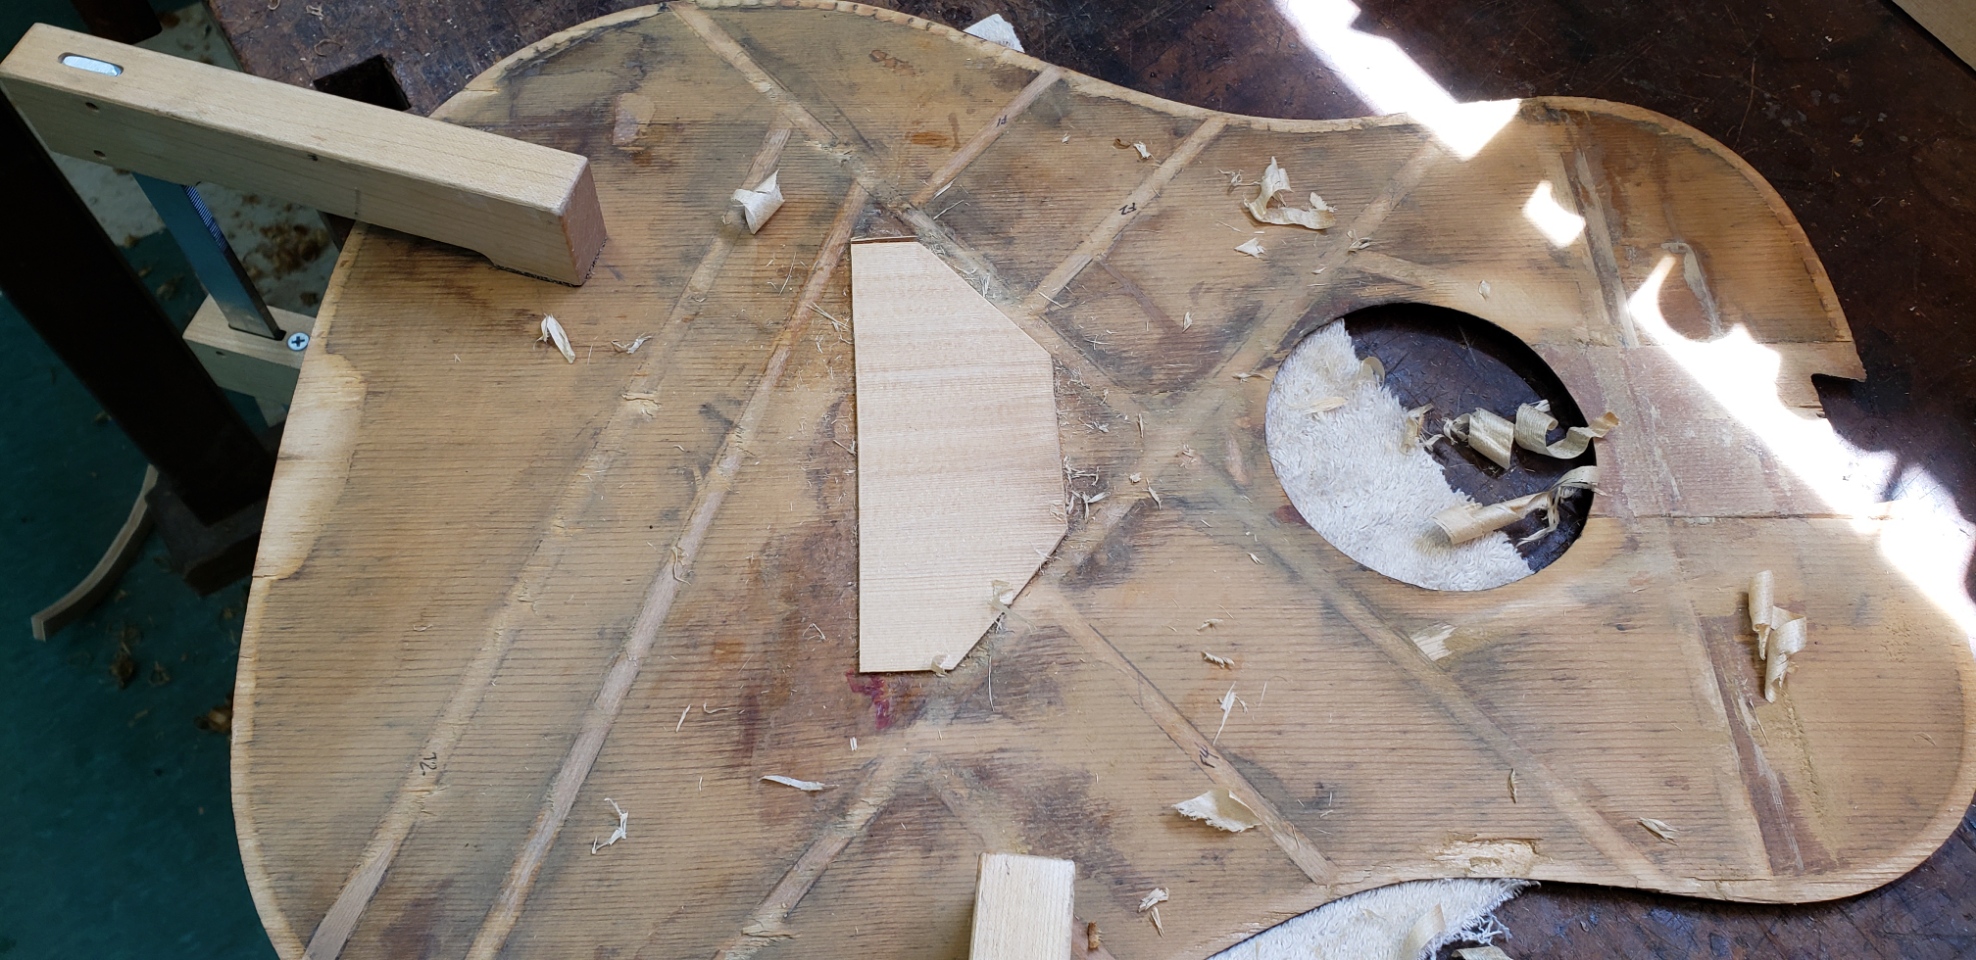
Disassembly of the top started with removal of the excess wood that was an attempt to repair the "cave in" at the fretboard. There have been 3 repairs in this area. The one that looks like a stunted "popsicle" brace, another between that and the transverse brace, and a third in from of the transverse brace on the soundhole side. All pretty sloppy but it's difficult to do neat work through the soundhole with no visibility inside the guitar. The sad thing is that these repairs probably did not really work, as evidenced by the concave top.

The wood added in those repair attempts was removed along with the large upper transverse brace. The cracks in the top are evident here. These will be reinforced in a neater way on rebuilding.
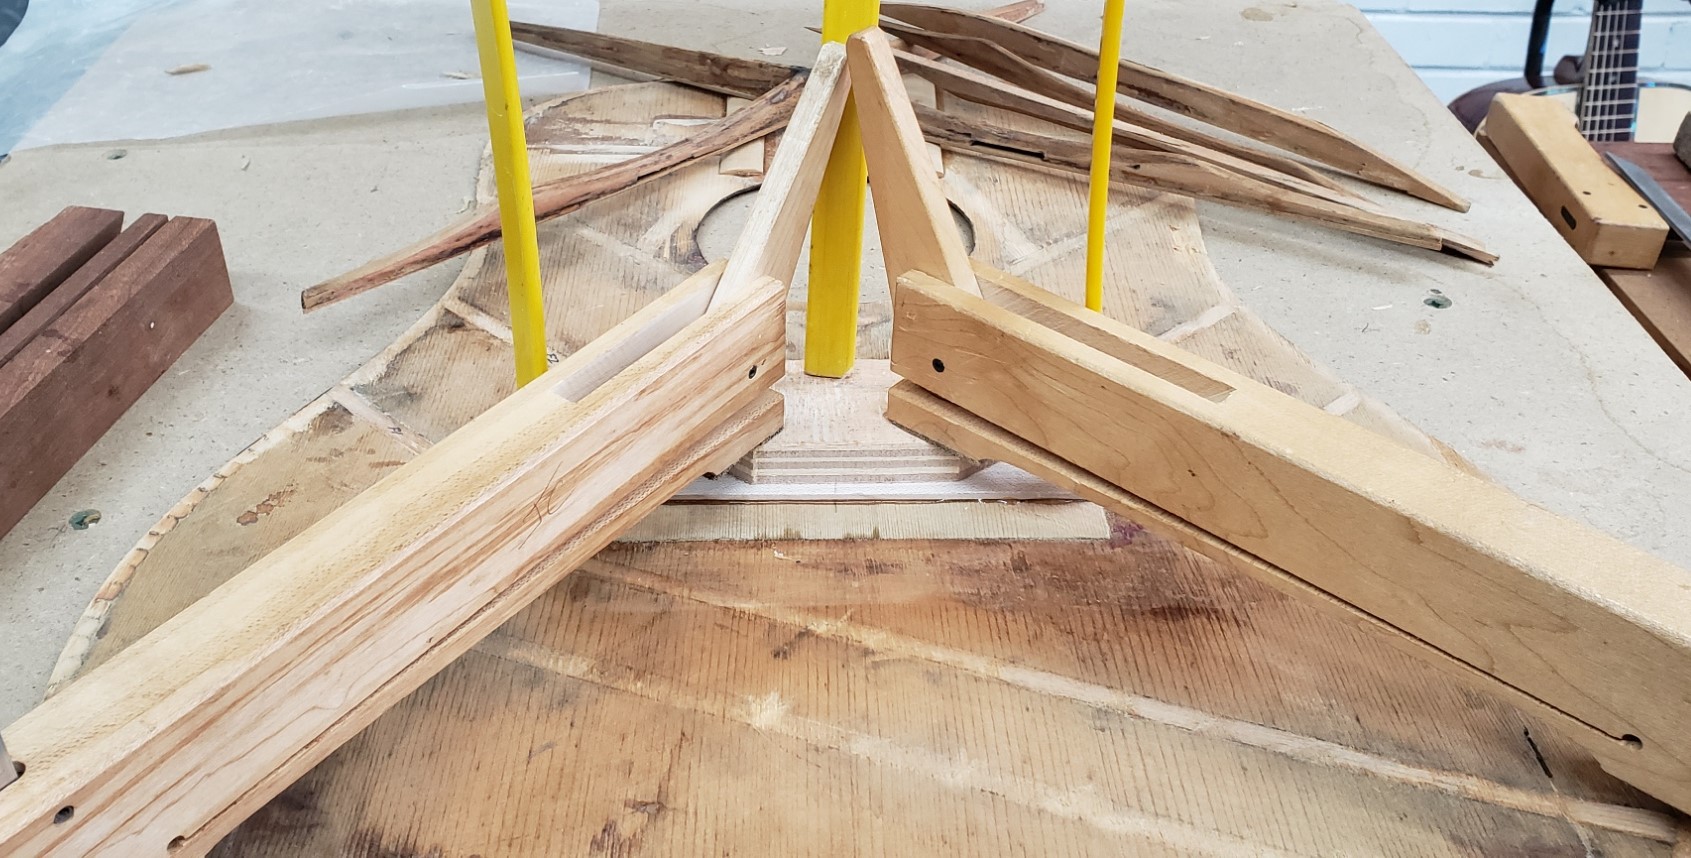
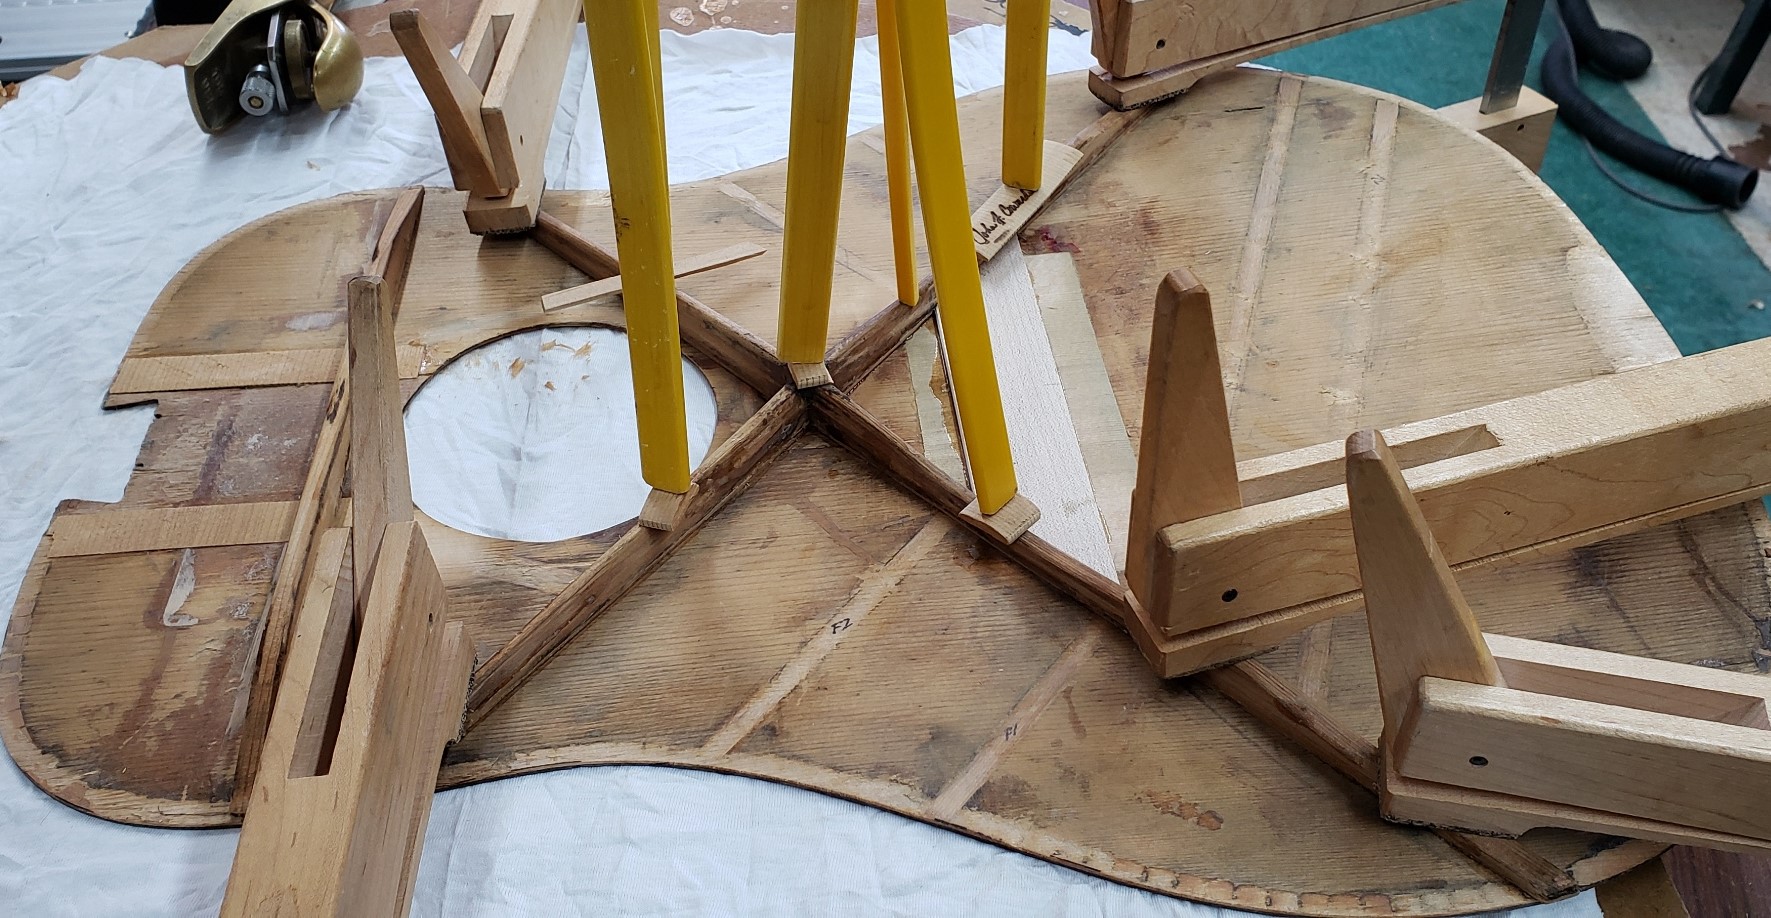
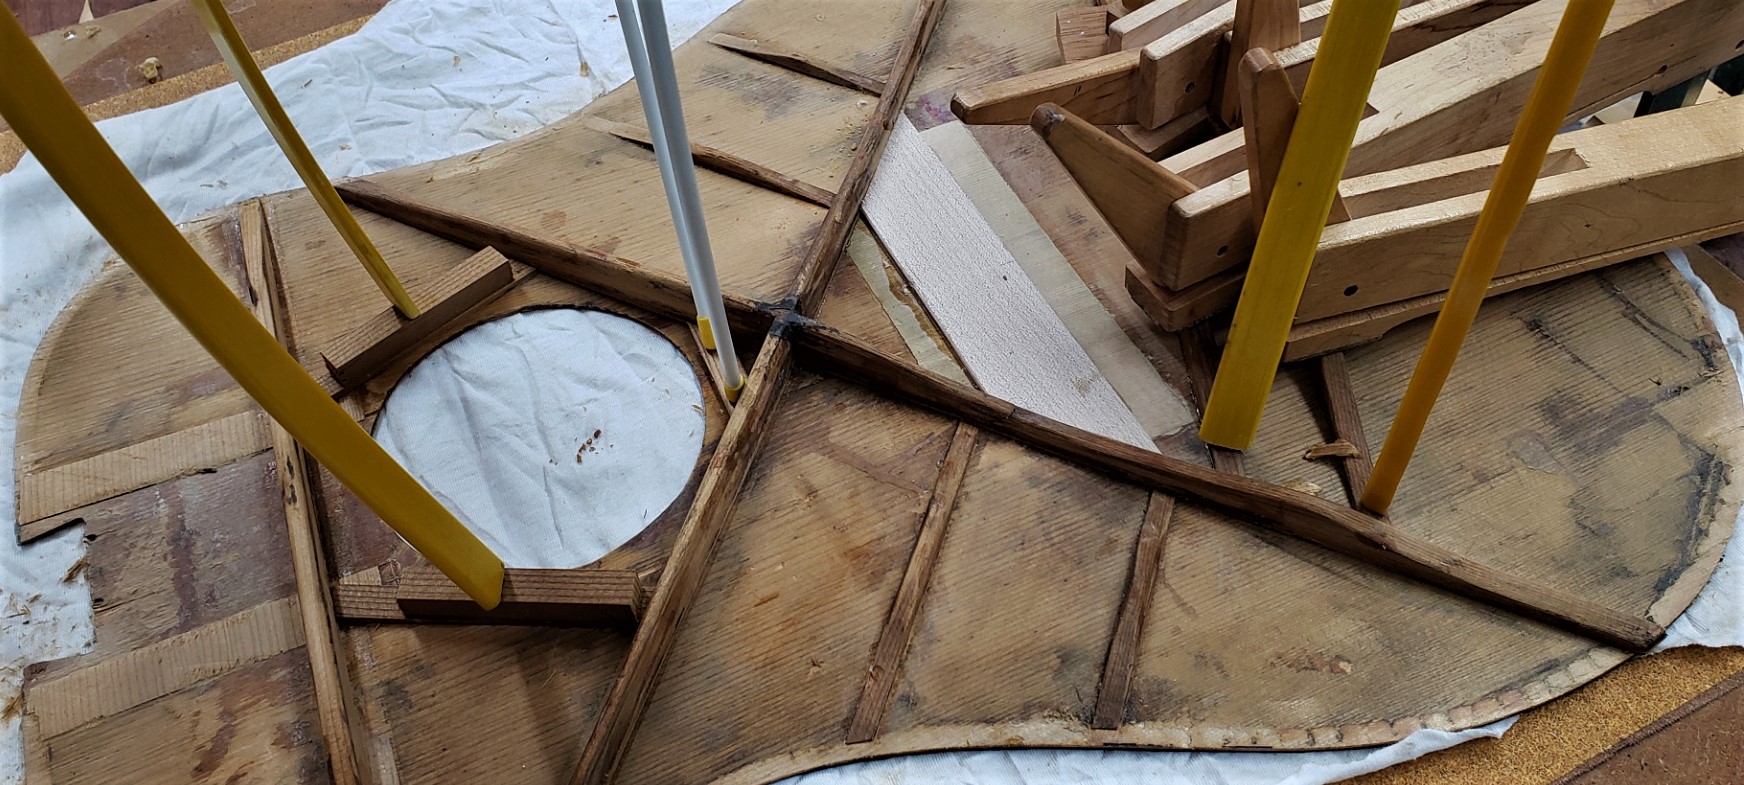
Next, the soundhole reinforcements and the X brace were removed. The plan is to reattach all the original bracing but with the correct radius.
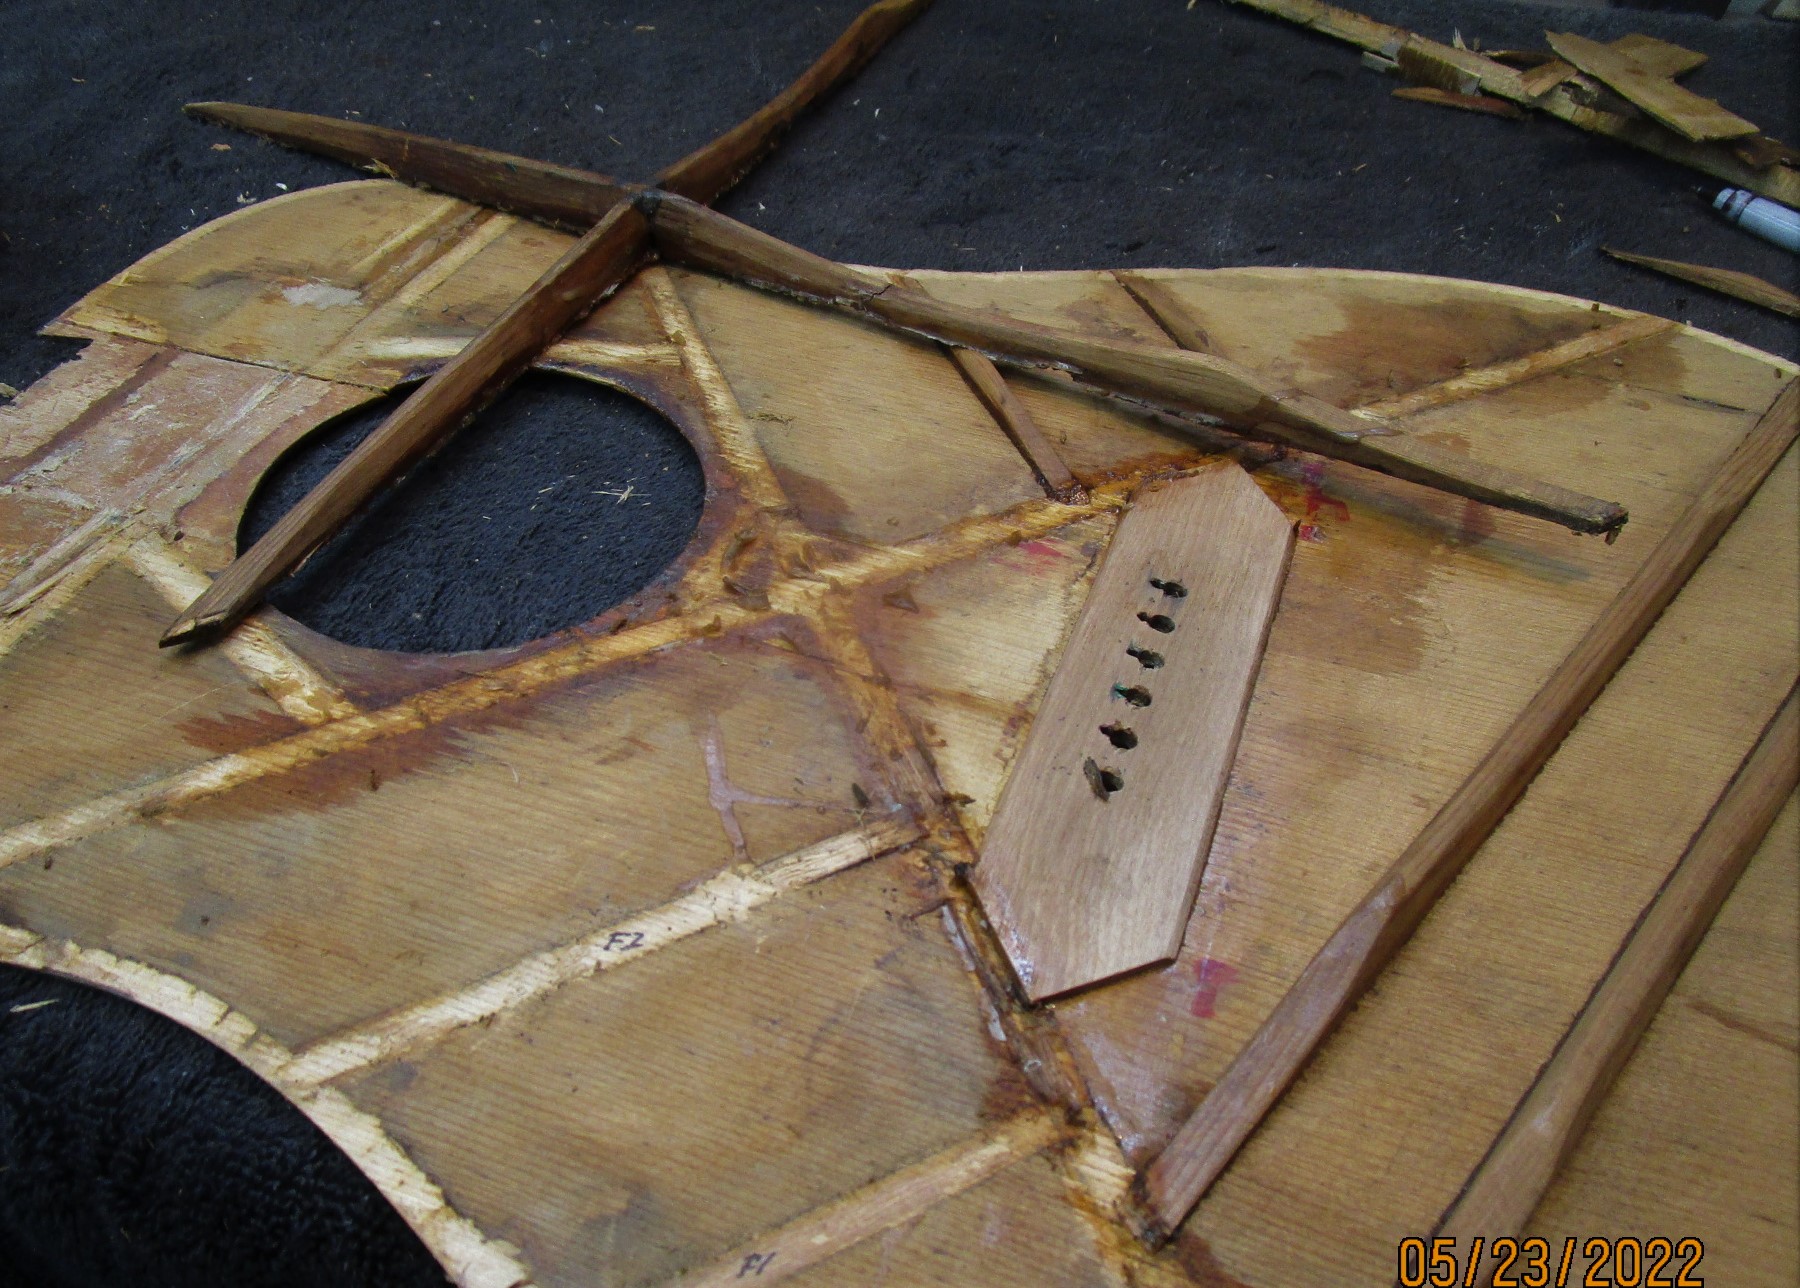
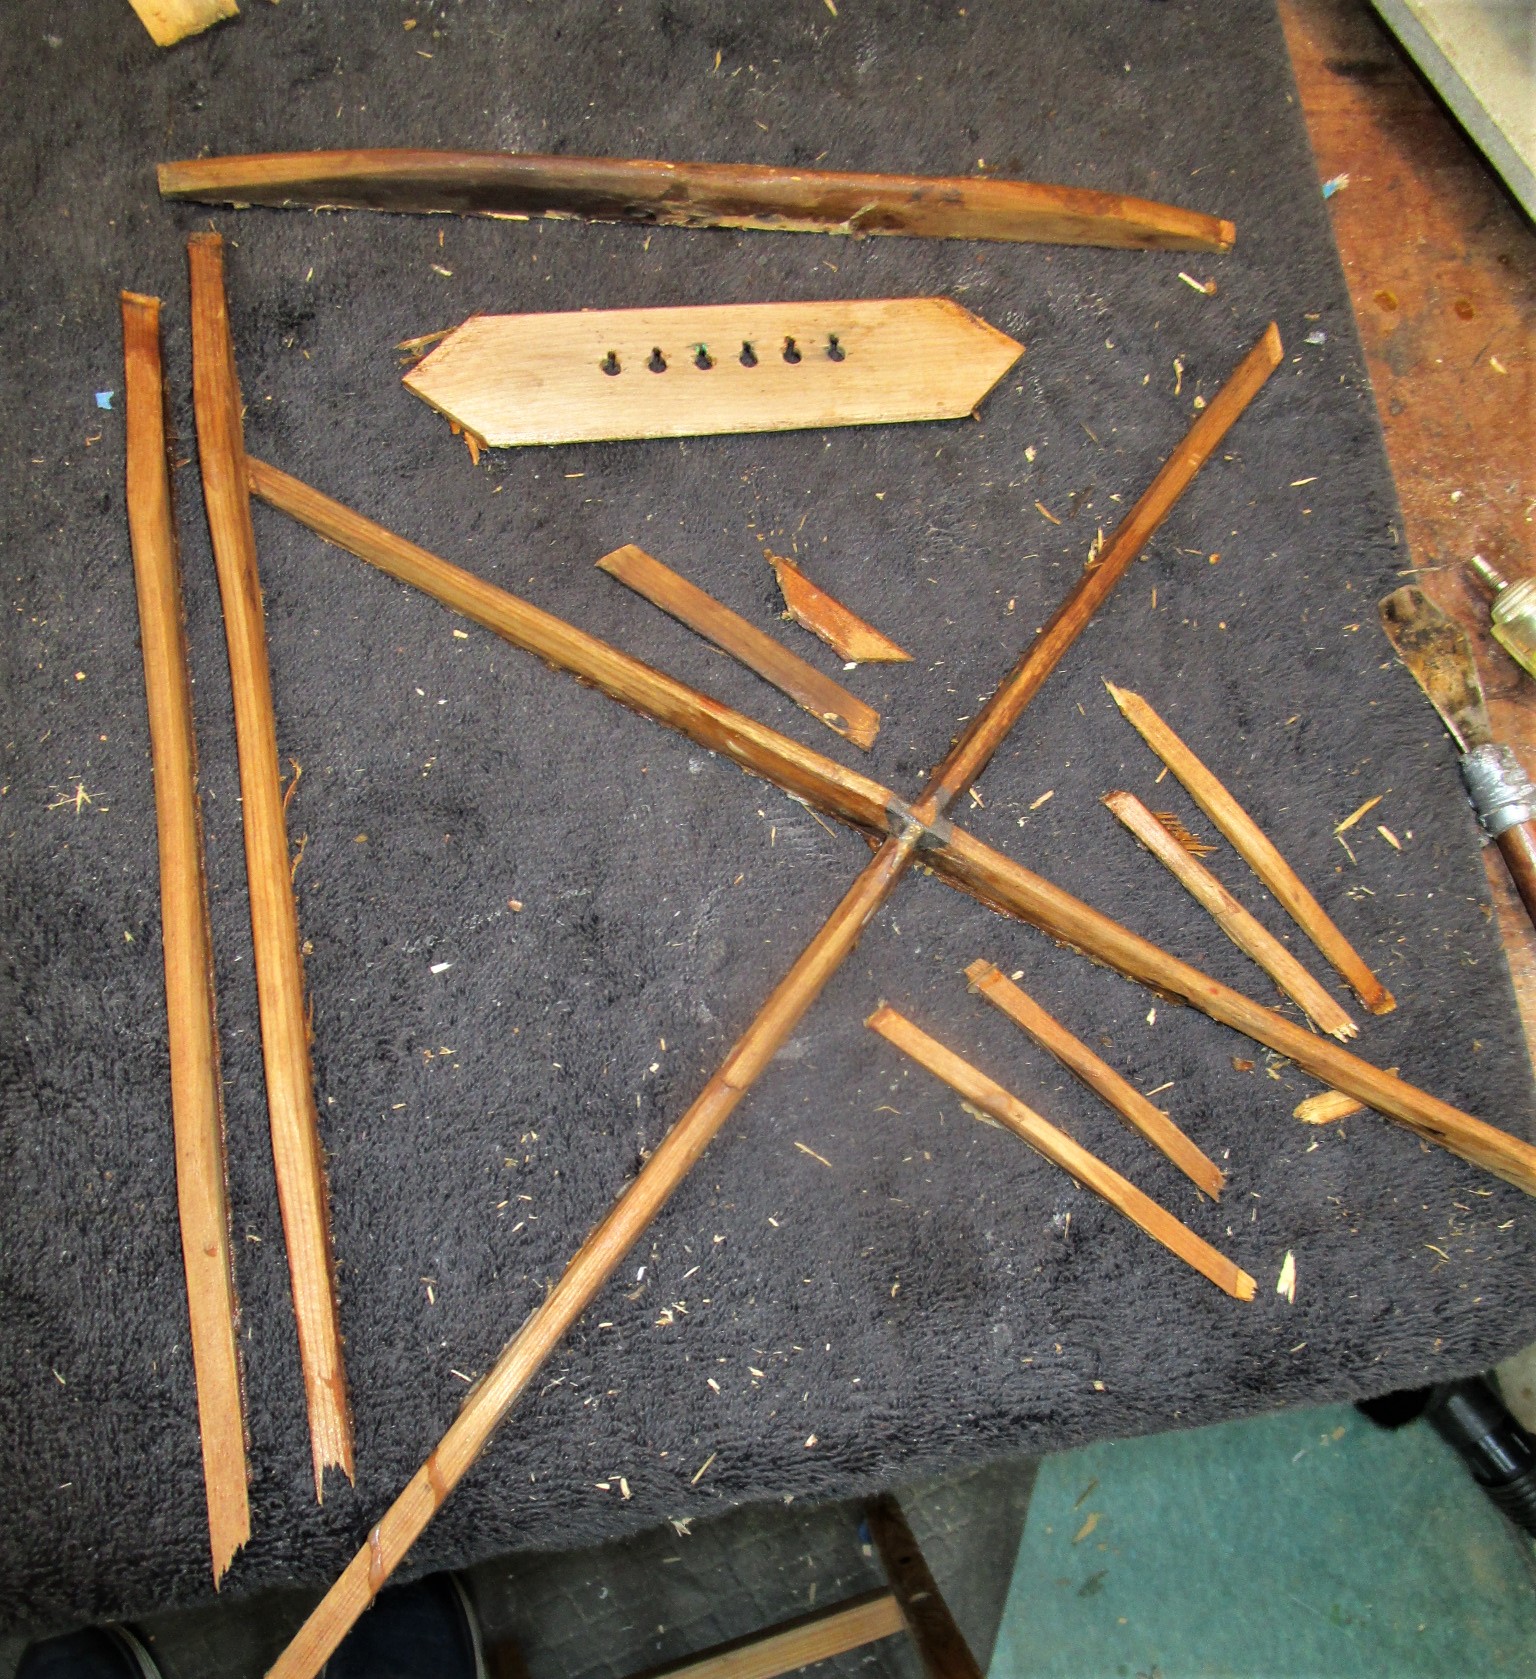
Then the bridgeplate, which was severely cupped and can't be reused-- it's not original to the guitar anyway-- was removed, then the finger braces, and the tone bars. Here are braces removed, and the top with no bracing. I plan to remove any glue residue and sand the inside of the top very lightly, not removing wood, but just to clean the surface as much as possible to prepare for the bracing to reattached.
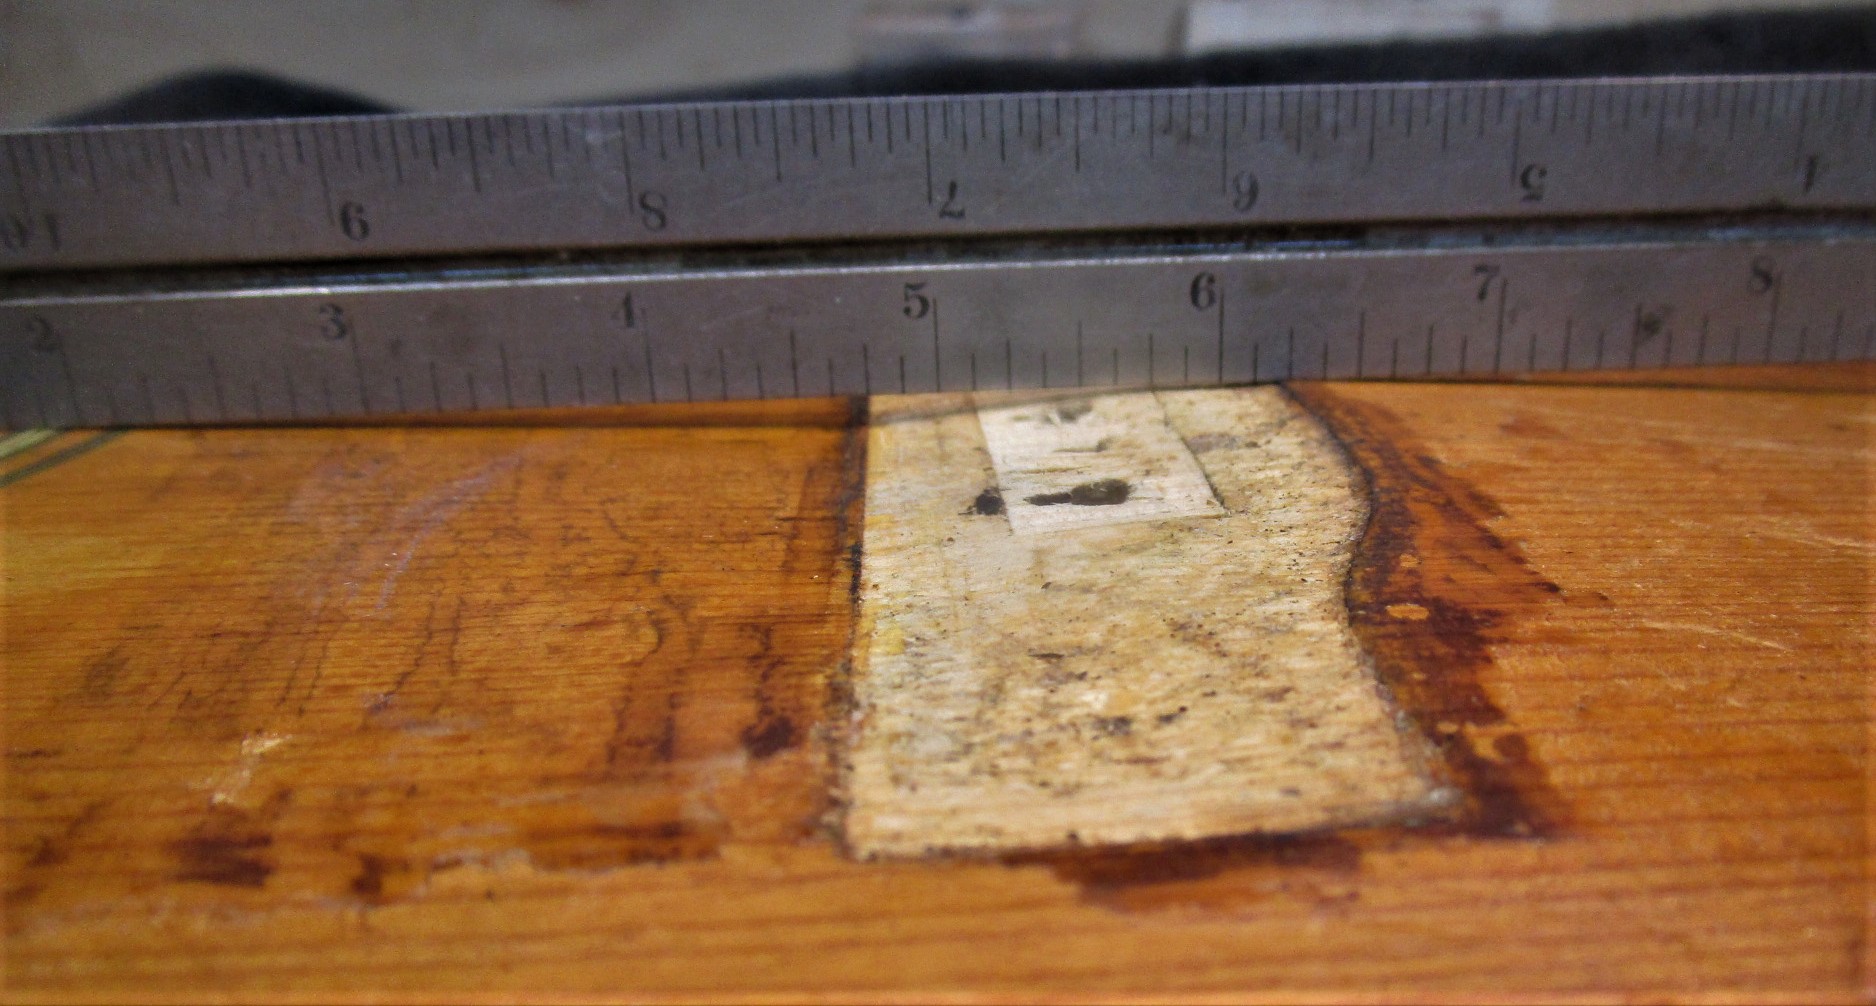
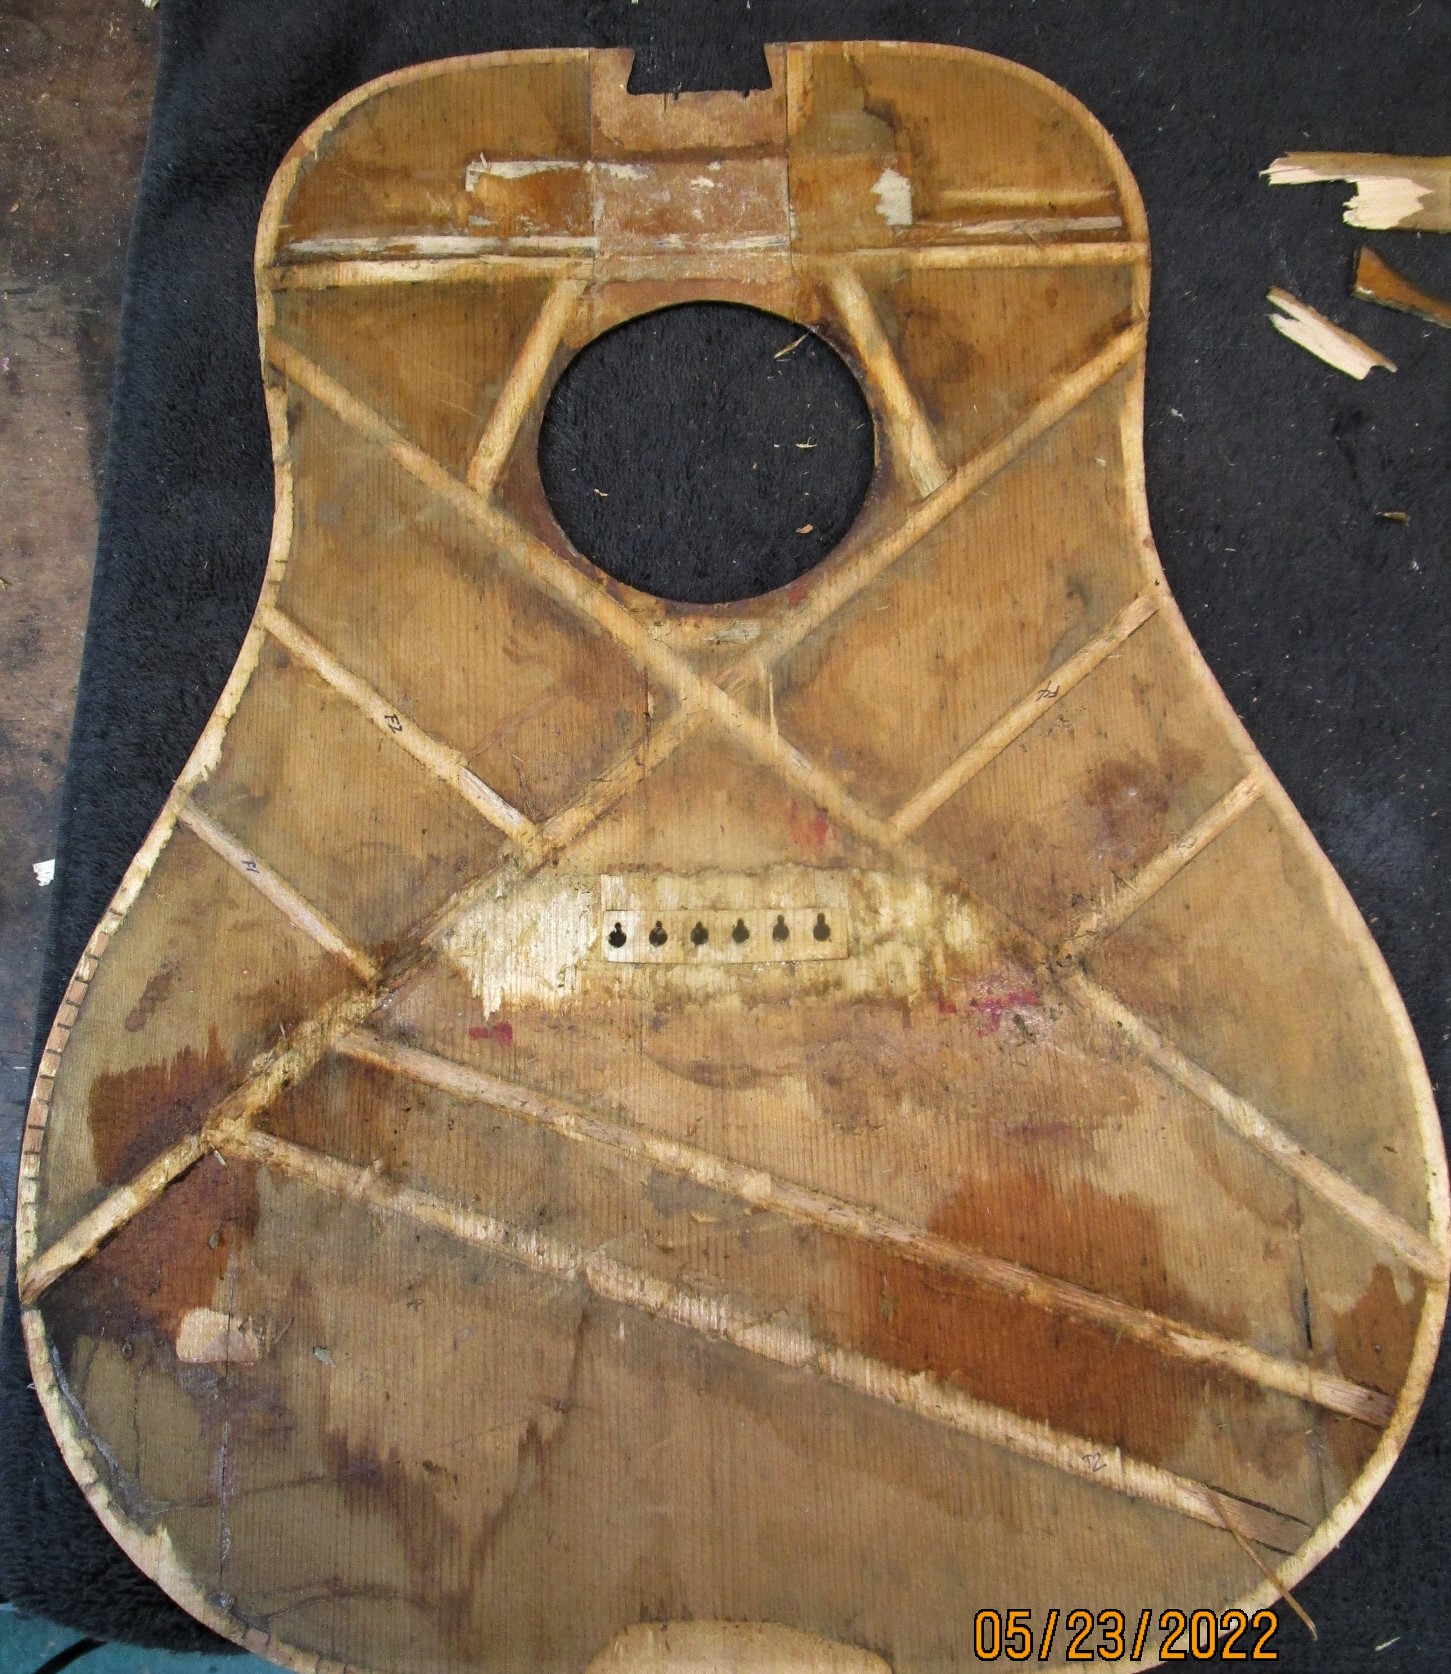
The top with all bracing and repair wood removed, before any cleaning or prep for reattaching the braces. Lots of glue residue and staining from smoke and other insults to the wood. The bridge plate area was rough from prior work and has a patch at the bridge pin holes, likely required when the original bridge was removed some time in the last 80 years...
The top in the go-bar deck with the dished board underneath to start the process of rebuilding it with the correct arch.
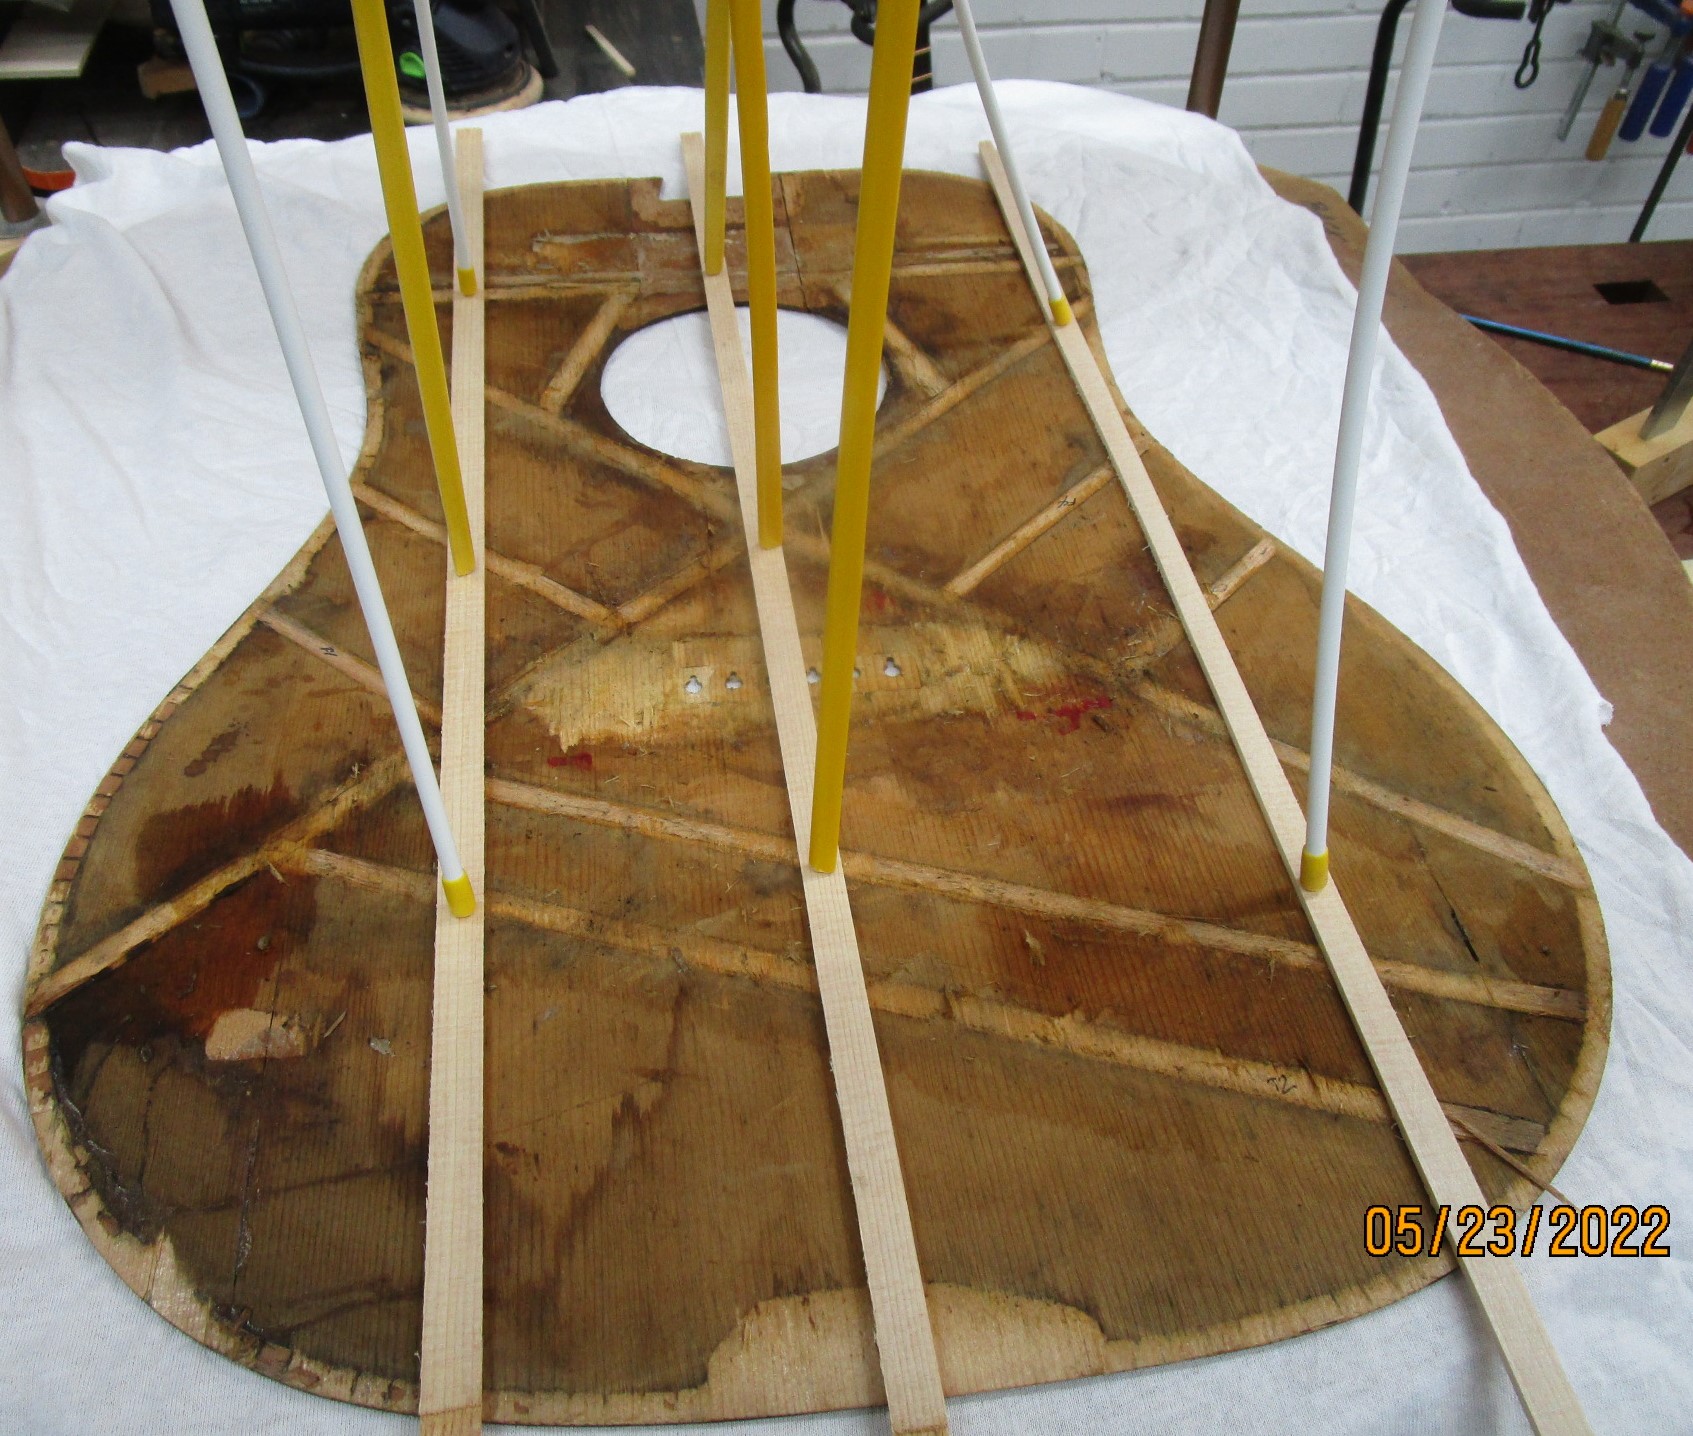
The first step in rebuilding the top is to clean the glue surfaces of the braces. Again, care is taken to remove as little wood as possible. The X brace shows the places where the bridge plate and tone bars were "tucked" into the X brace.
The tone bars and the upper transverse brace also need some attention. The transverse brace suffered from the additional wood applied in the prior attempt(s) to stabilize the top at the fingerboard extension where the neck block broke loose and was caving in the top at the soundhole.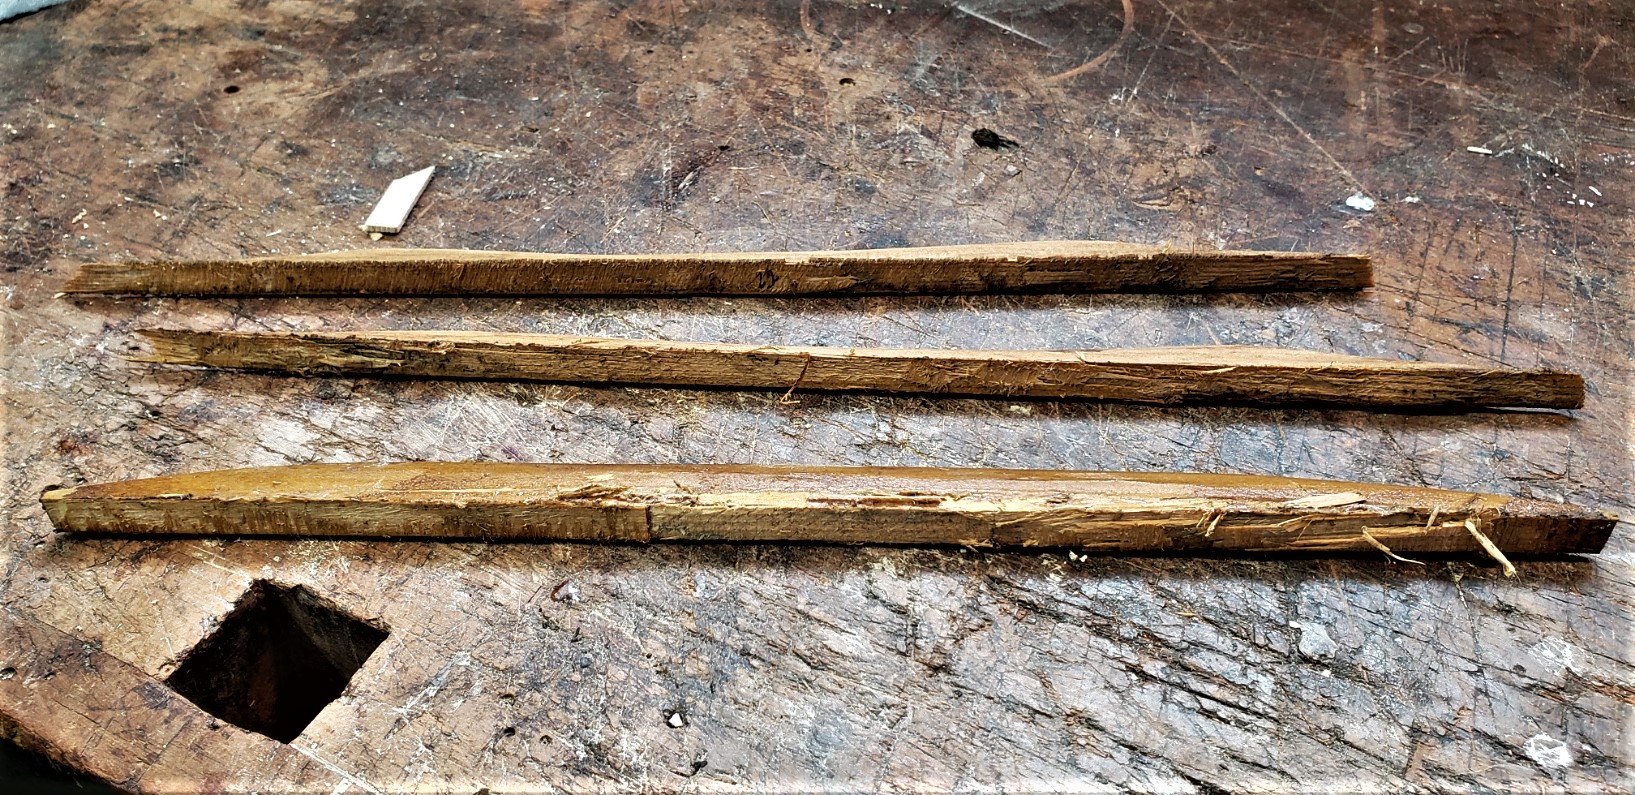
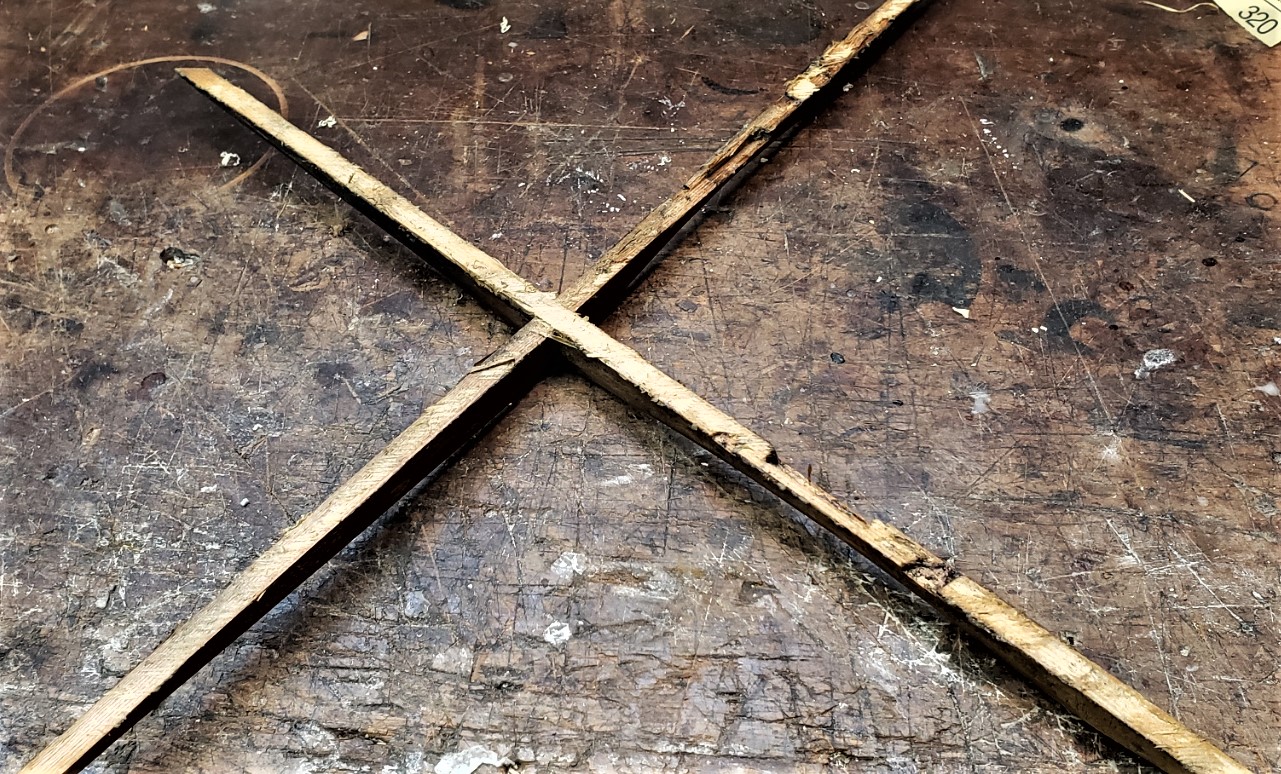
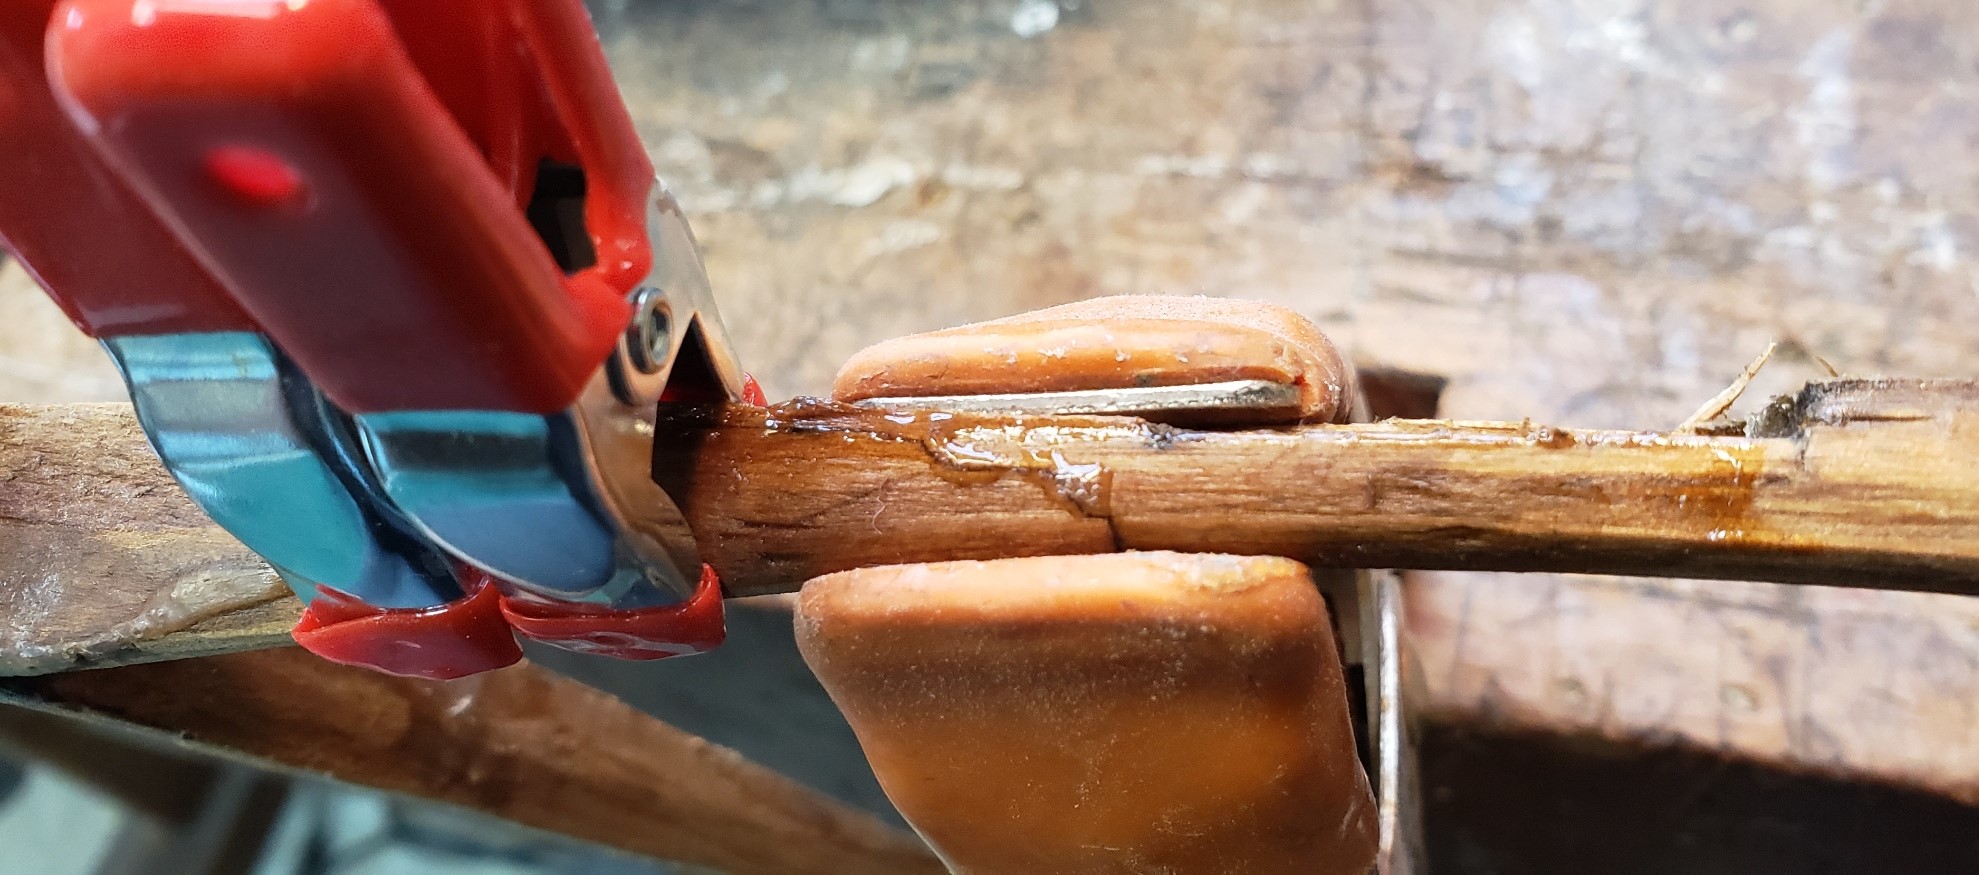
Two cracks were found in the X brace. These were glued and reinforced with a thin strip of spruce.

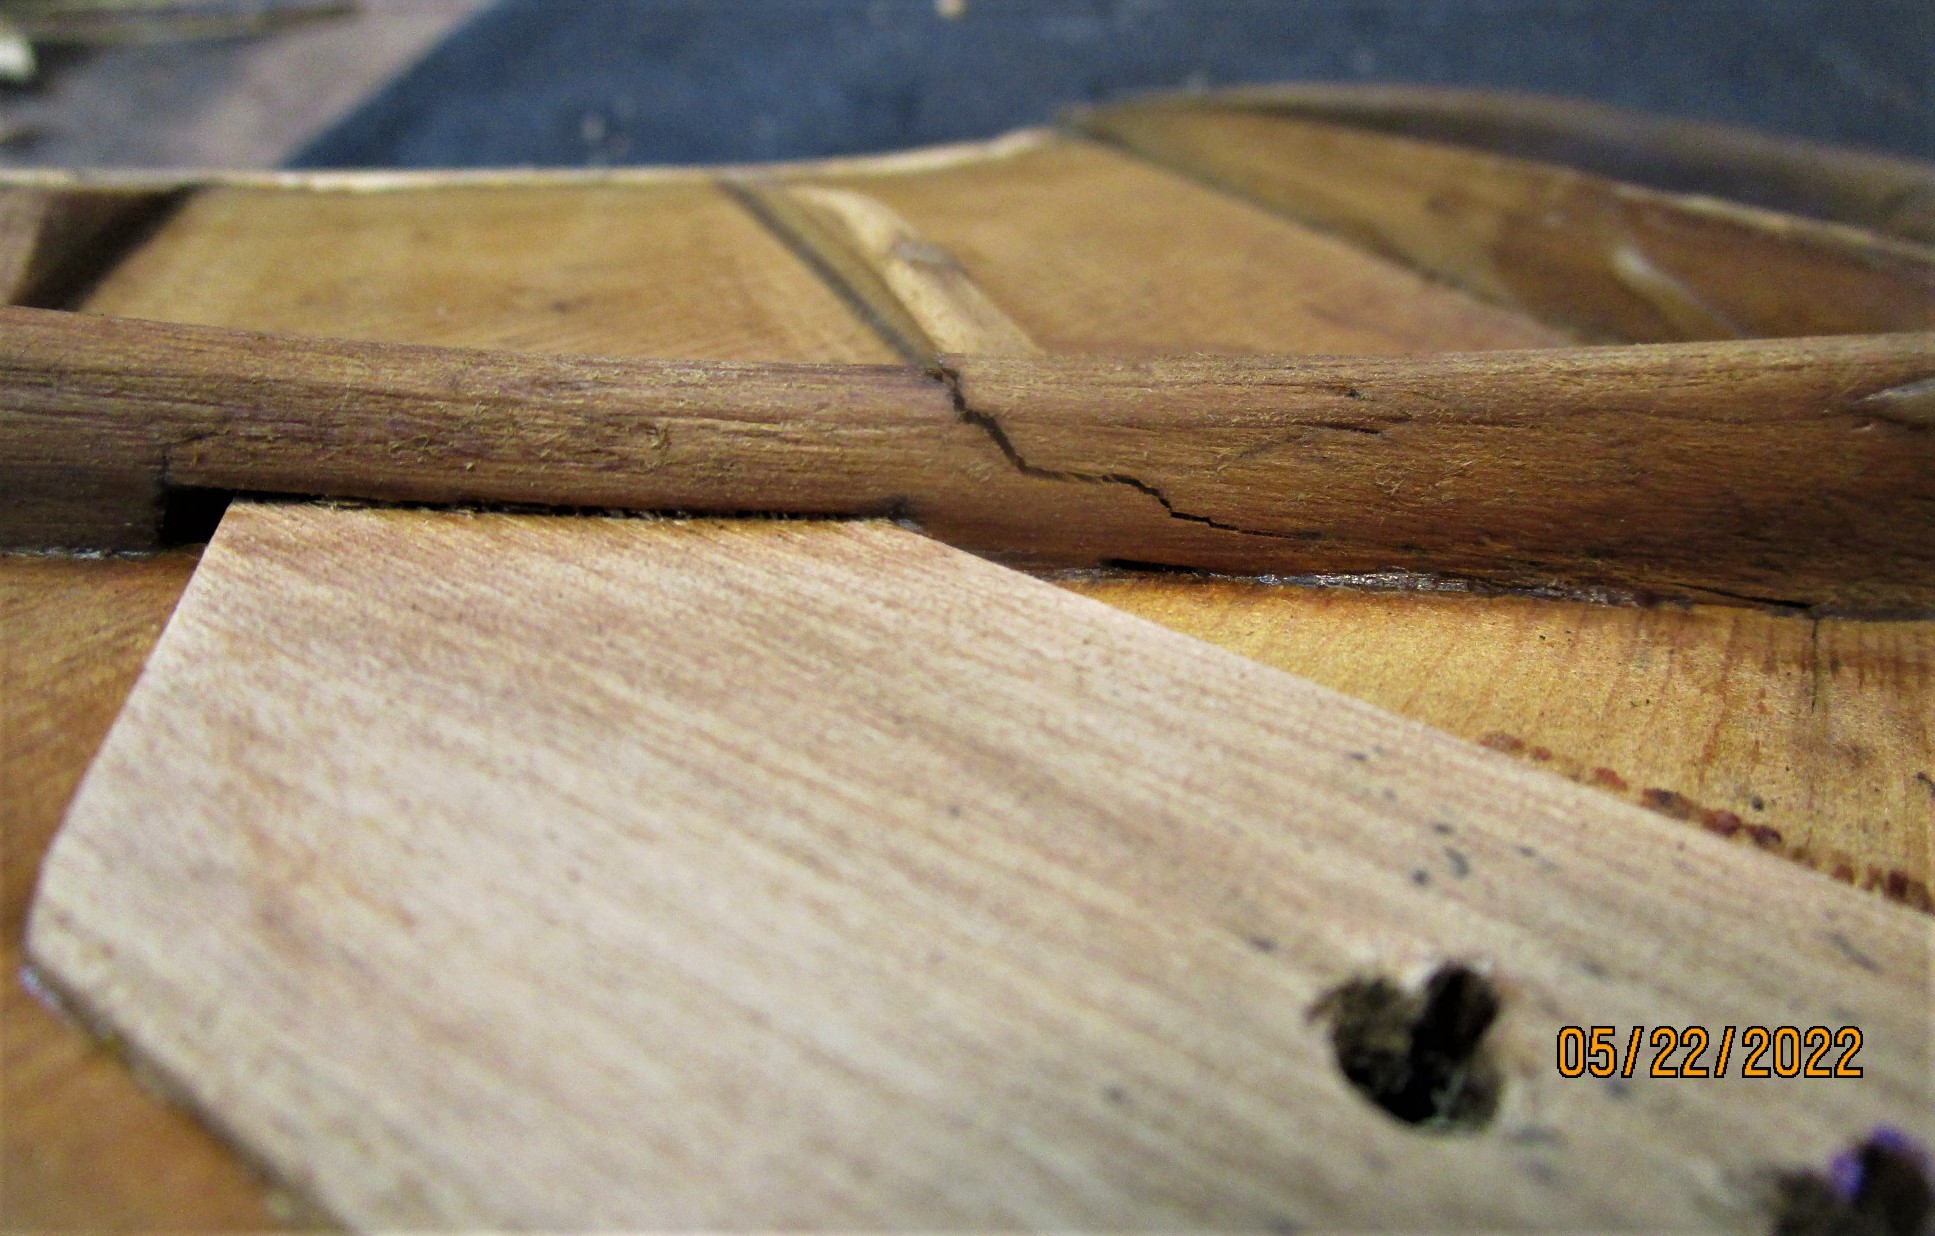
The top of this guitar was deformed in several places. The bridge had pulled up but was still attached at the front The top was severely bellied there, but the stress had "fractured" the spruce at the front of the bridgeplate inside. The neck block had pulled forward at the fretboard extension where the spruce had cracked and so the area around the soundhole was caved in.

The area at the fretboard extension is reinforced with thin cross-grained spruce and trimmed to be thin.
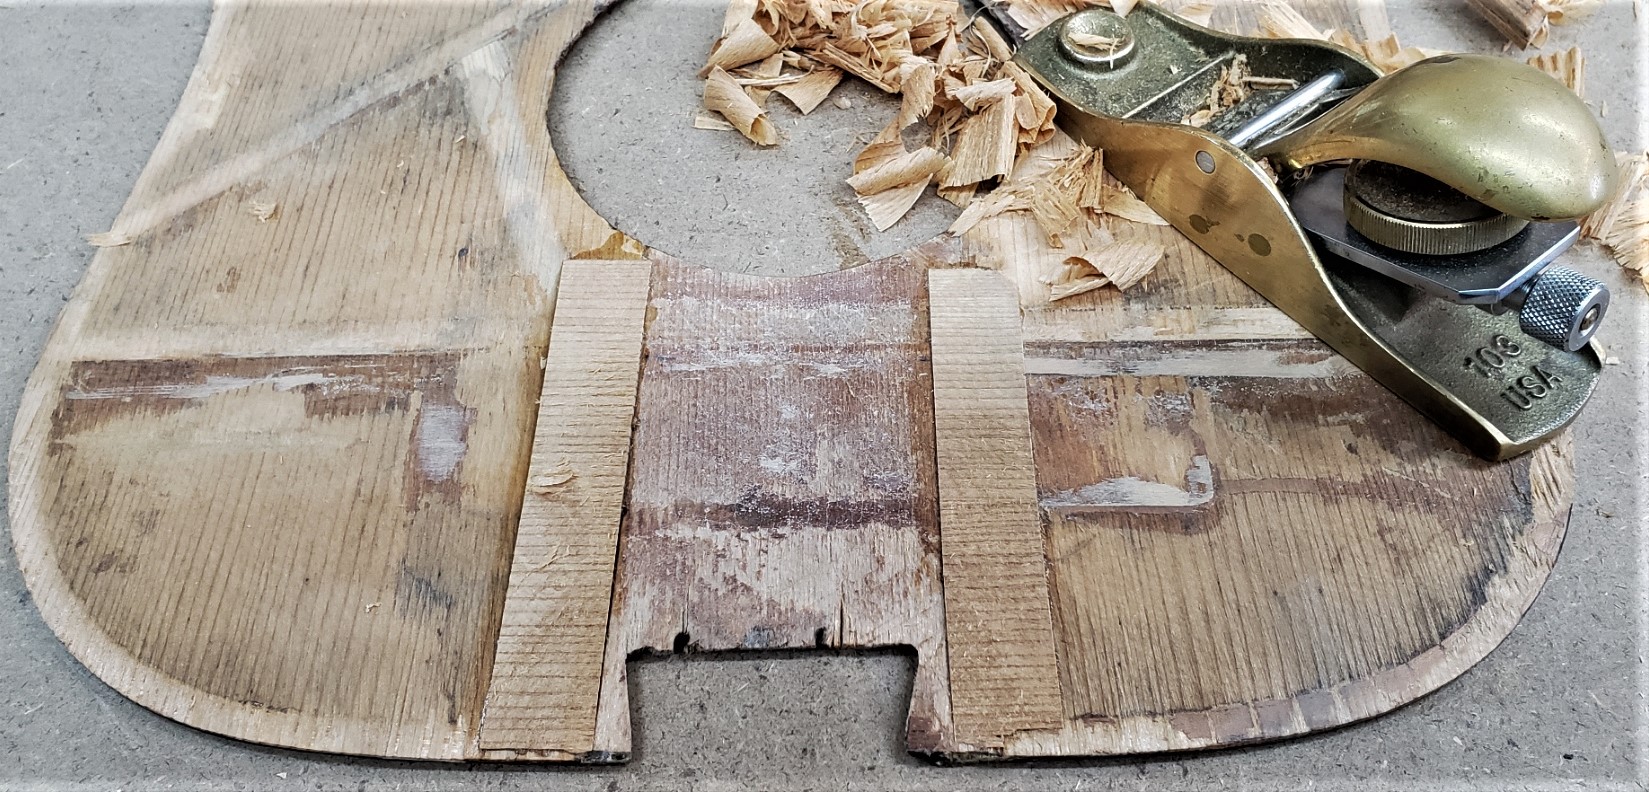
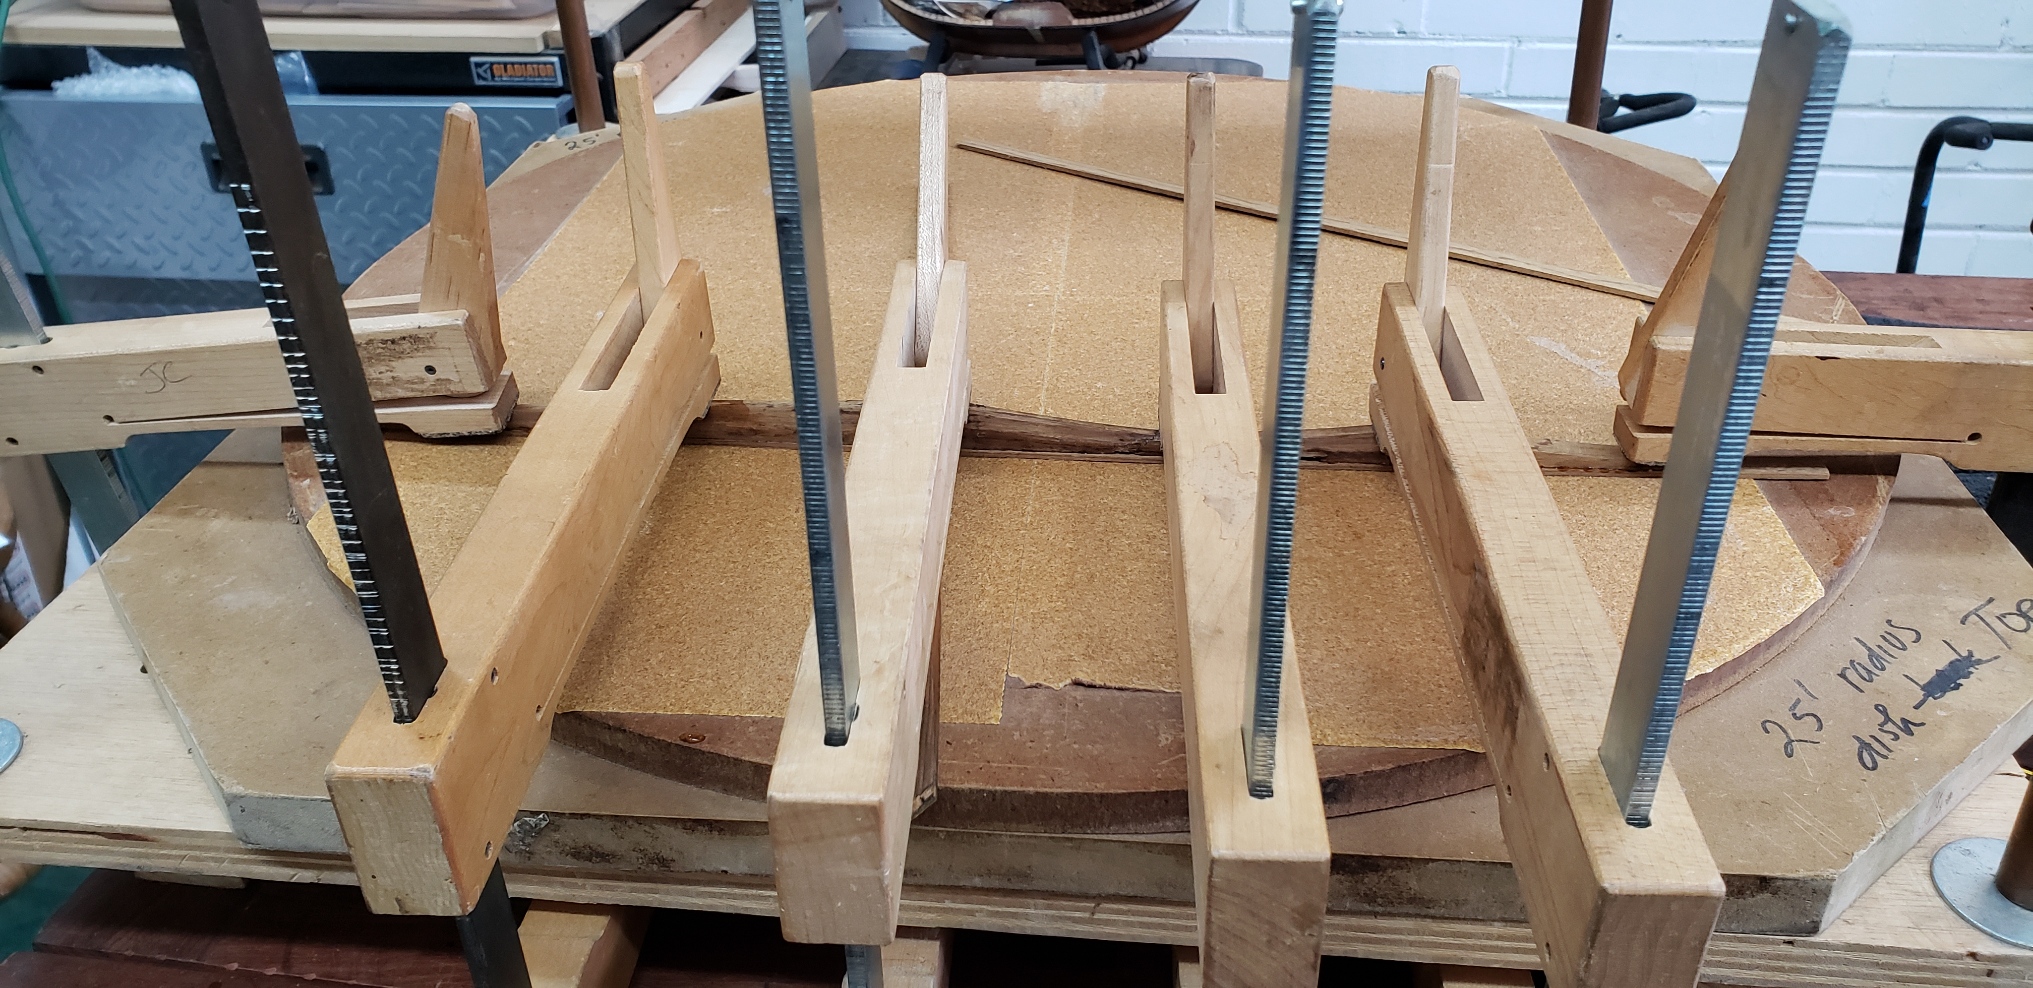
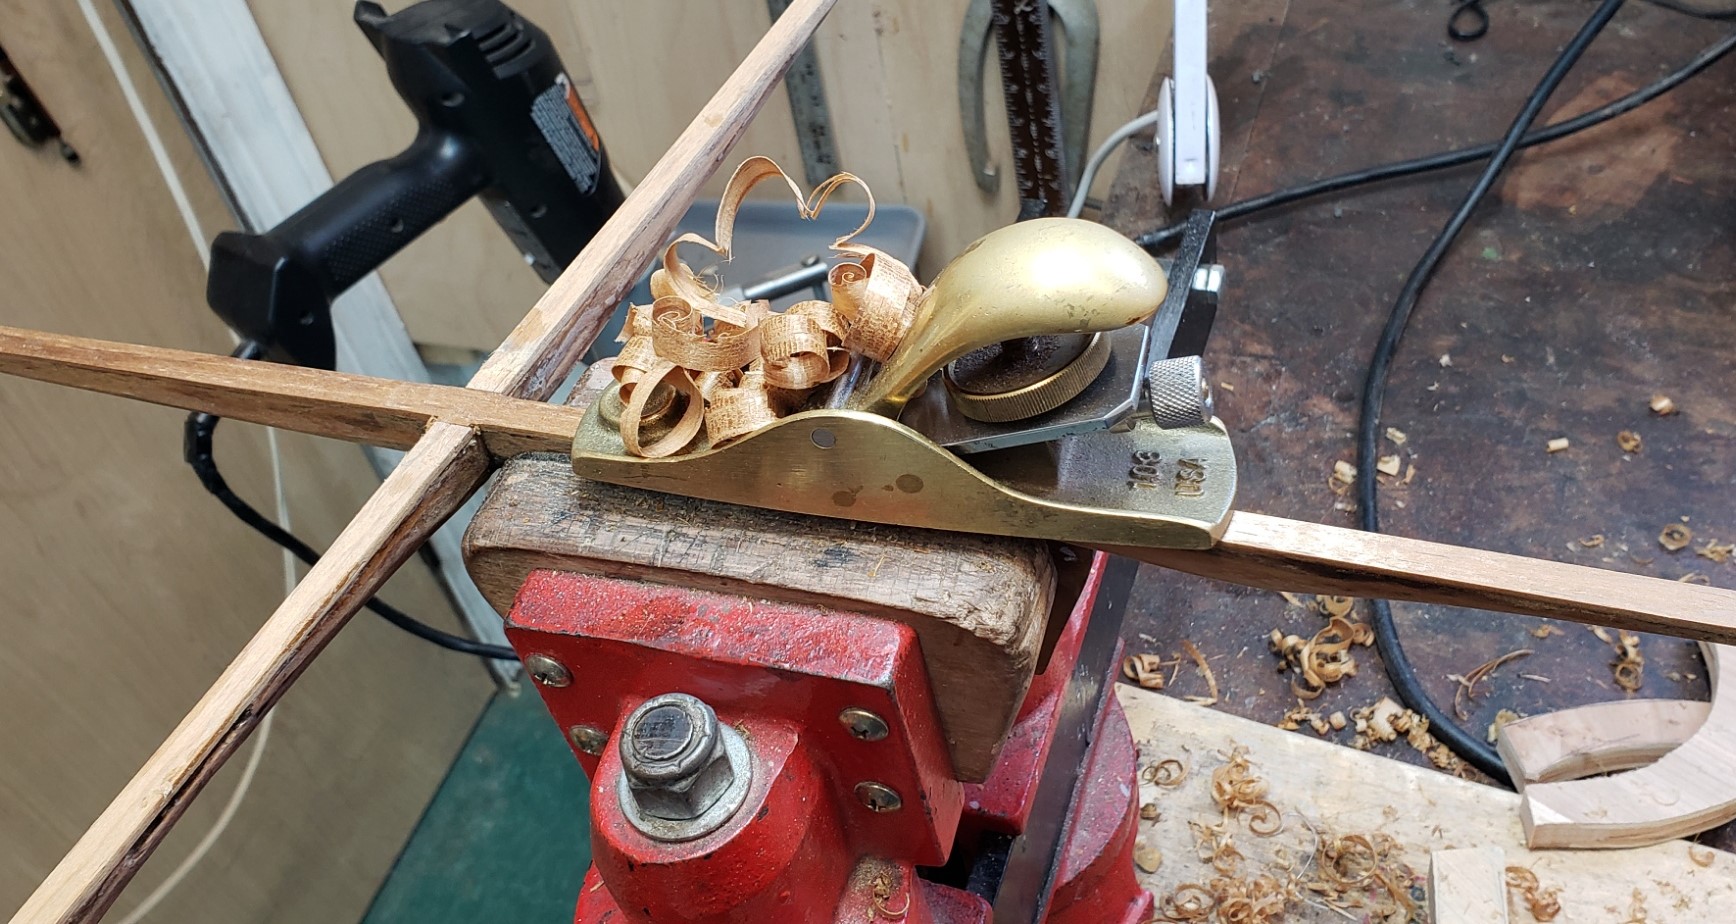
In order to insure that the proper arch of the top was restored, braces were glued to the top in a concave workboard with a 25' radius. Additionally, the main X brace received thin (~1.5 mm) reinforcing strips of torrefied red spruce that was applied in the workboard to insure that the X brace had the correct radius. These reinforcing strips were glued in the workboard to have a radius and trimmed to to add strength but as little new wood as possible.
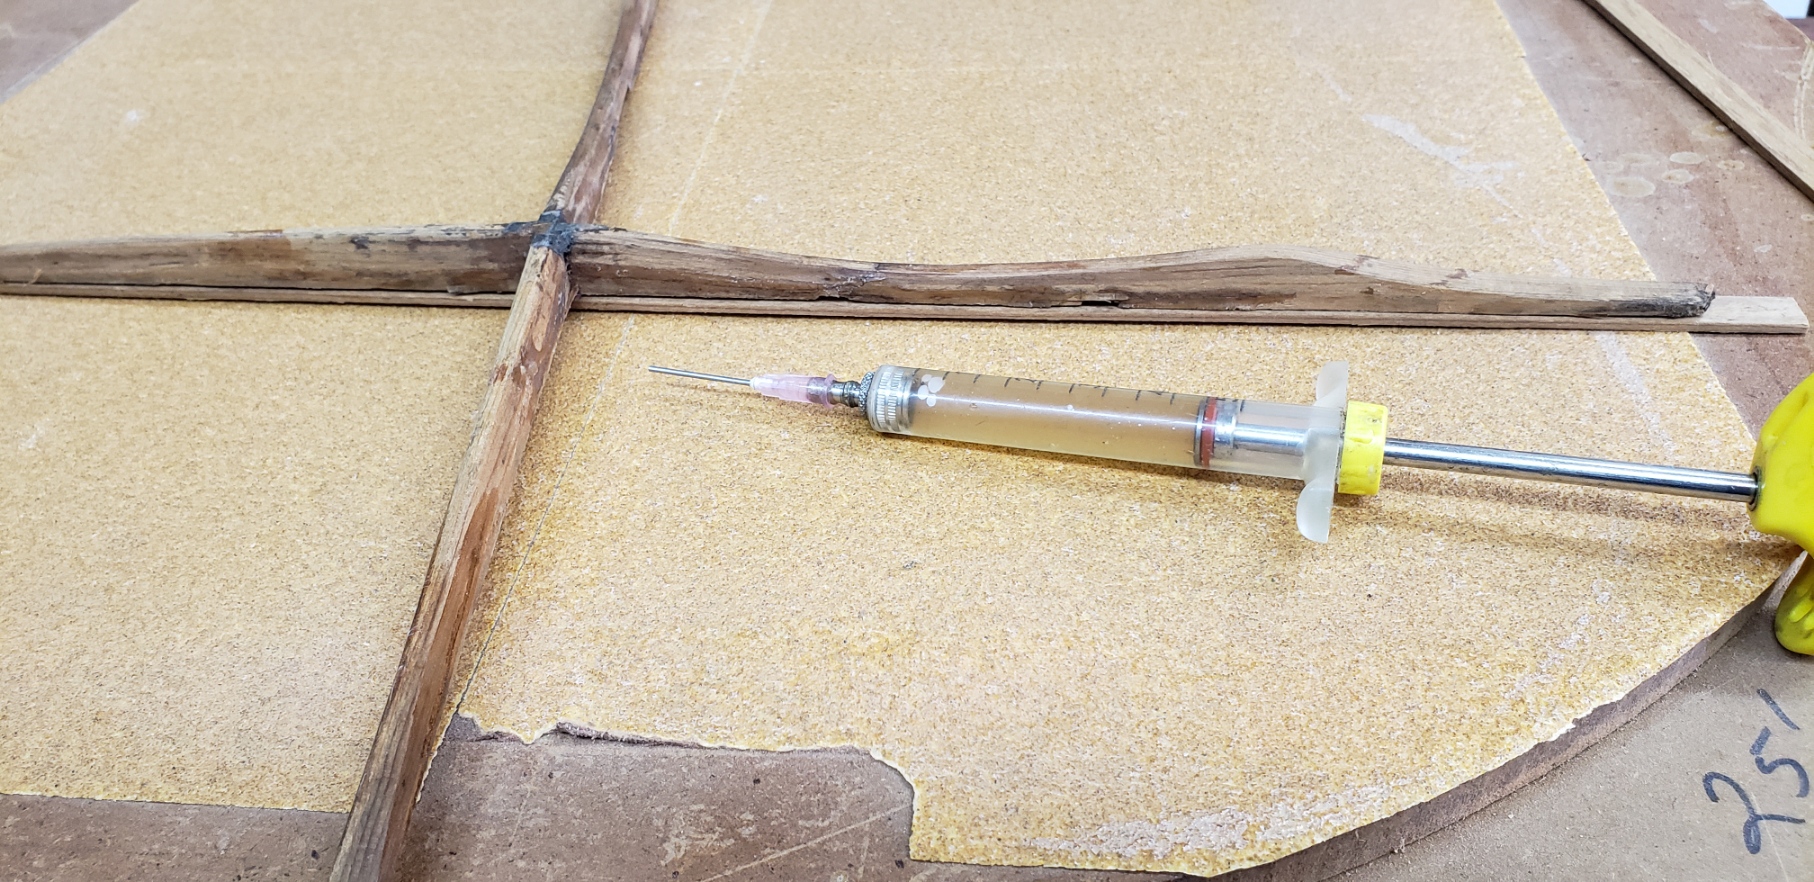
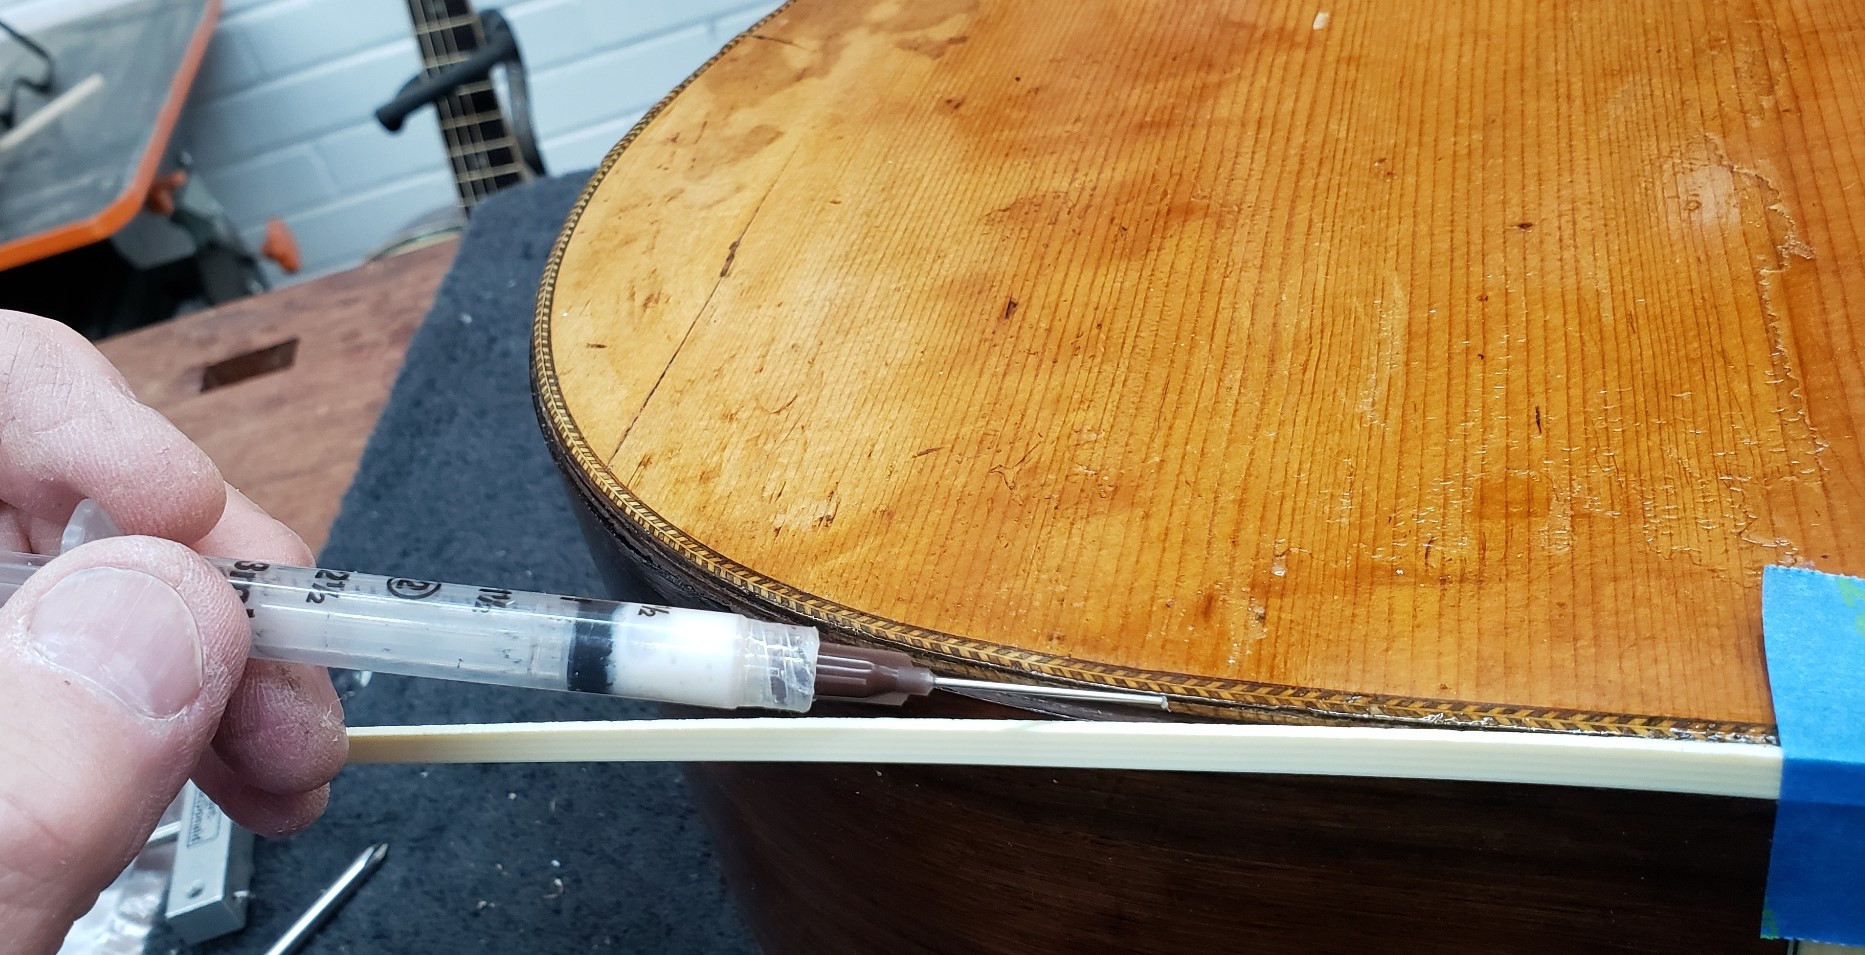
All braces (and everything else) were glued using animal protein glue (hot hide glue). Using the syringe, the glue could be applied neatly and remains warm inside the tube. In the photo below, the reinforcing strips are not yet trimmed to length and reduced in thickness.
At the bridge area, the existing bridgeplate was warped and concave due to the bridge pulling up. This plate was not original, but was applied in a prior repair. A new bridge plate, with the correct thickness and dimensions was required. However, the spruce at the front of the bridge was fractured, with a crack that did not extend through the top. This fracture, resulting from the deformation at the bridge, along with the damage from the prior removal of the original plate required the application of a thin (less than 1mm) patch of spruce under the new plate. This patch was "feathered" into the existing top, reinforcing it and providing a good flat glue surface for the new bridge plate.

The new bridge plate is glued in place over the patch. The cleaned and reinforced braces are at the top of the photo.
Next the X brace is glued, then the tone bars, finger braces, and upper transverse brace. The only new wood used is around the soundhole to reinforce that area as was originally done. The original thin pieces of spruce there were not salvaged, but new torrefied red spruce strips were used.
Gluing the X brace.
The bridge plate is "tucked" under the X brace.
 Reattaching the tone bars. The finger braces have been re-glued. The tone bars are feathered into the top at the edge but are tucked into the X brace as originally done by Martin.
Lastly the upper transverse brace is re-glued along with new wood strips to reinforce the sound hole area.
The top with all original bracing reinforced with arching and re-applied. Not very pretty, but structurally sound again with (almost) all of the original wood.
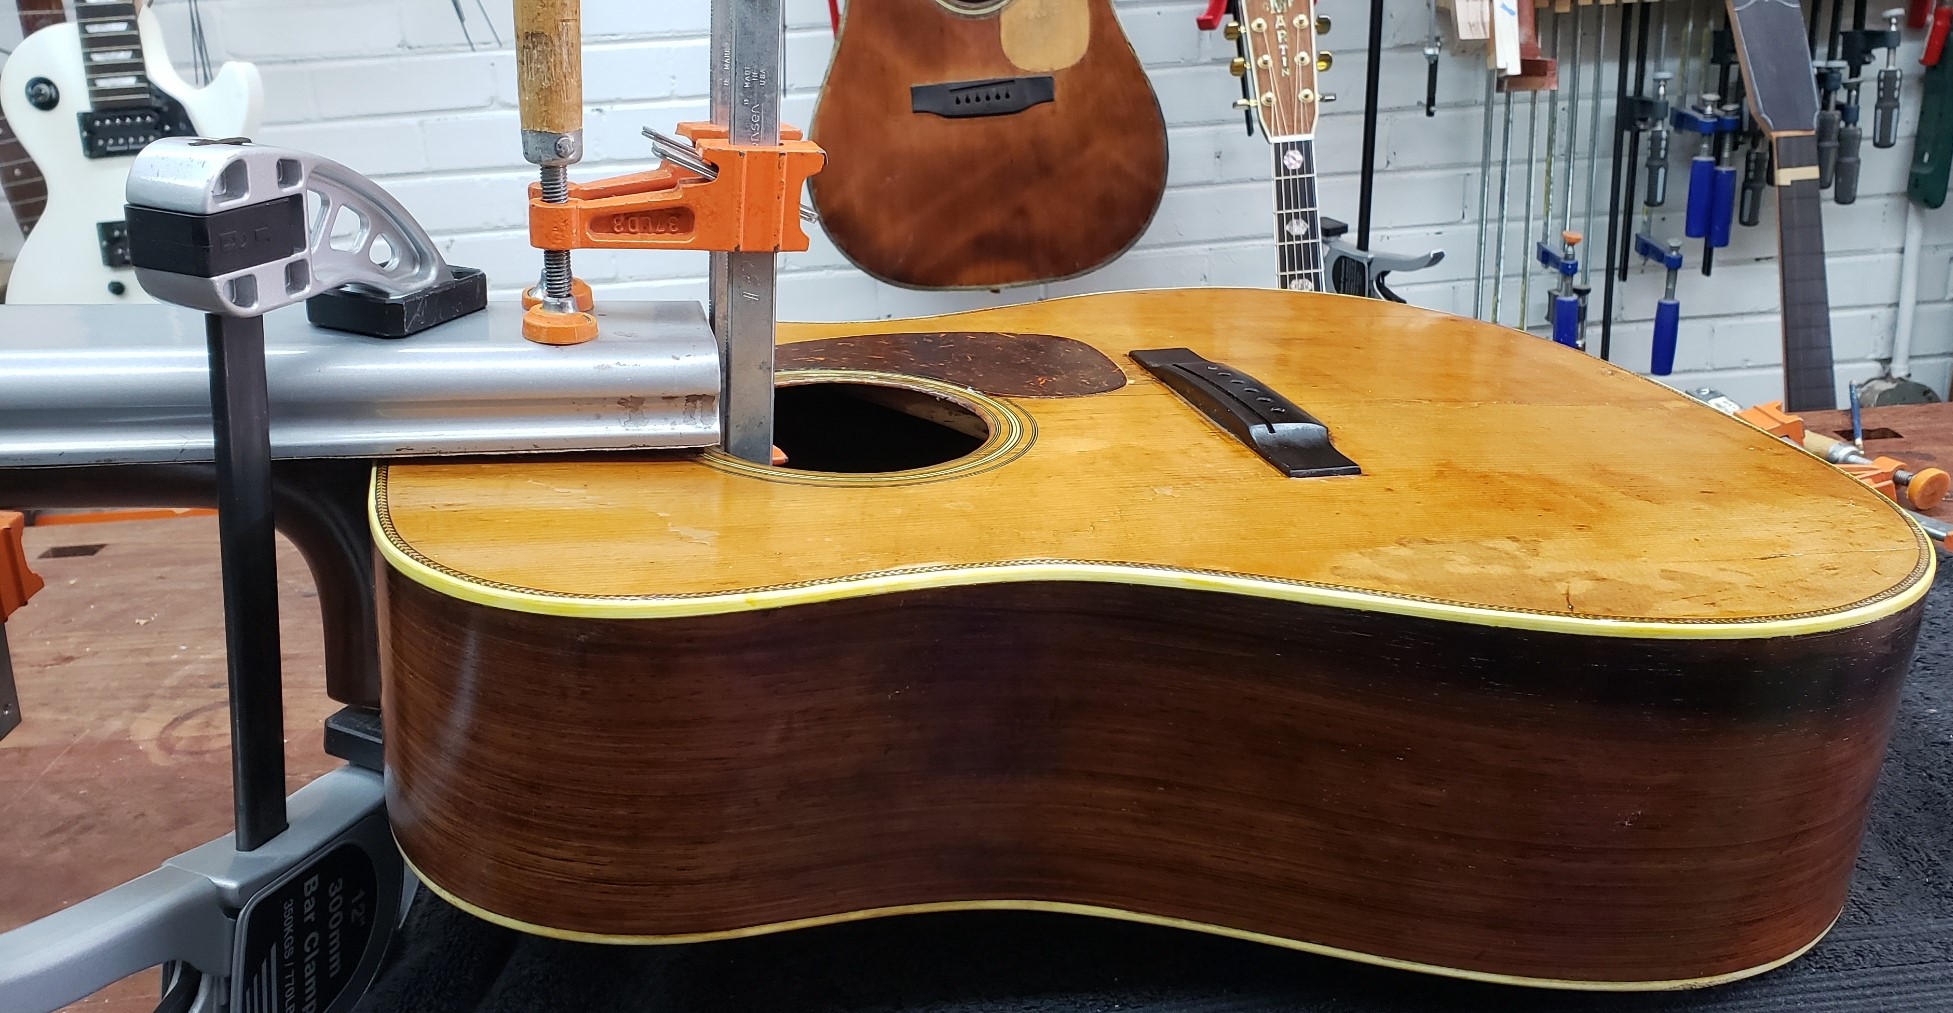
The exterior of the top, now with no deformation and the correct doming. The bridge and pickguard are not yet attached. No finish touch up has been done yet.
Interior Cleaning / Re-applying the Top Contents
The interior of the body was blackened from smoke. Cleaning this area was difficult. Using lacquer thinner, light sanding, and scraping, the insides were cleaned to the extent possible. Excess glue from old repairs was removed. This work was done while attempting to remove no wood or other original material. Cleanup was a compromise between scrubbing and preserving.


Two existing cracks in the top were cleated, and the top was ready to be reattached to the body. Since hot hide glue is used, the top must be reglued in sections. Also, alignment of the top is critical, since the binding channel must be maintained, so the first job is to align the end block with the top and glue that area. Next the neck block area is glued. Finally, glue is applied to the sides and they are aligned so that the binding channel is correct. The X brace and the upper transverse brace are mortised into the linings.
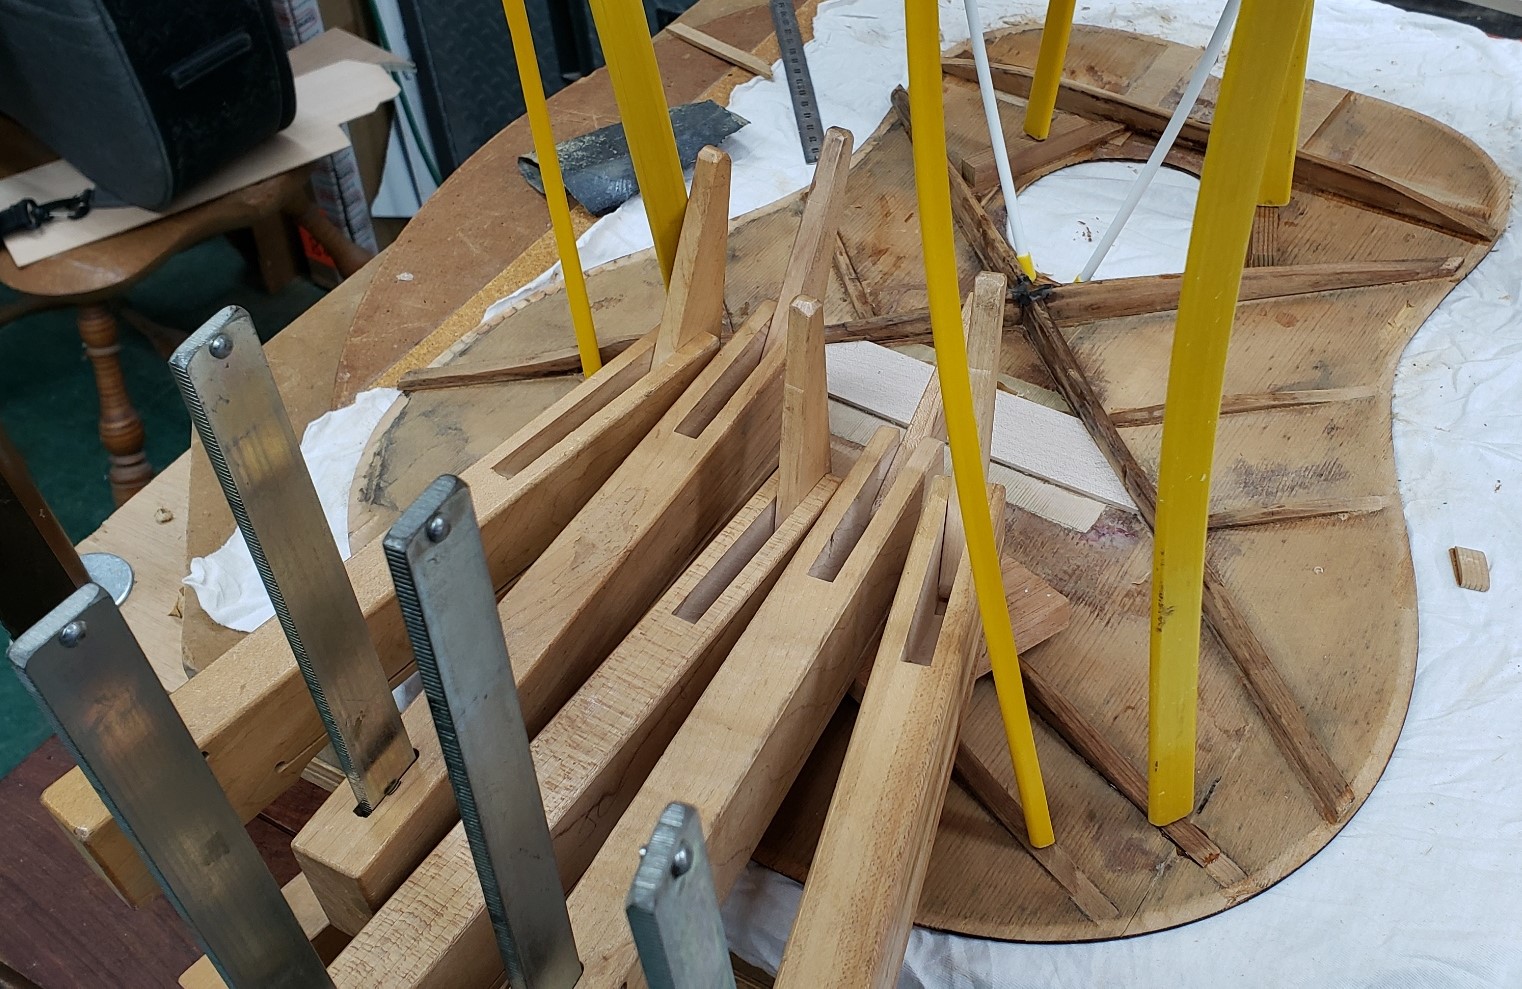
Here the tailblock is glued.
Next, glue is applied to the linings in sections and clamped. Here the neck and tail block sections are glued and clamped up to the point where the X brace is mortised into the linings (kerfing) of the guitar. The remaining edges of the top near the waist will be glued later using a syringe to apply hide glue between the top and the linings.
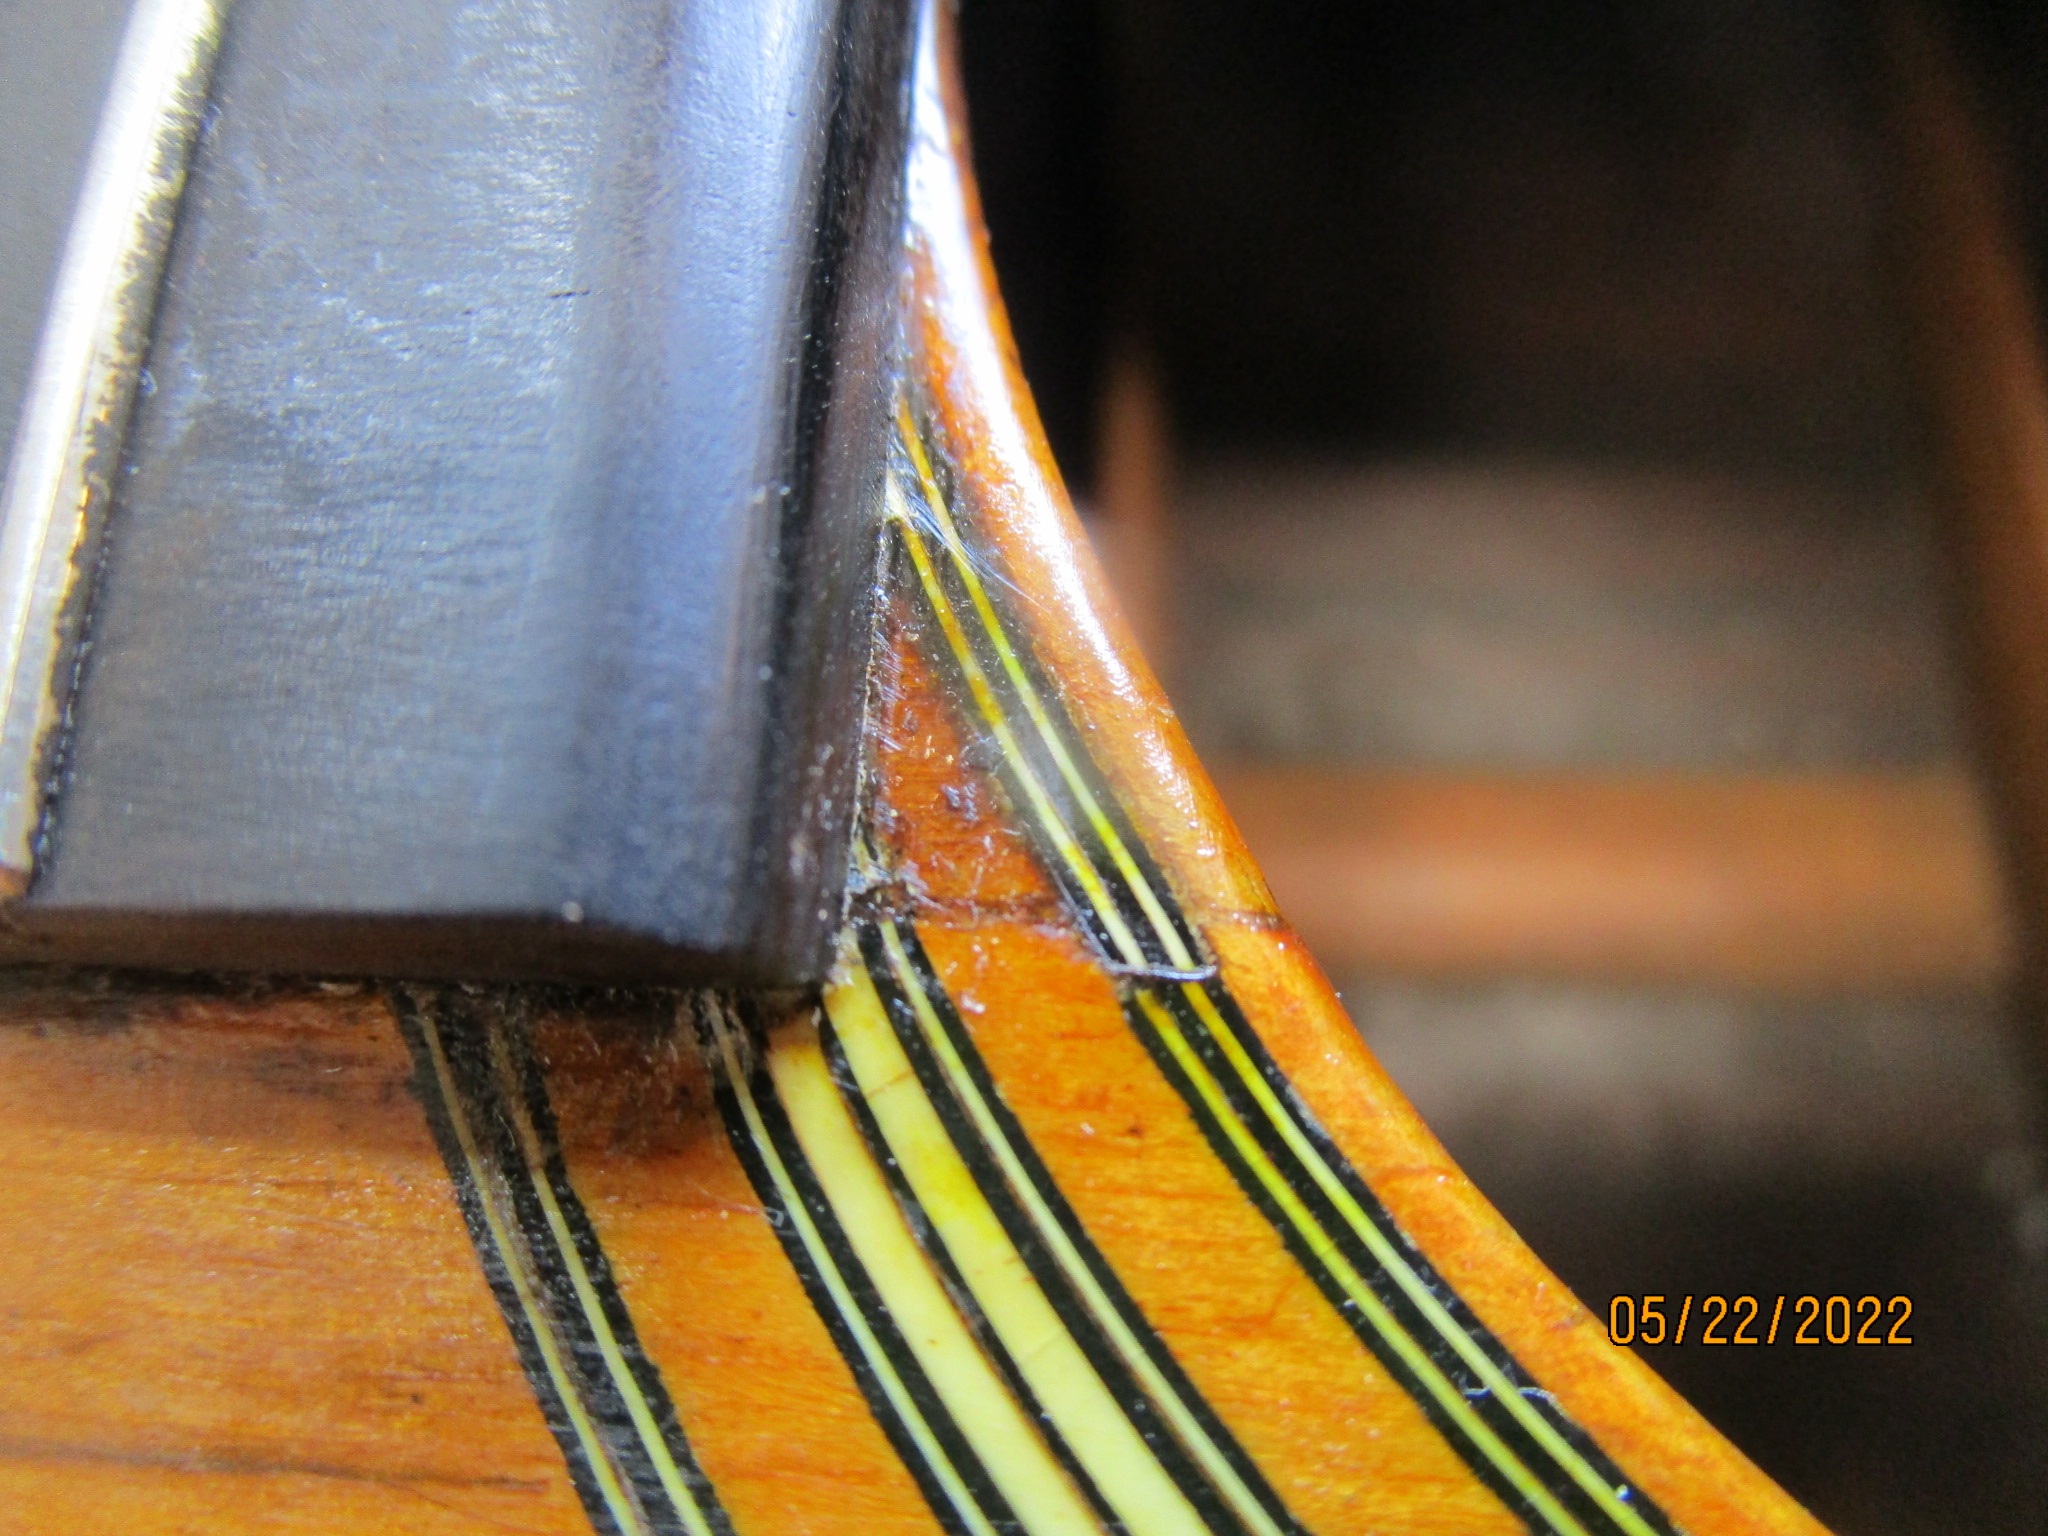
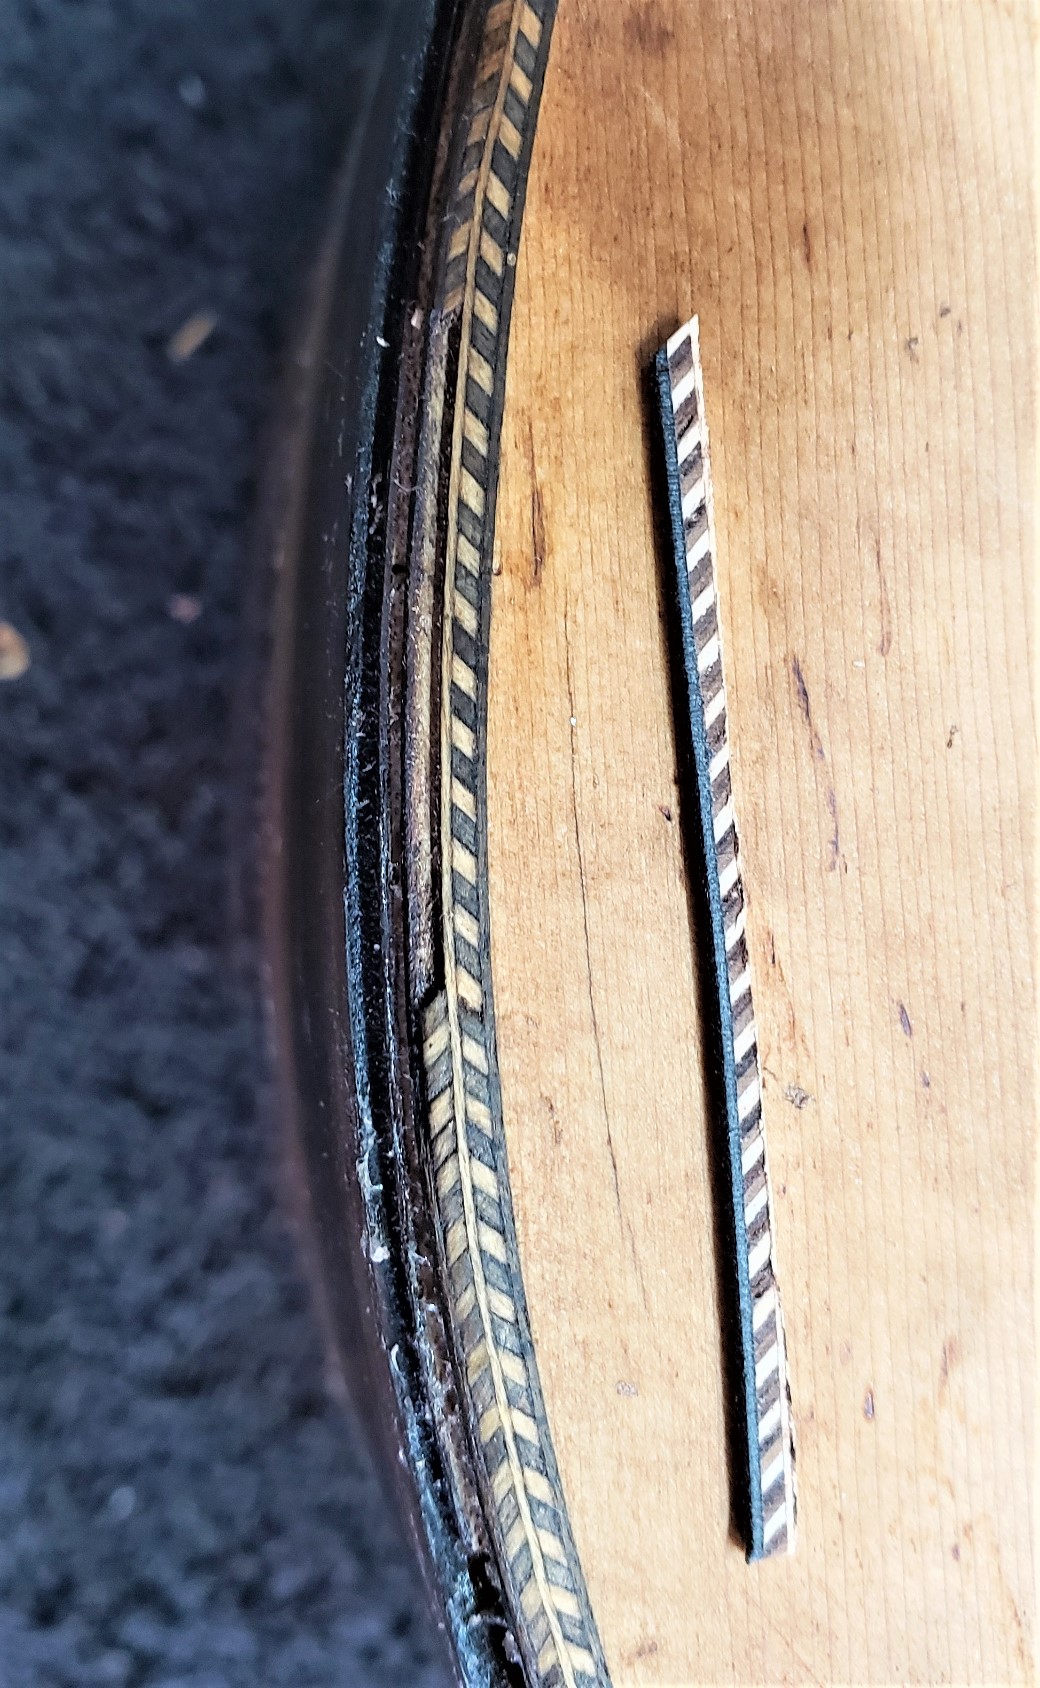
After re-gluing the top, two very small areas of herringbone purfling need repair. Finding herringbone purfling that matches the original is nearly impossible. Gurian Guitars (https://www.gurianinstruments.com/) supplies various sizes of herringbone trim in a "grab bag" that allows selection of the closest match. Not perfect, but these are small sections that should be hard to notice.
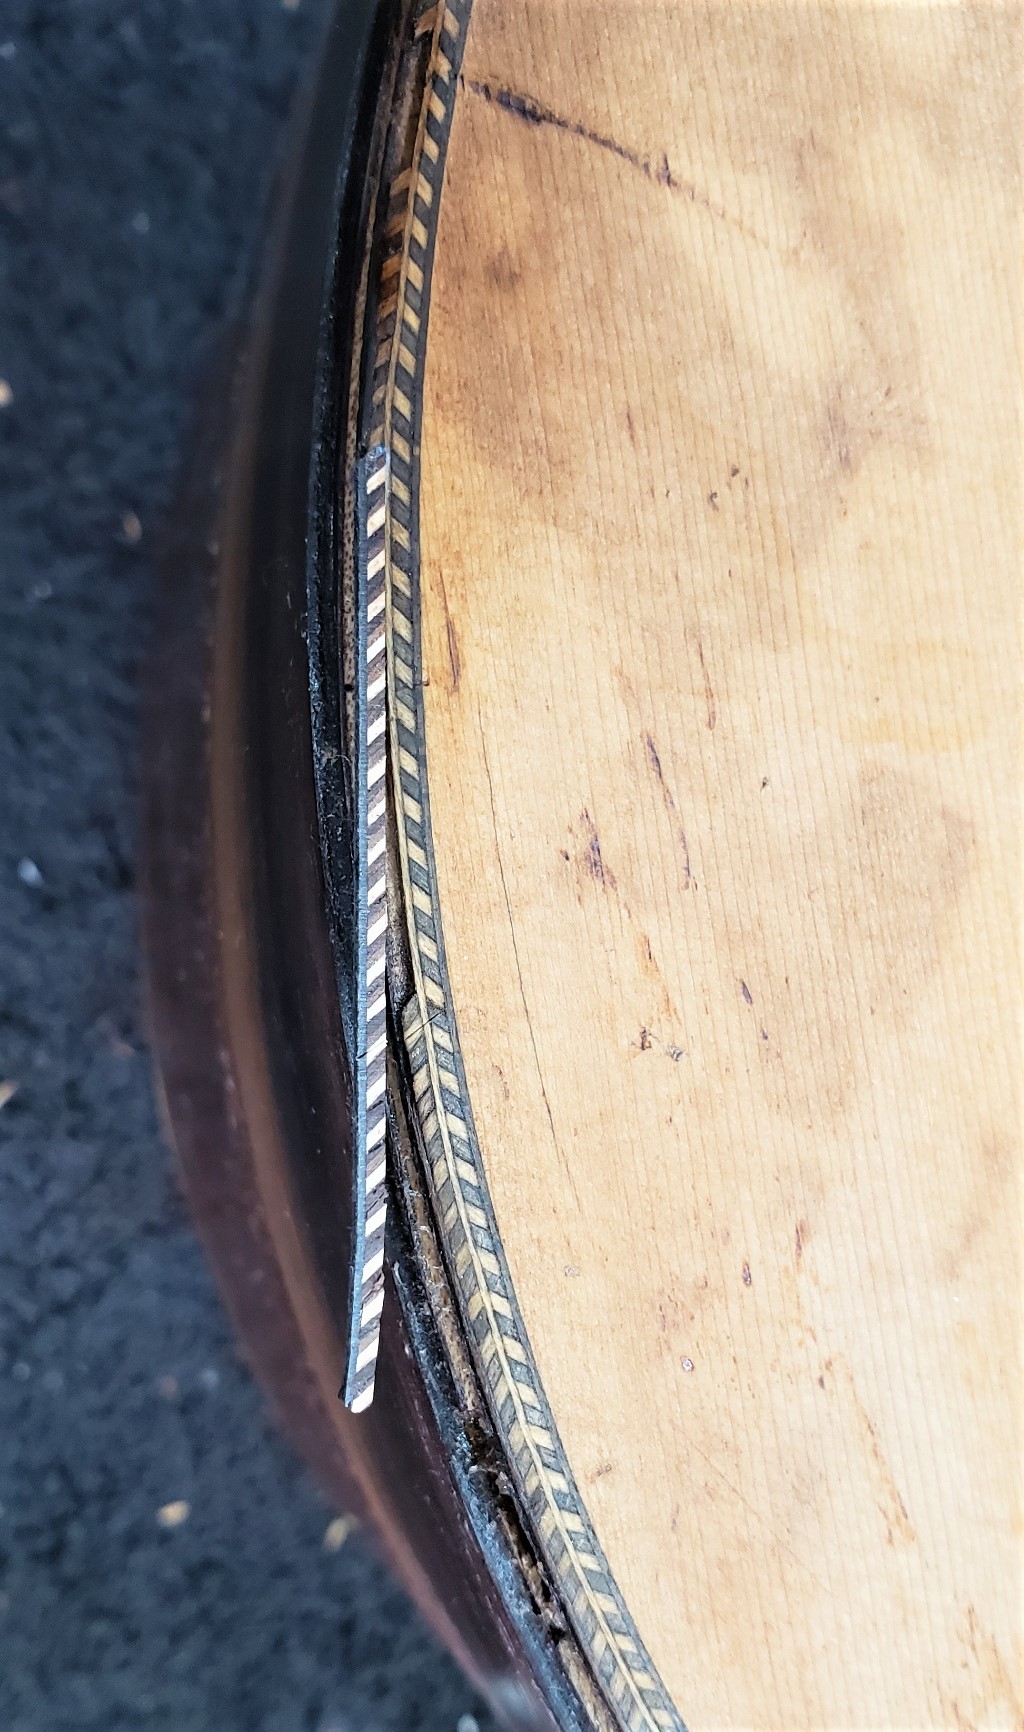
After binding, and with some "patina" applied, the repair blends pretty well, though not perfectly.
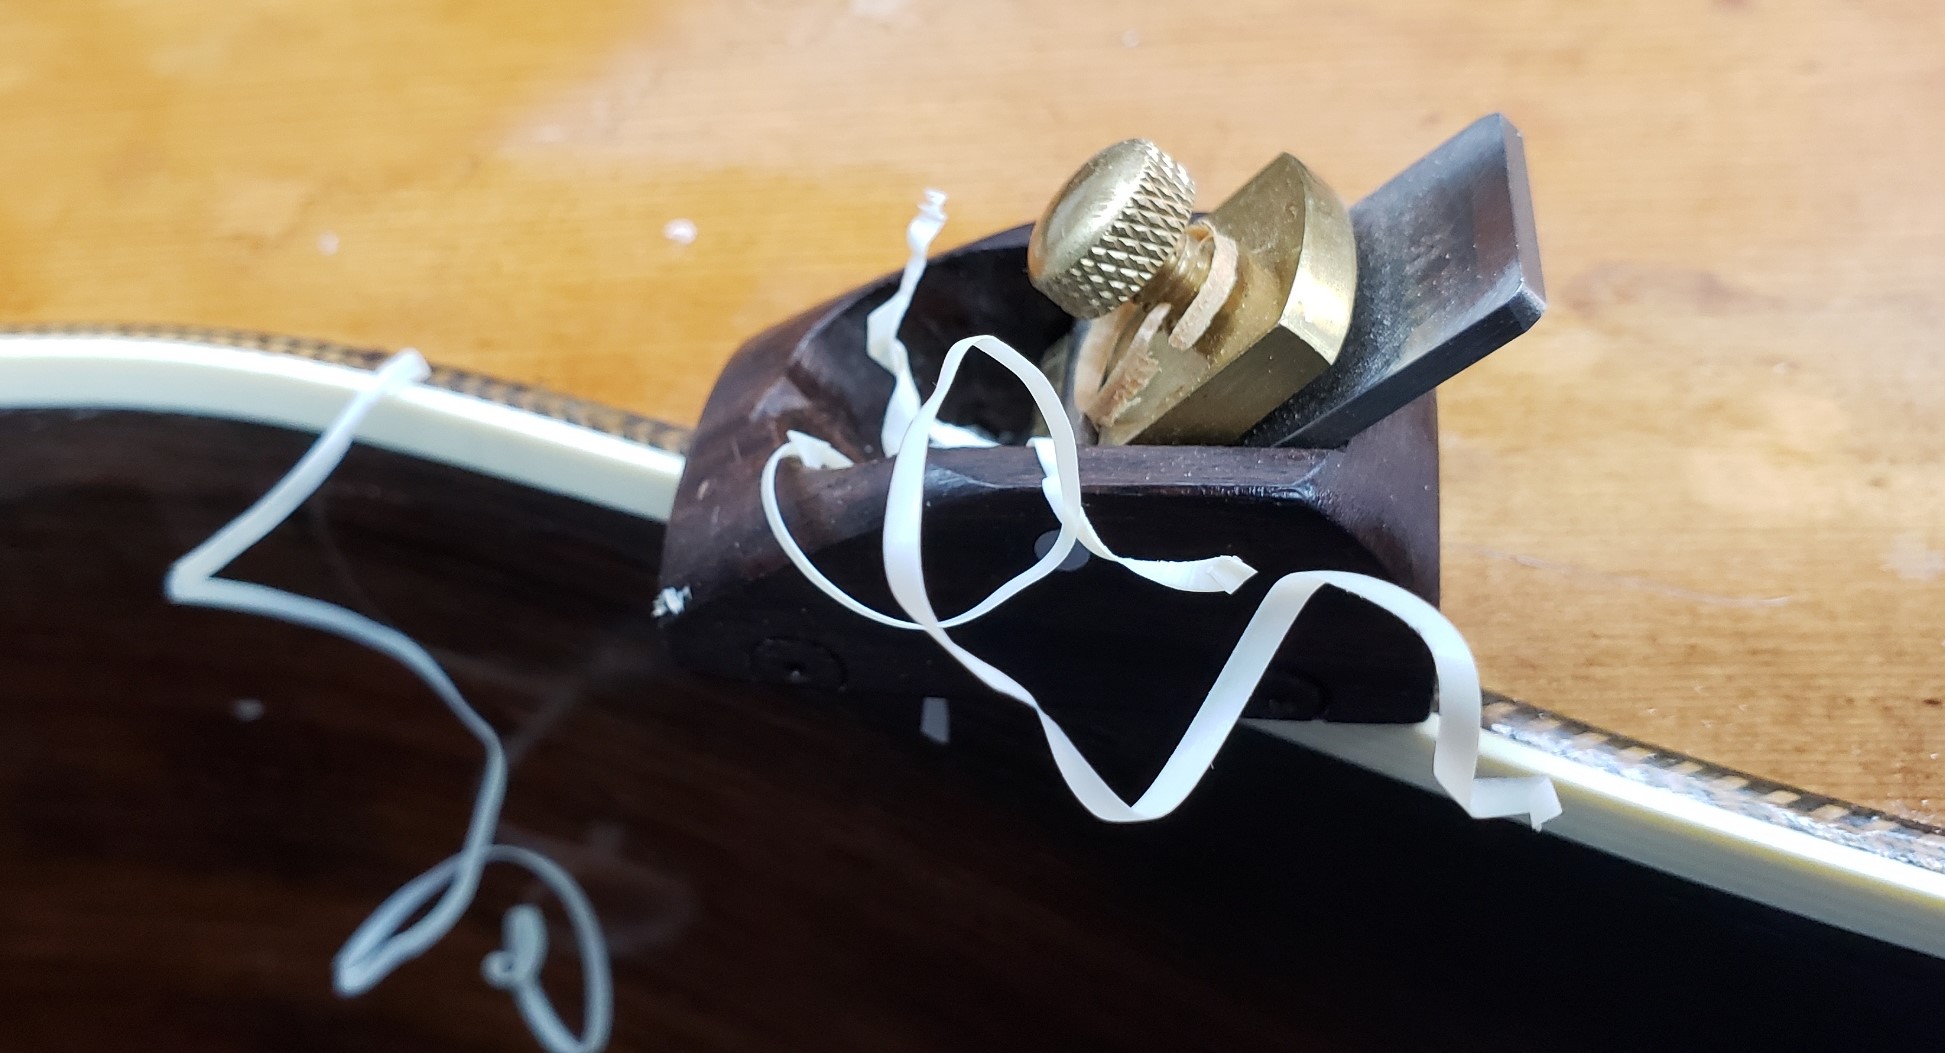
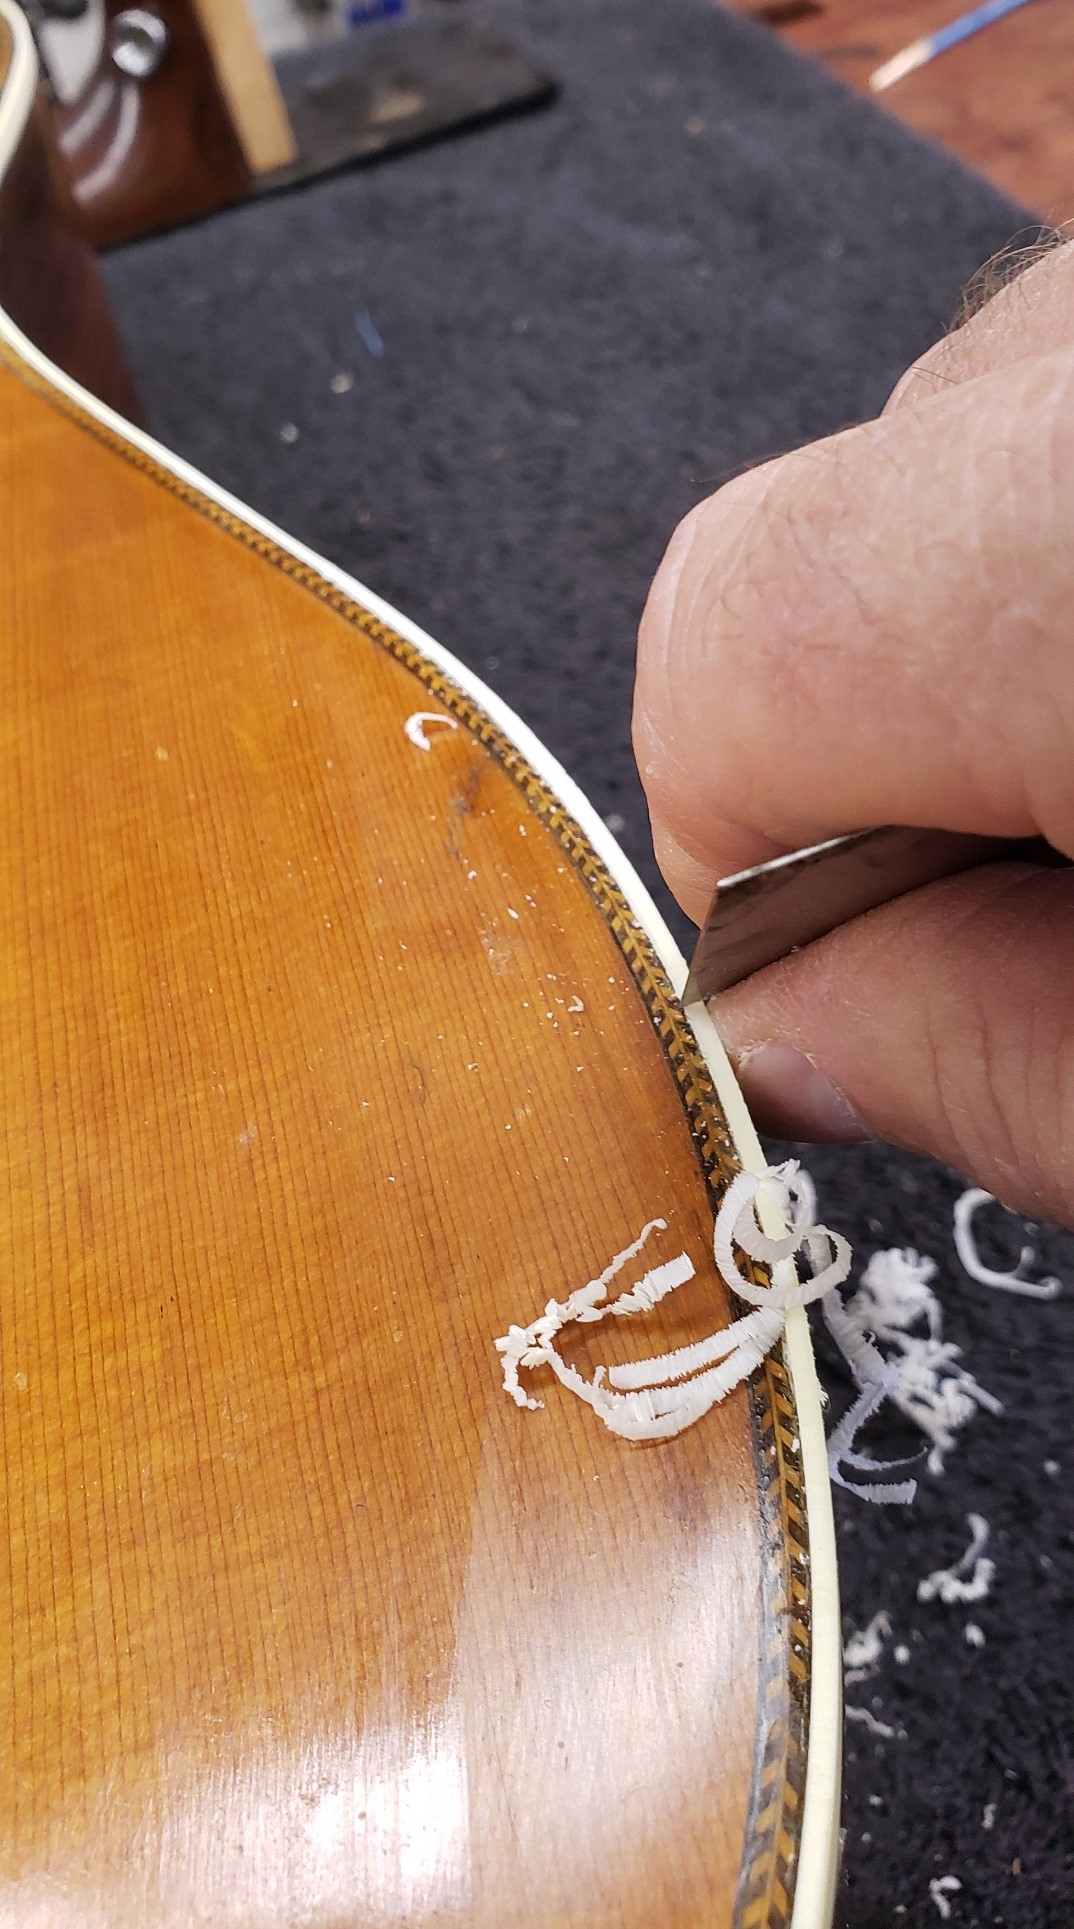
Next the binding is applied. Due to the fire damage, the original binding was not usable. Ivoroid celluloid binding that is a textural match for the original was used to replace the top binding. The new binding was sized close to the original, glued, and then trimmed and scraped flush with the top and sides. Binding glue, thinned with acetone, was applied using a small syringe. After application, during finish touch up, the binding will receive some light amber stain to color match it with the existing back binding.
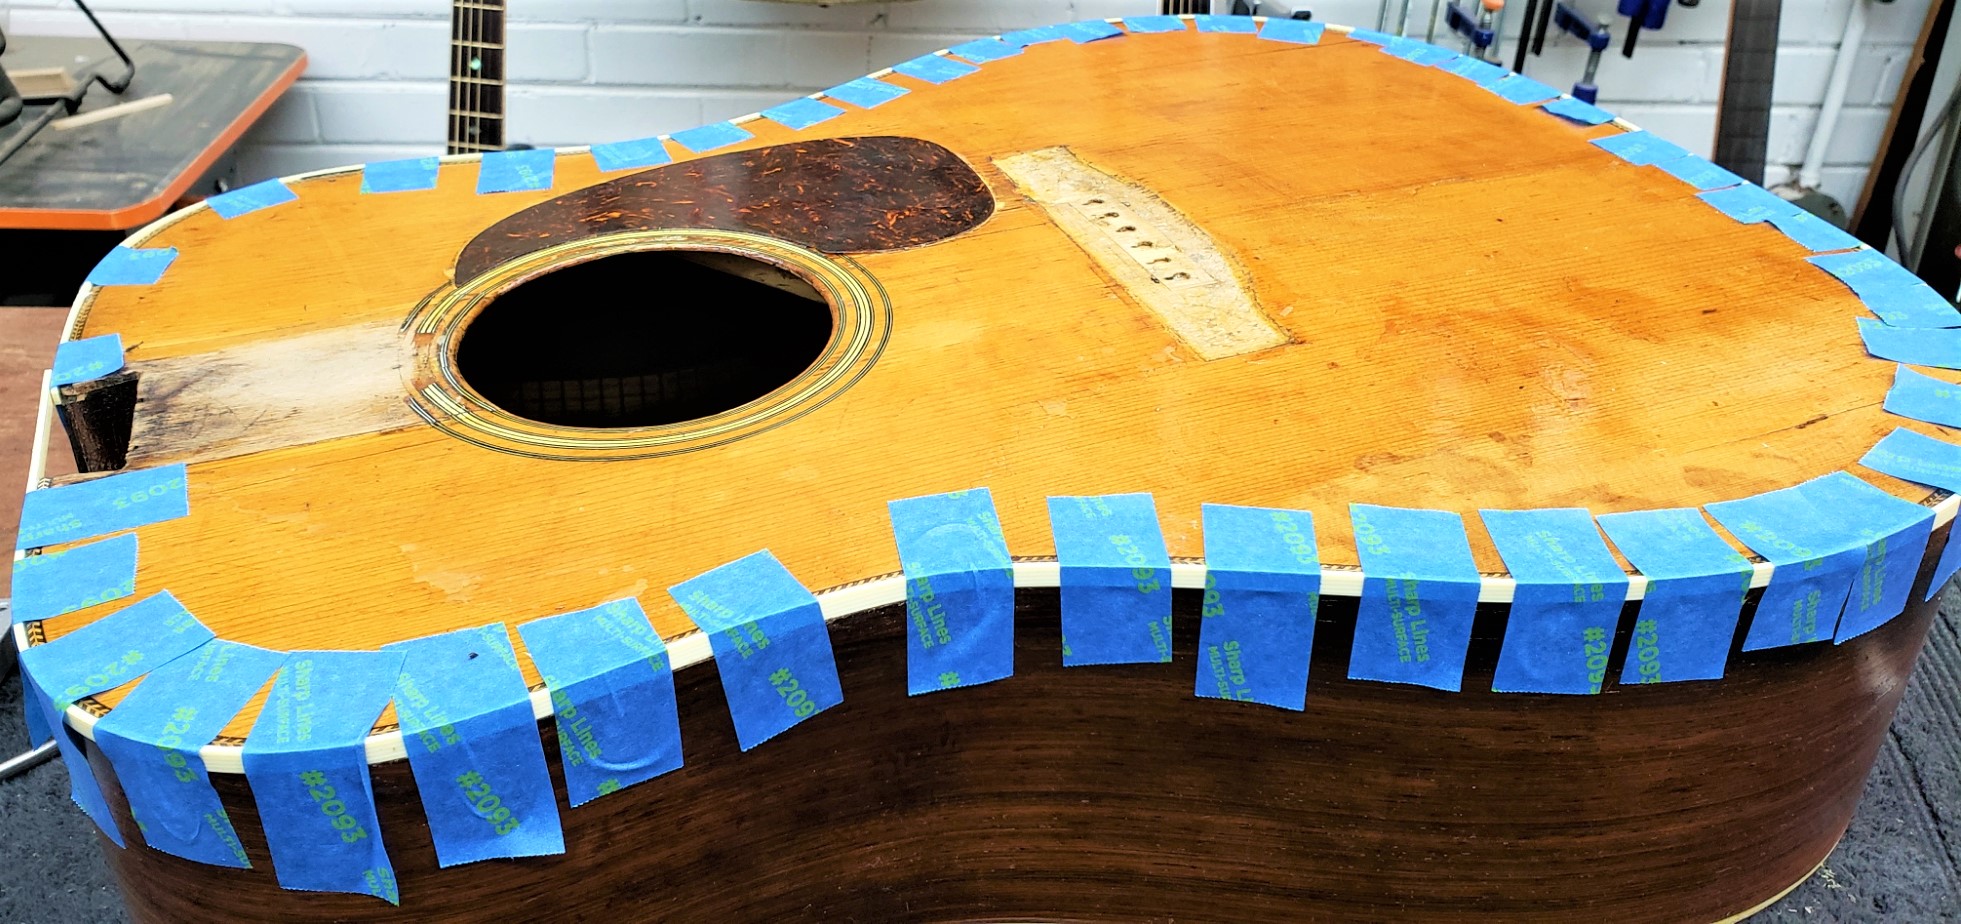
Due to the fragile nature of the existing lacquer, blue tape was used to secure the binding, since the normal binding tape was too sticky and would have pulled the lacquer up when removed.
The new binding was then trimmed and scraped flush.
In this photo the bridge is not glued, only taped in place for the picture. The pickguard was reapplied in the modern fashion using 3M transfer adhesive, which will not cause stress on the top since the pickguard, which is likely original, has shrunk as much as it ever will. The shrinking pickguard, applied in 1938 by Martin to the raw spruce before the finish was applied, did previously cause the famous pickguard crack. Three top cracks, still visible, were glued and cleated to reduce the possibility that they will spread.
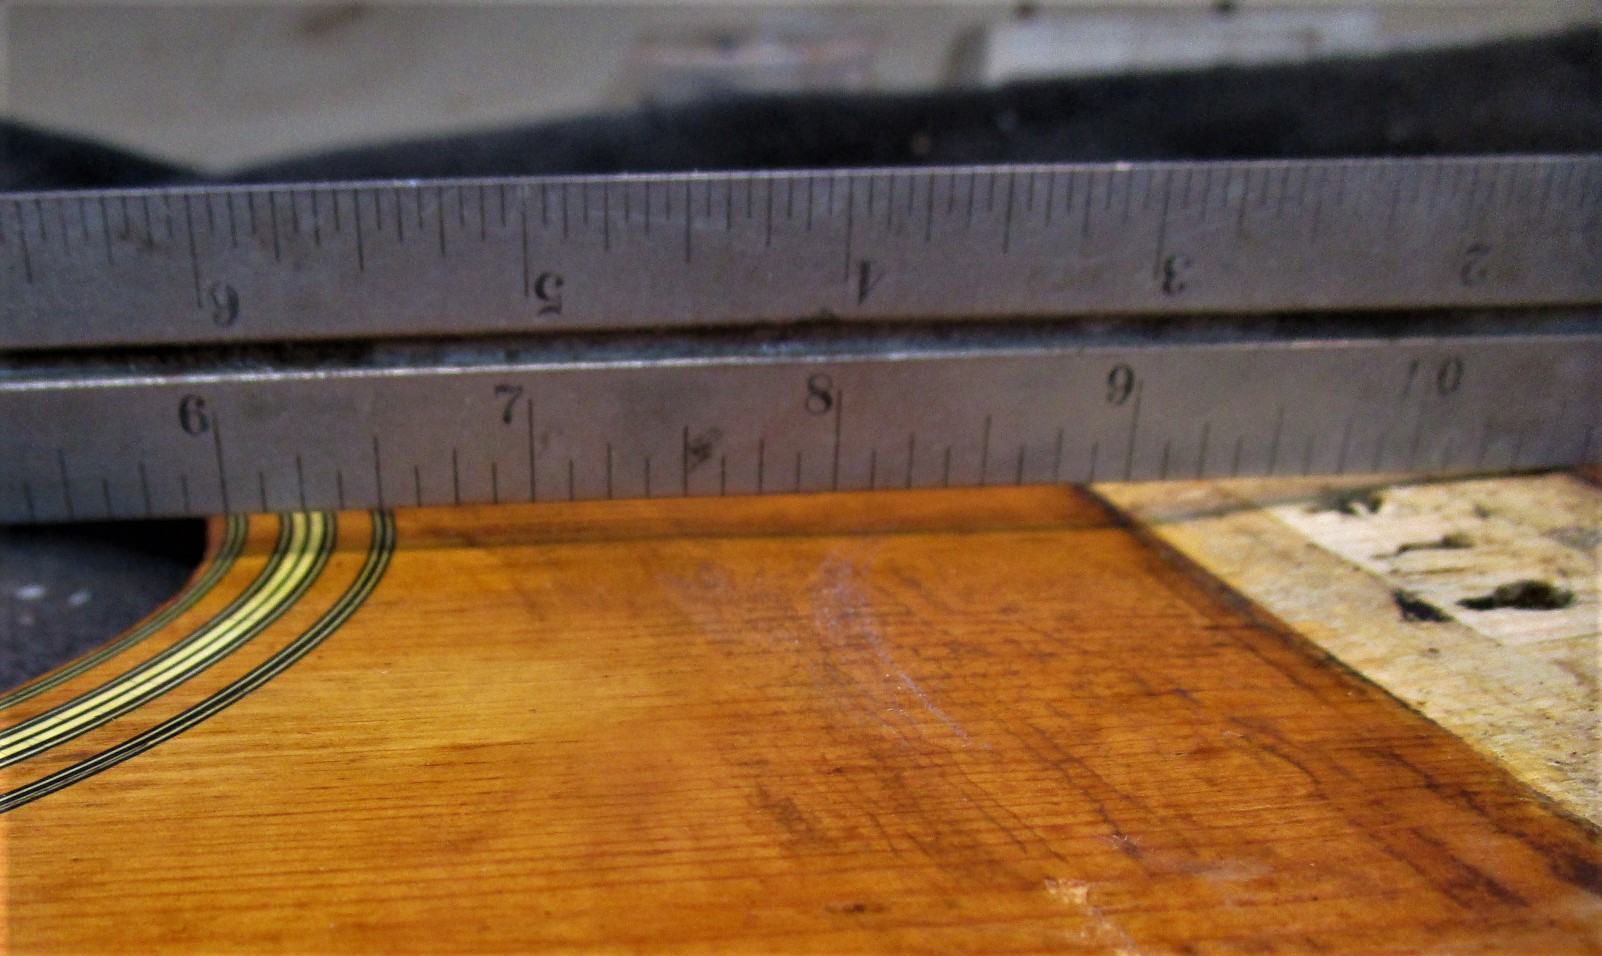
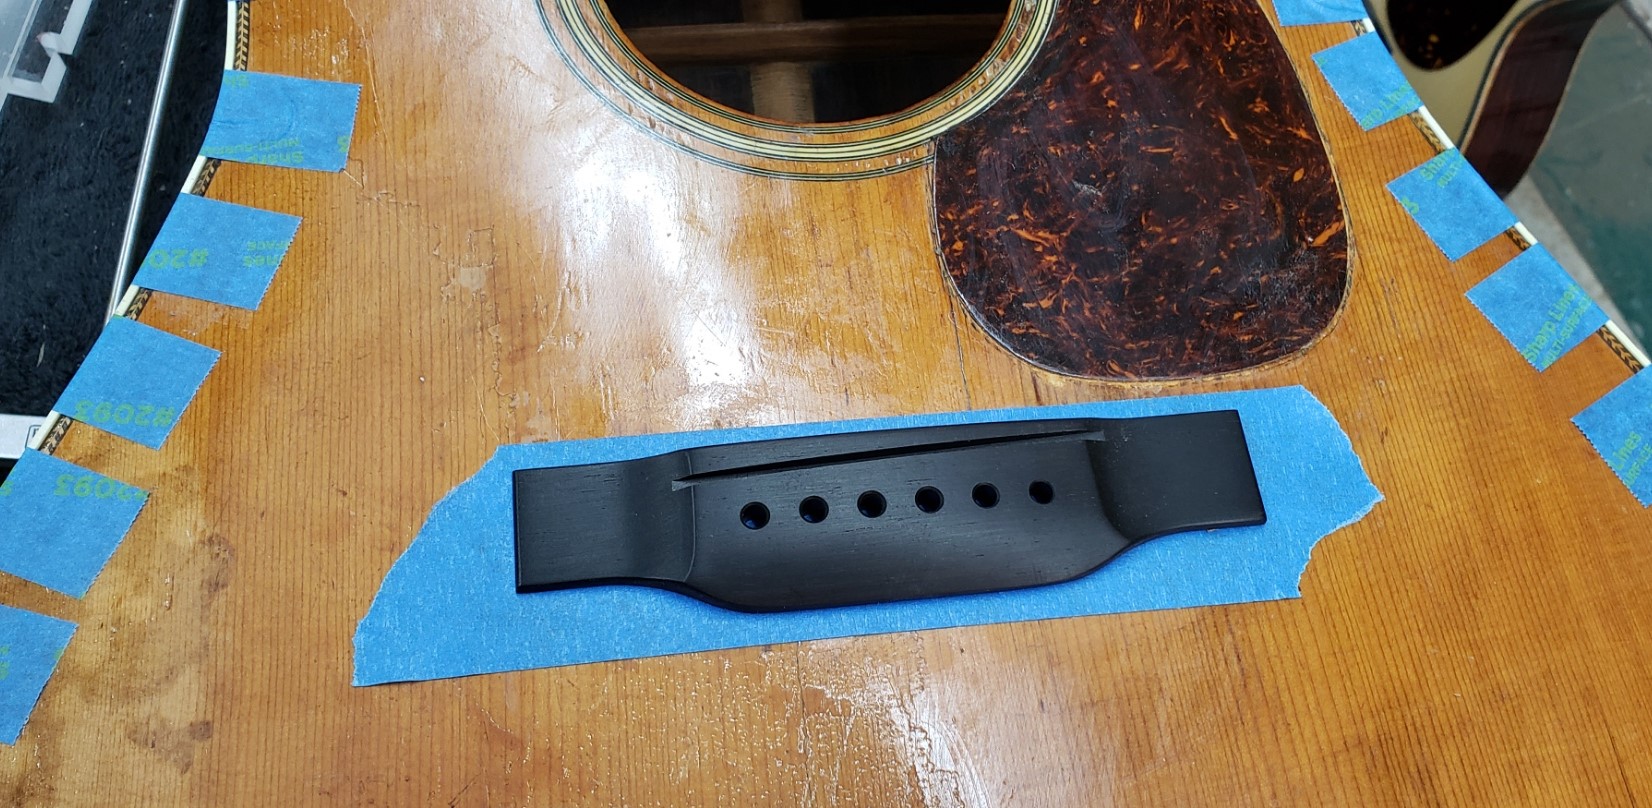
Before any touch up of the top the bridge location is verified to be centered on the top and and located to give proper intonation when applied.
This bridge is a replacement from T. J. Thompson, who sells replacement bridges for vintage Martins. These bridges are the best available replicas for a 1930's Martin guitar. Thanks, TJ.
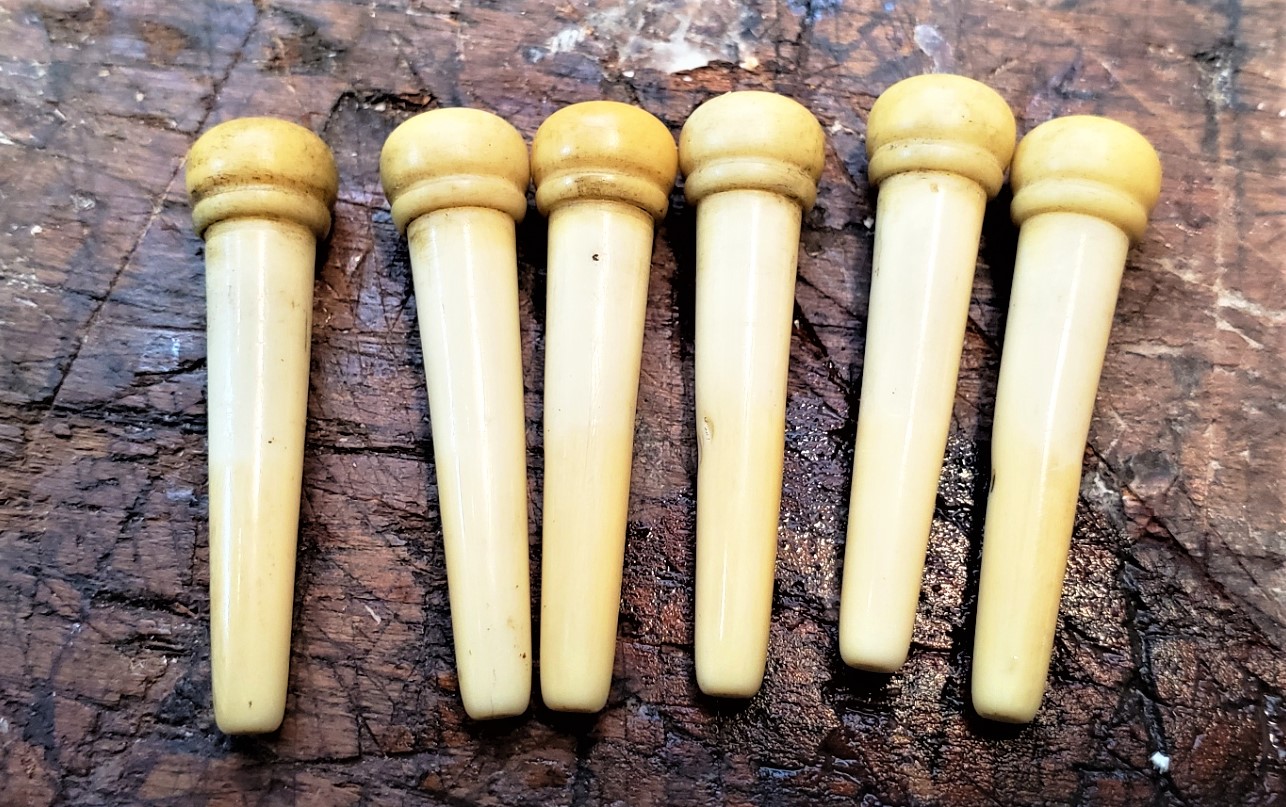
In preparation for final assembly of the guitar, the tuners (replacements) and bridge pins (The original un-slotted pins!!) must be cleaned, since every part of this guitar was stained with soot. Before:
After cleaning:
Before:

After:
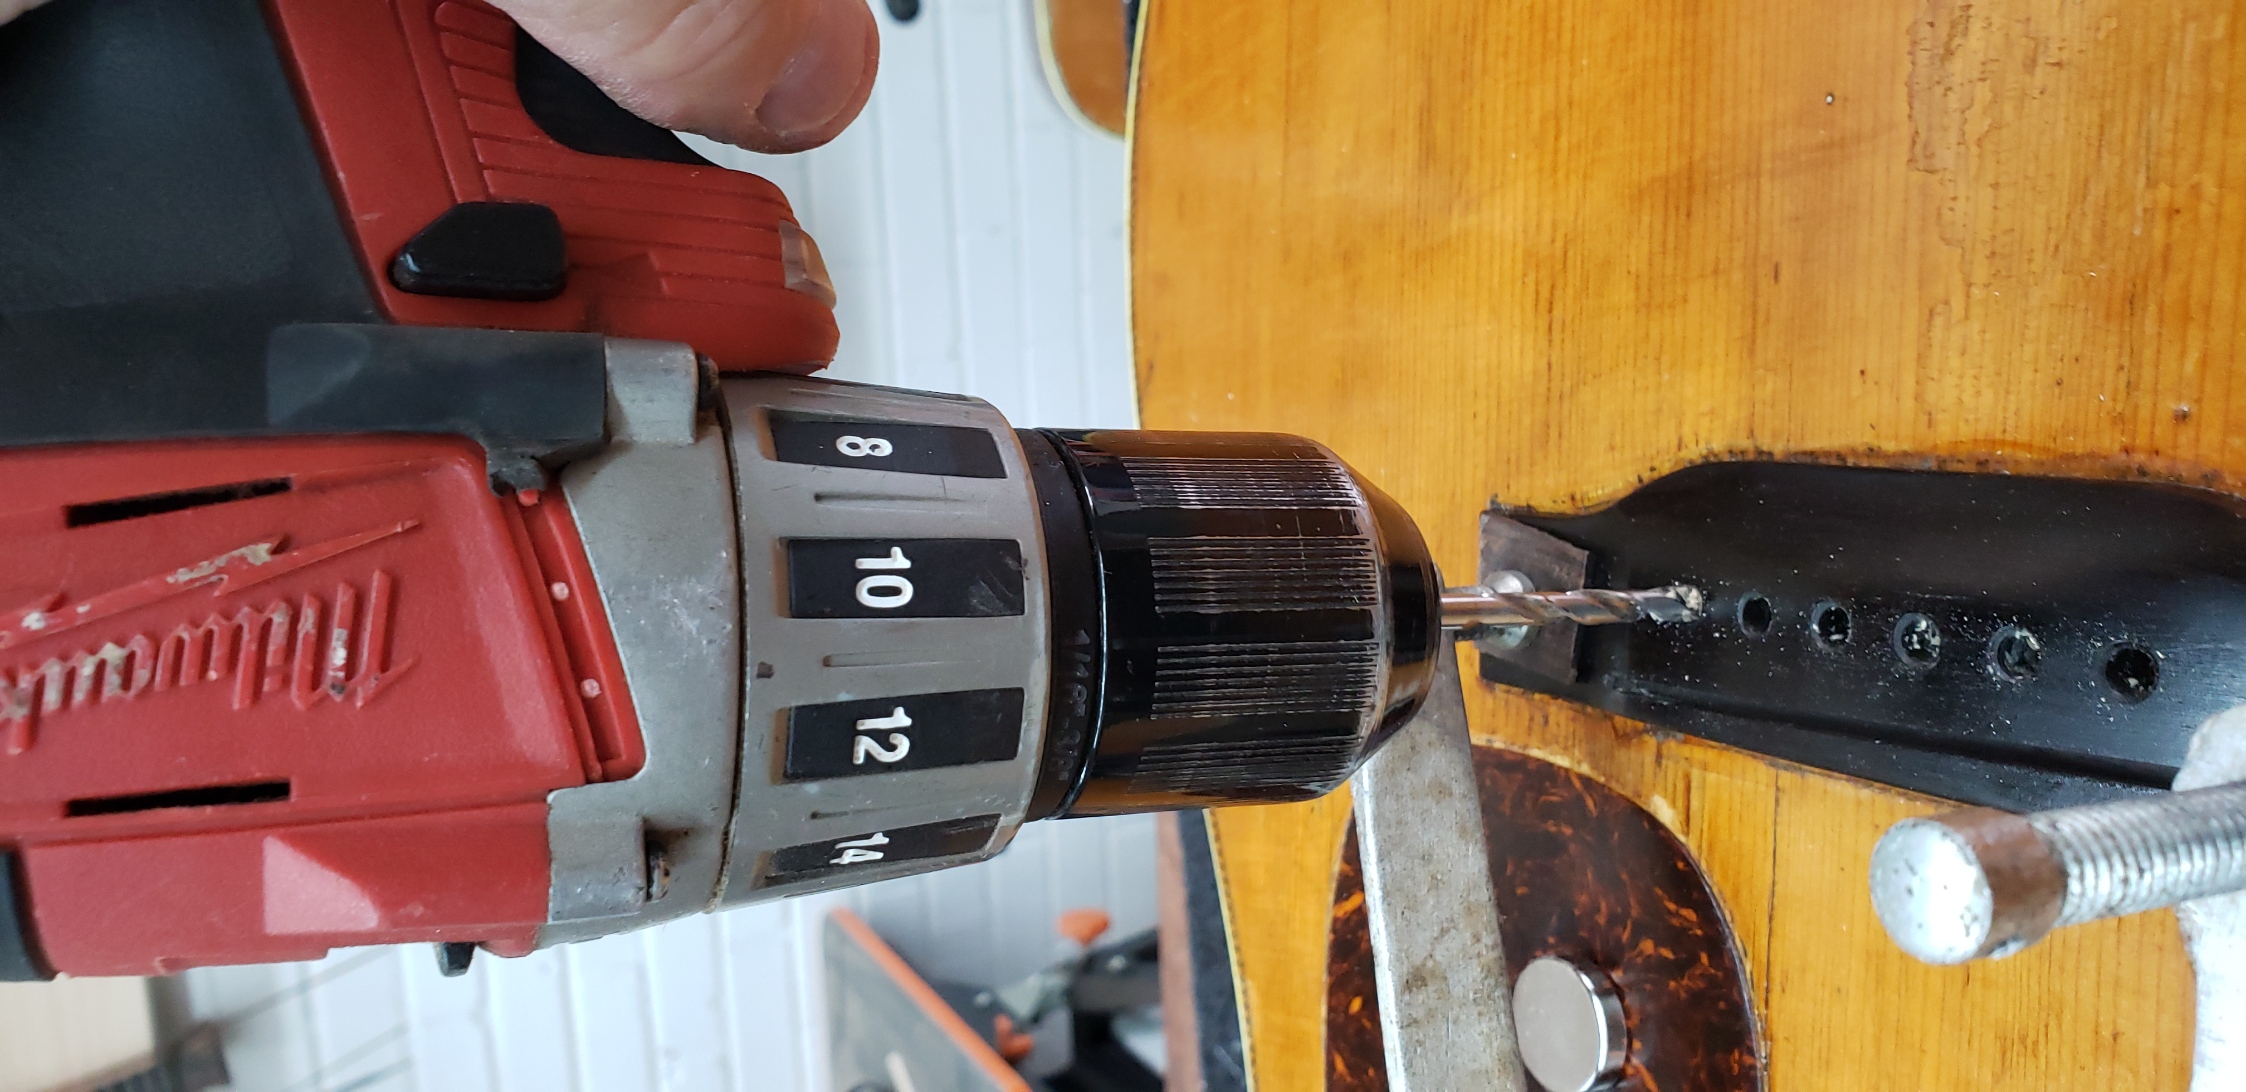
Next, the bridge is reglued to the top using clamps and a specially made internal bridge caul. The bridge pin holes are drilled through the top and bridge plate. Since the bridge pins are unslotted, slots must be cut in the new bridge to accommodate string thickness.
After some touch up of the areas where the original finish (nitrocellulose lacquer) was damaged by the fire, and the binding is color matched to the original, areas of bare wood will be touched up using french polish (shellac and oil). The french polish technique applies the thinnest possible new finish but seals the bare wood. Spraying new lacquer on this guitar would add too much new finish, too much gloss, and would not look appropriate. This point is debatable, but my strong preference is to NOT apply new lacquer to a vintage guitar unless the entire guitar has already been poorly refinished.
The tuners are re-attached to the neck. The neck angle is checked, the dovetail joint is fit and the neck is re-glued to the body.
Setting the neck
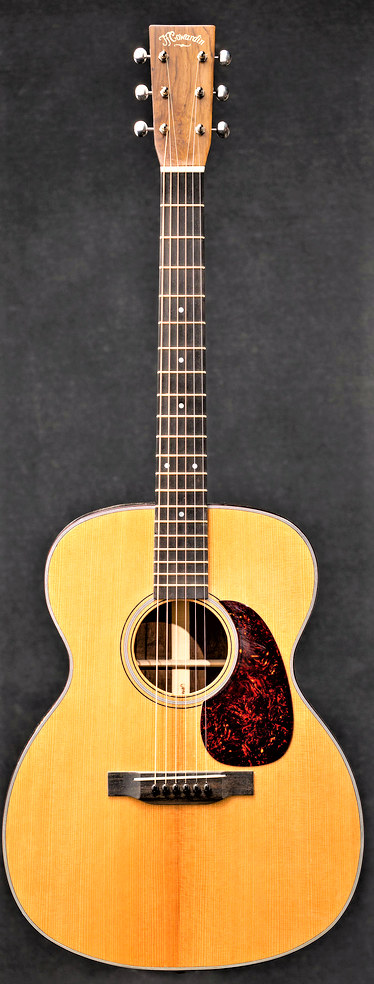
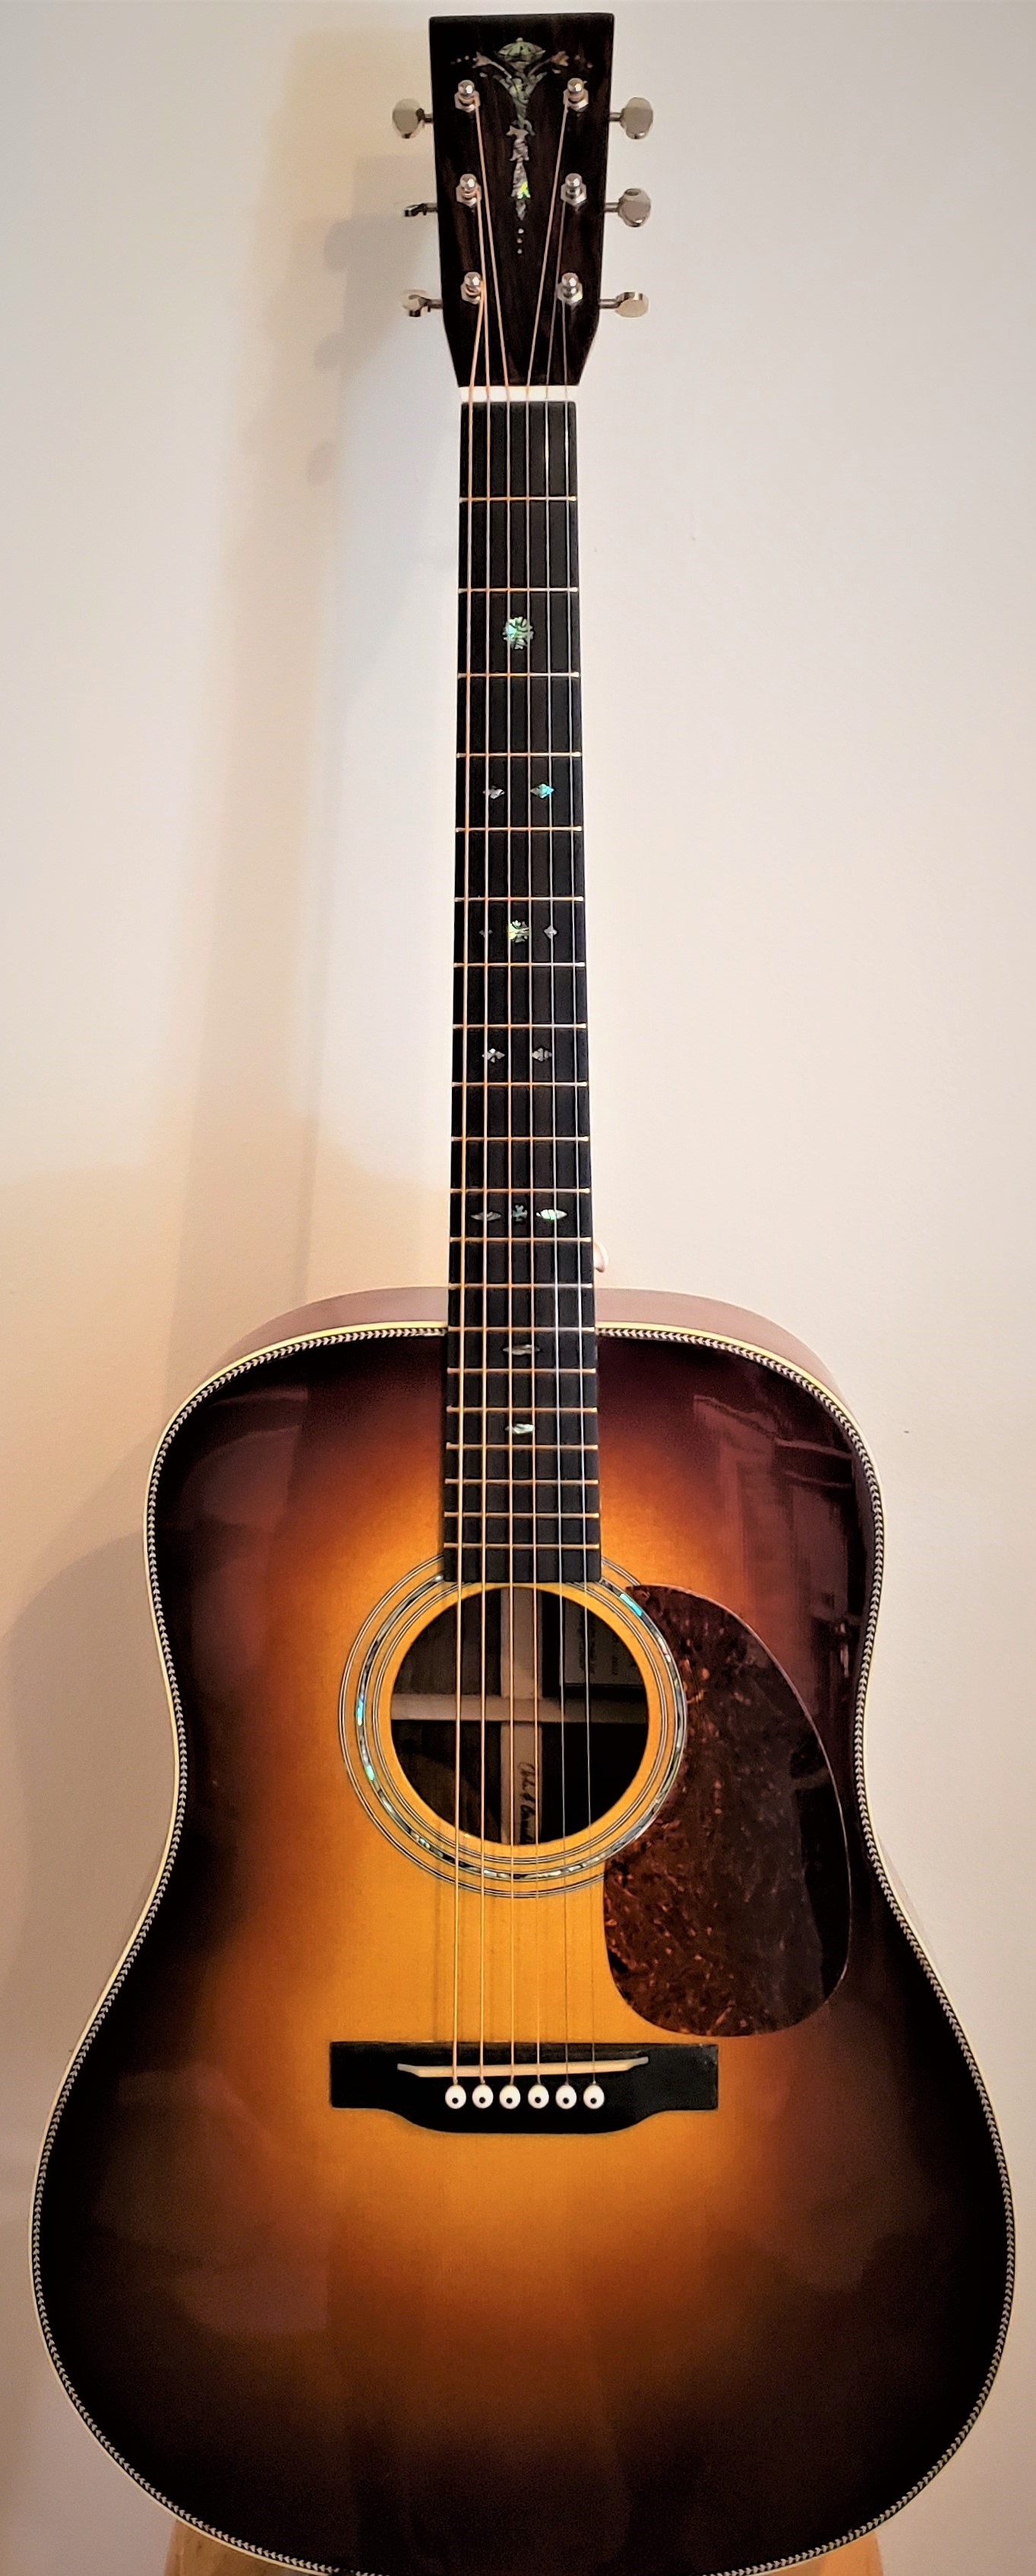
The completed guitar

The owner tells me this is one smokin' hot herringbone...